“Surely you don’t have to post that picture!” – Mom
I couldn’t think of a better way to start today’s post than mom’s reaction to the photo I sent her of the pantry cabinets earlier this week.
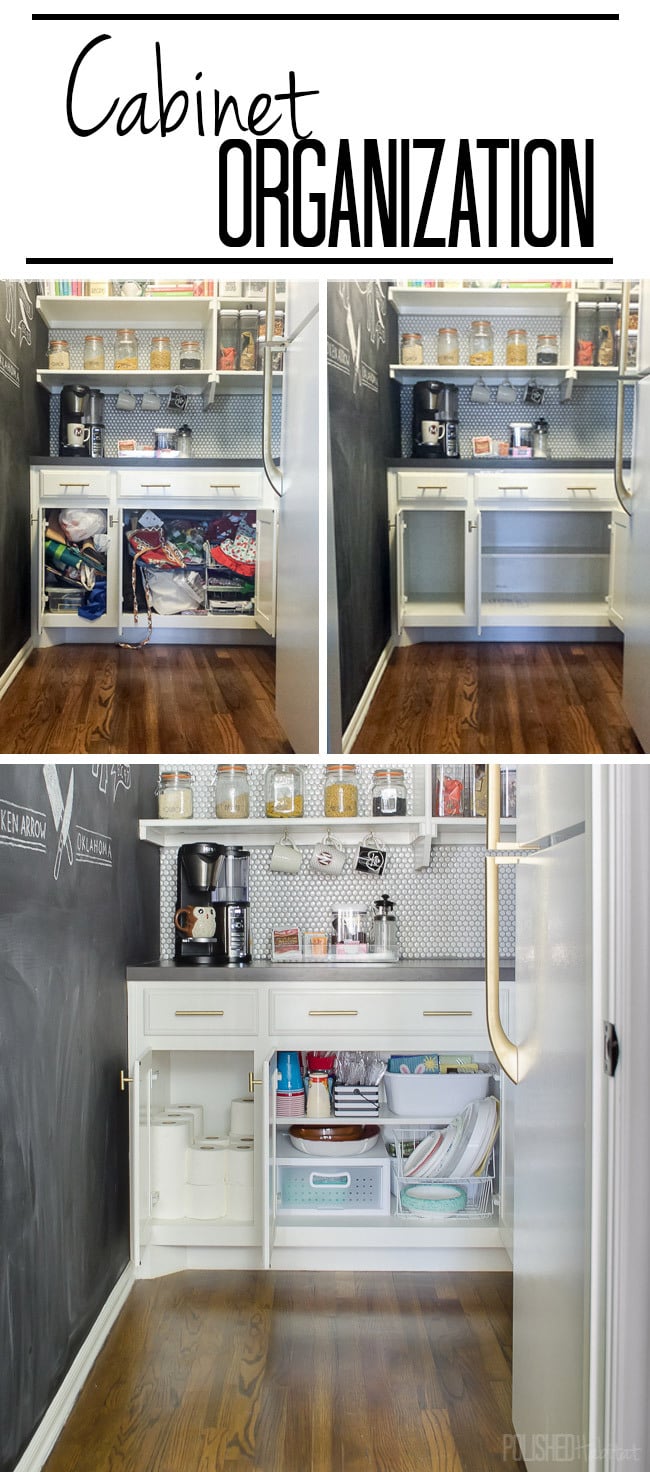
You see, I had the best intentions of organizing them 18 months ago when I updated the pantry. Sadly, there was just not enough hours during the One Room Challenge. The mess festered and grew into a code red situation. You probably think I’m exaggerating the issue.
ARE YOU READY?
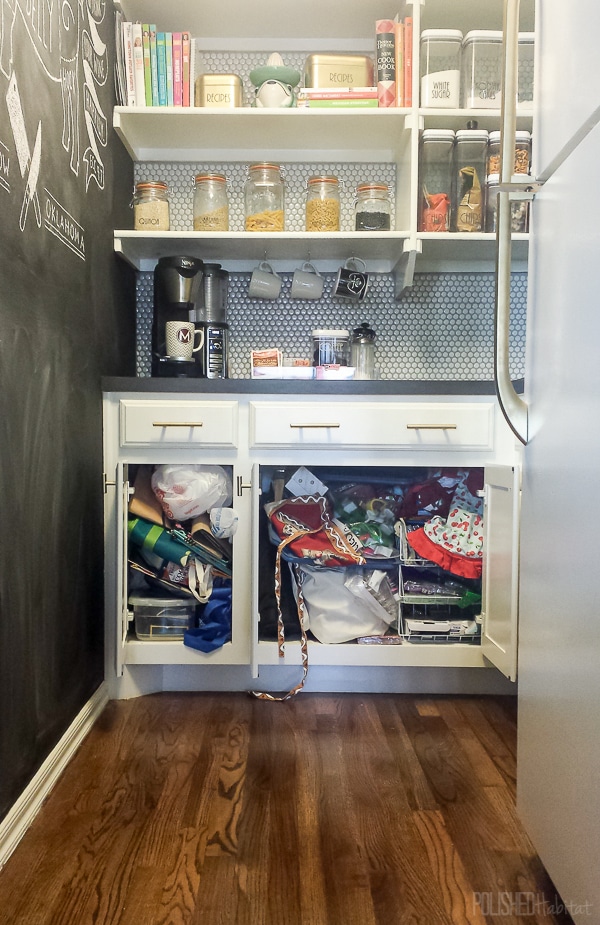 As soon as I snapped this picture, things literally fell out of the larger section. Yowsa.
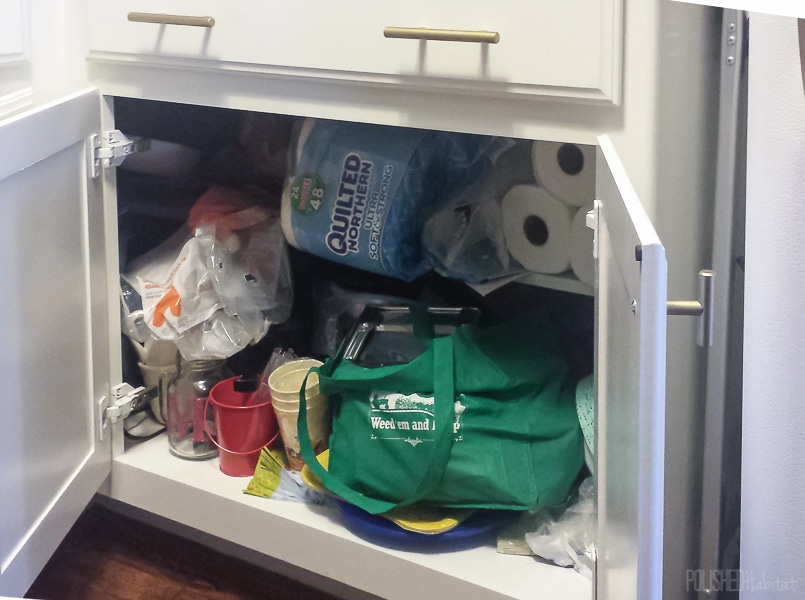
And the right hand cabinets next to the fridge weren’t much better.
This is a prime example of what happens to cabinets (or any space) when you don’t have a system.
We knew things like paper towels and paper plates went in the pantry cabinets, but they didn’t have a set place.
Tip #1: Pull EVERYTHING out.
Before I could organize, I needed to dig out everything in the cabinets to figure out what needed to stay and what could go. I’ve got to say, this is a pretty impressive amount of stuff that was shoved in just the smallest section of cabinet. Serious clown-car situation!
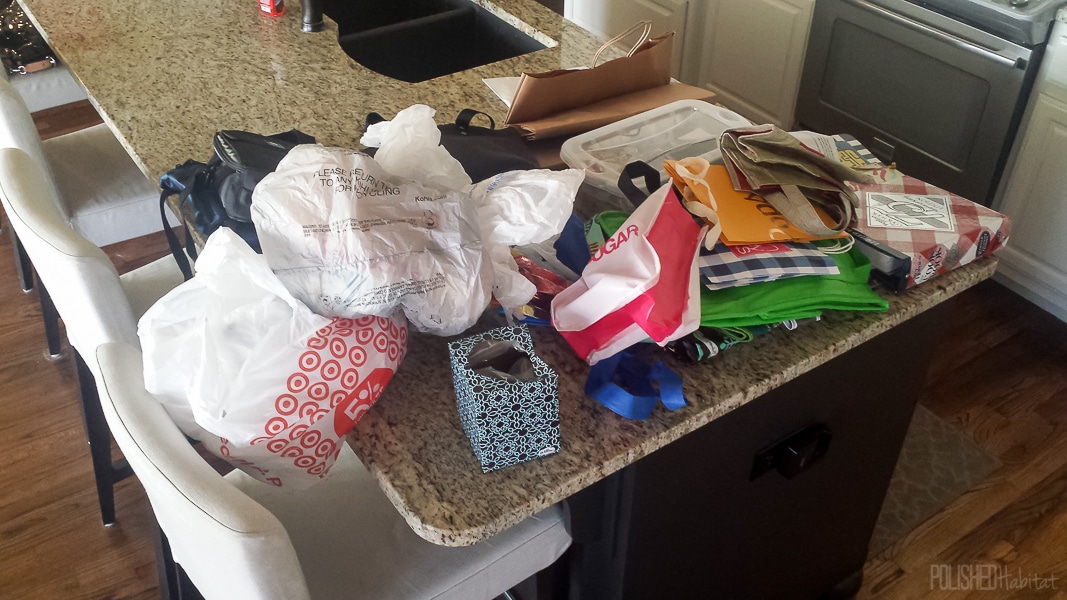
Tip #2: Grab a big box or bin to collect things for a future garage sale or donation.
If you have the same cabinet clutter situation I was in, I can pretty much guarantee you have things that no longer need to live in your house. As I emptied the cabinets, things were sorted to these categories.
Option 1: Garage Sale Box
Option 2: Trash
Option 3: Keep, but NOT in the Kitchen
Option 4: It Actually Belongs Here
Tip #3: Rethink locations.
The reuseable grocery bags that we actually USE live in the shoe cabinet, so there was no need to have an entire cabinet of them any more.
With that opening freed up, and after seeing how much I could store in the smallest section of cabinetry, I realized it was perfect for all the extra paper towels and toilet paper we keep on hand.
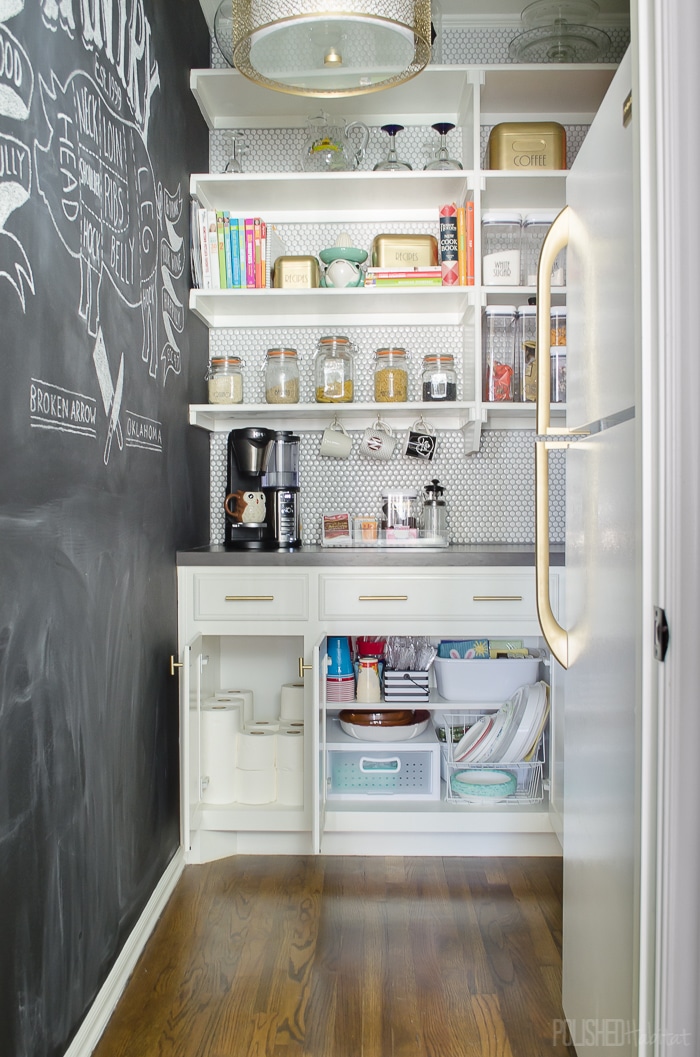
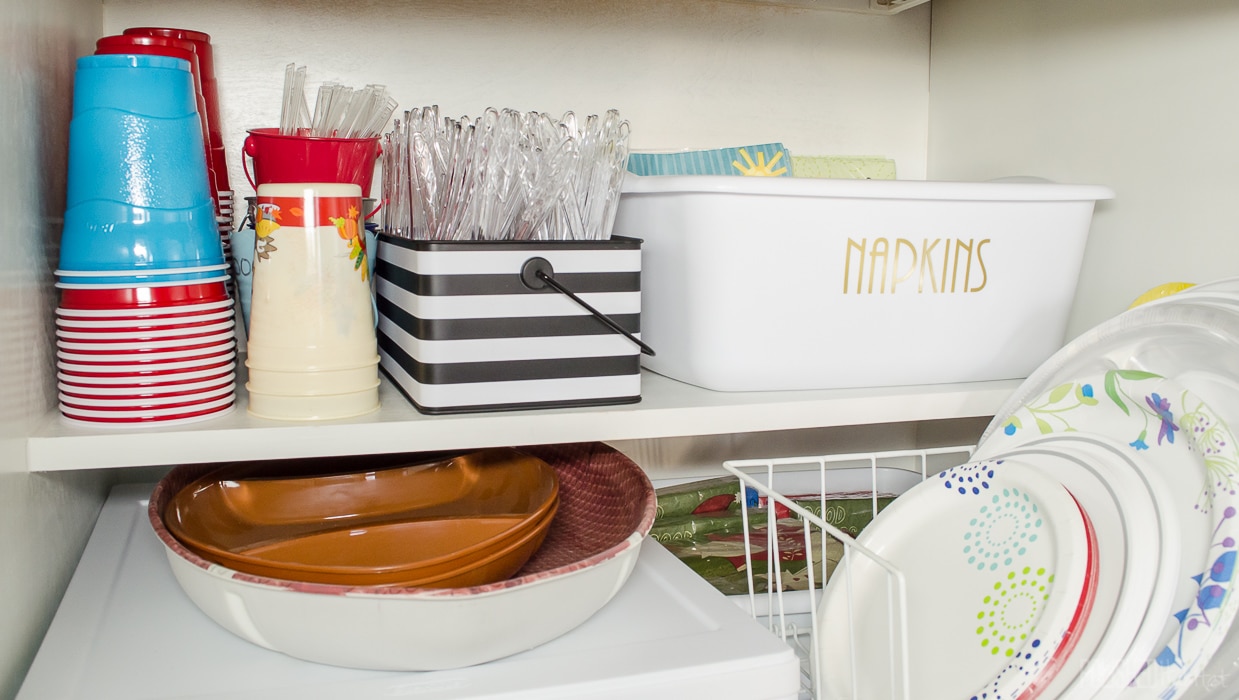
I also decided to make an entire cabinet for entertaining supplies – plates, cups, cutlery, etc all in one spot.
Before, all those items were mixed in the cabinet with paper towels, toilet paper and whatever else I could fit. And I had a Sam’s Club box of 360 plastic utensils on the fridge because it wouldn’t fit in the actual cabinets.
Now it’s all together. So good.
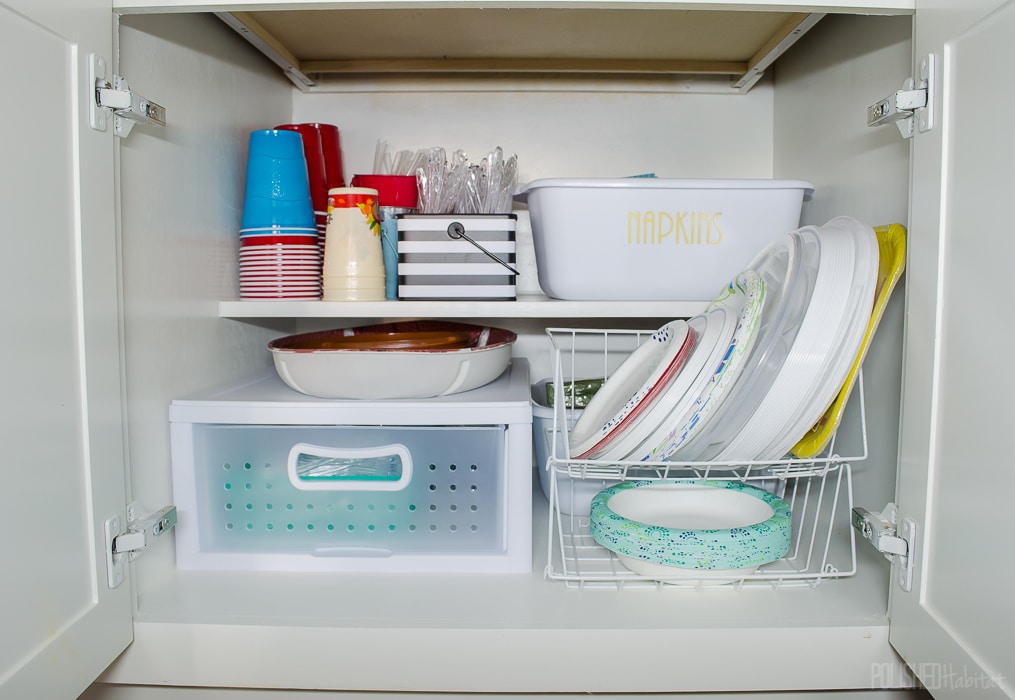
Tip #4: Add drawers.
I LOVE these plastic drawers. Not only are they good to hold smaller items neatly, you can stack items on top of them. I bought mine at Target in the store, but they have similar ones in all different sizes on Amazon (affiliate link).
I used mine for our seemingly lifetime supply of plastic cutlery.
 Tip #5: Use CHEAP dishpans to corral items.
 Tip #5: Use CHEAP dishpans to corral items.
When I was at Target I noticed that they had a super cheap ($1.79) dish pan that looked like it could make a great storage container inside a cabinet. Total fluke of a find, and now I own ten of them. I bought 6 the first day, and have already been back to wipe out the rest of their stock.
When I emptied the cabinets, I found napkins, napkins, and MORE napkins. Two dishpans full to be exactly. One of them is full of Christmas napkins, and I tucked it behind the paper plates. The rest got a pretty gold label and an easy to reach spot on the top shelf.
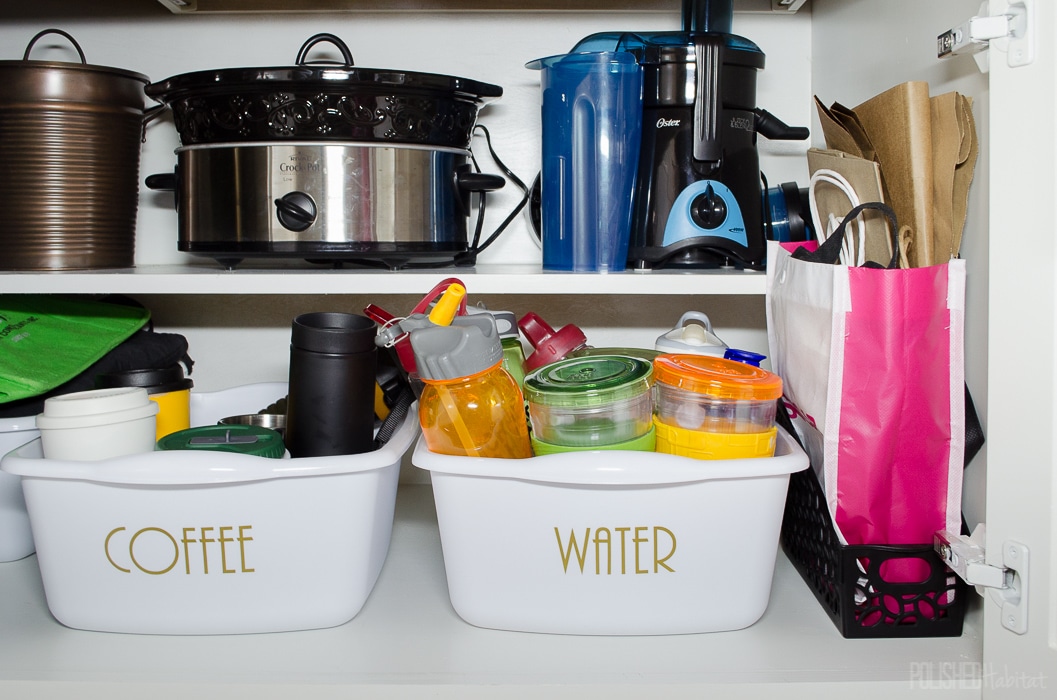
In the other pantry cabinet, I used two more dishpans.
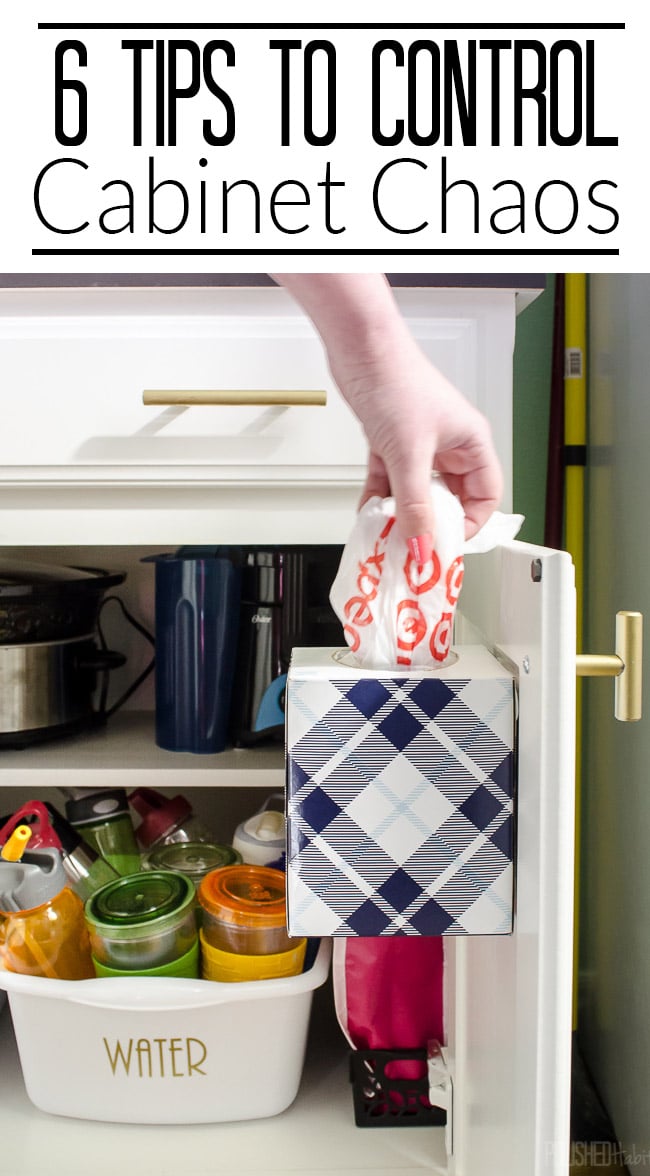
With so many things in the garage sale box, I had space to move all our water bottles and travel coffee mugs out of a kitchen cabinet and into the panty. Those dang bottles always fell over and made us crazy. Now even if they fall, they stay in a confined space. SO MUCH BETTER!
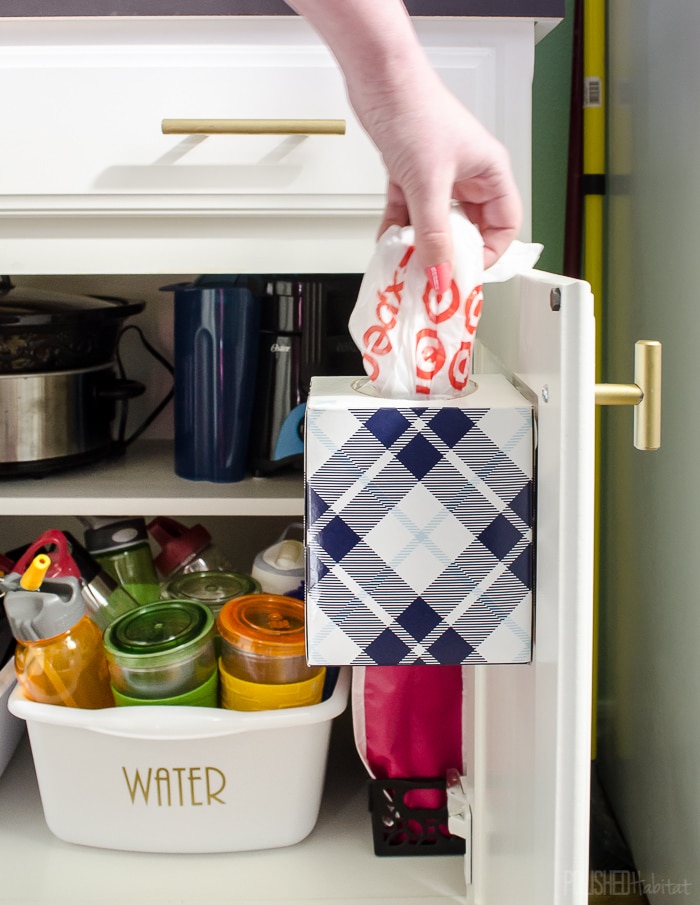
Tip #6: Use a tissue box & Command Strips for plastic bags.
This might be my favorite thing in the pantry cabinets! I filled a tissue box with bags, and then attached it to the cabinet door with a medium Command Strip (Amazon affiliate link) at the top and a small one at the bottom for extra stability. Voila, a plastic bag dispenser!
Not only is it more convenient, it doesn’t take up any actual cabinet space.
It feels AMAZING to finally have the pantry all the way organized. Well, most of me feels amazing. My thighs are BURNING from all the squats it took to empty, clean, and organize lower cabinets for a few hours. OUCH!
All this was really the prep work needed to organize the kitchen cabinets -see how they turned out next!

Sara says
You’re my idol… Seriously, every. single. thing you do is amazing!
Melissa George says
Well you know how to get a girl’s day off to a great start! Thanks so much Sara!
Sara says
Meant to add that I saw (maybe on Pinterest) someone that used sideways magazine file boxes with the opening in the front for water bottles and to-go cups. I did it in my cupboard and it takes up so little space and they don’t all tip over.
Rita Jannusch McKenzie says
Love this organization. Especially the inexpensive items used to put everything in its place.
Melissa George says
Thank you Rita! It’s so good to hear from you too!
Hannah says
Poppd over from Iheartorganizing bc i had to get more details about the bag dispenser idea!! How smart! And practically free! Two questions: did you need/bother to insert the bags in any special way to make pulling them out again, simpler? Or did you just stuff them in one by one? And also did you cover it in pretty paper ?
Melissa George says
Hi Hannah, thanks for popping over! I find I can fit more in and they come out easier if I roughly roll them up, so I fold them over a couple times to make one long piece of plastic bag, then roll it up and shove them in. It only takes a second, but if I”m being lazy I’ve also just shoved them in. Both ways work. My box came from Target last fall (so cute, right!?!), but covering a less cute version in paper is a great idea!
Peggy says
I use an empty Lysol wipes container for my plastic bags. I just leave the lid off. I never thought of attaching it to the door! Doing that as soon as I get to the store to get sone stops! Great idea!
Sabrina Quairoli says
My favorite thing to organize is the pantry. I love the idea you shared on the plastic drawer placing it inside the pantry. As a Professional Organizer, I remind my client that creativity and making the system work for the entire family is key to organizing a pantry. Great images too. =)
Carol says
Great ideas Thanks Really like the cheap dishpans I’m on on tight budget
Melissa George says
I’m so glad it was helpful! My other favorite tight budget organizing containers are the photo boxes from Michaels when they are on sale.
I saw them today for $2.50, but occasionally they go all the way down to 6 for $10.
Here’s some of my favorite ideas for them: https://www.polishedhabitat.com/photo-box-organizing-ideas/ I just picked up more to do another post specific to organizing Christmas related things in them!
Lisa F. says
Nice Job! So rewarding to get uncluttered and organized.
Can you please tell me how you made the “WATER,” “NAPKINS,” and ”COFFEE” tub labels?
What size are they? Brass or Gold? Cricut? Stickers I can buy WHERE?
I love that they are not the usual lettering one sees, and that you chose large lettering I imagine are so easy to read quickly.
I’d appreciate a favor of a reply.
Lisa
Melissa George says
Hi Lisa, they’re gold vinyl labels I made with the Cricut! This post shows how I make them: https://www.polishedhabitat.com/organizing-with-cricut-maker/ Thanks for reading!