Just two weeks left in the master bedroom makeover, and now we have a wall! Well, technically we’ve always had a wall in the bedroom. It would be kinda weird if we didn’t. But the wall we had before was boring. Now it’s got life!
If you’re a first time visitor, welcome to the madness! You can get all caught up on the before photos and my plan for our Uptown Meets Downtown bedroom back in this post. Once you’ve read that, hop back here for the latest happenings in the room.
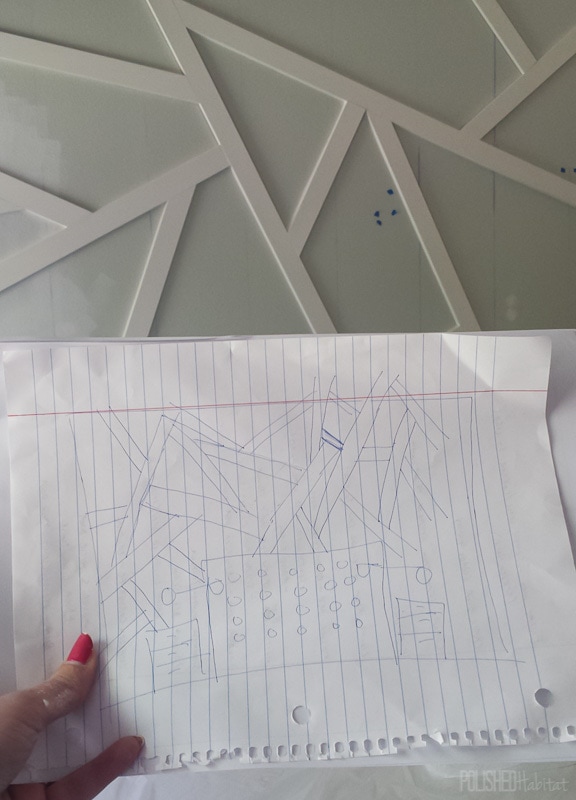
Last week, I alluded to a change in the design plan for the feature wall. The original plan had fun connected squares on the wall behind the bed. Remember this mock up?
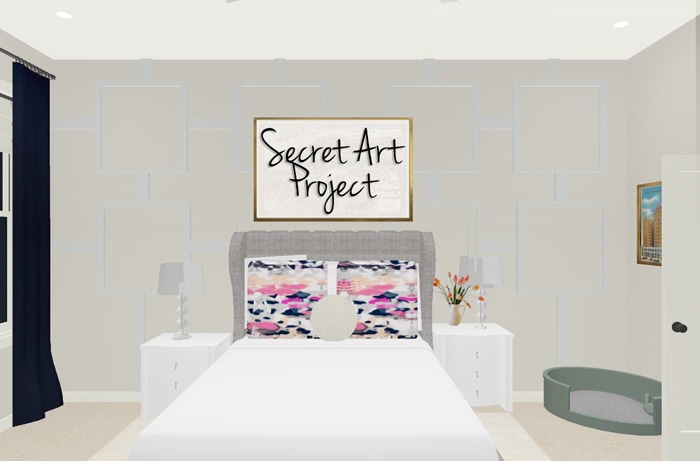
As wall-install day got closer, I fell out of love with that design. But, I didn’t have a better plan in mind. Then as I was falling asleep one night, I had this crazy image flash into my mind of diagonals flung all over the wall. A little inspired by the Nate Berkus fabric I used on the office bookcase, but different.
I didn’t really have words to properly explain my plan to my husband, so I used my always-stellar art skills to draw a picture. More on that later.
And with that as our guide, we researched some different wood options and decided to use pre-primed 1×4’s from Home Depot. They were a bit more expensive, but had nice squared edges, were straight, and didn’t require any sanding or wood-filling. After hours of sanding the wood we used in the master closet, paying a little bit more to save time was an easy choice.
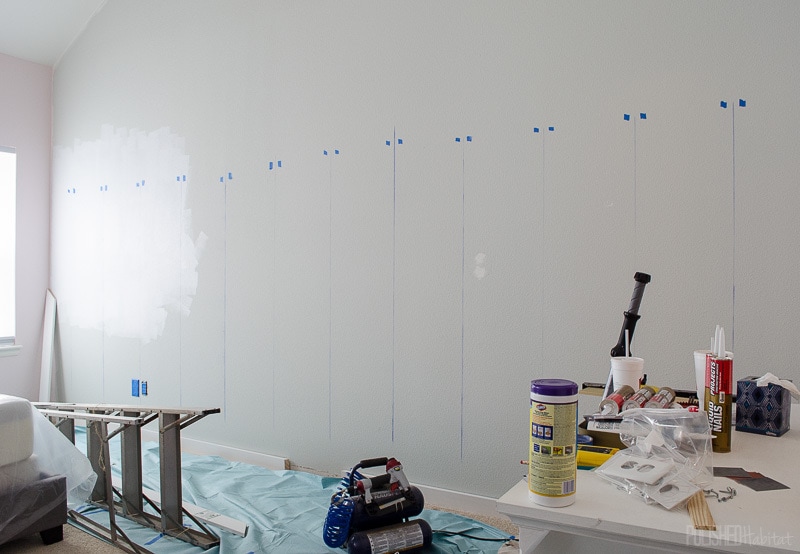
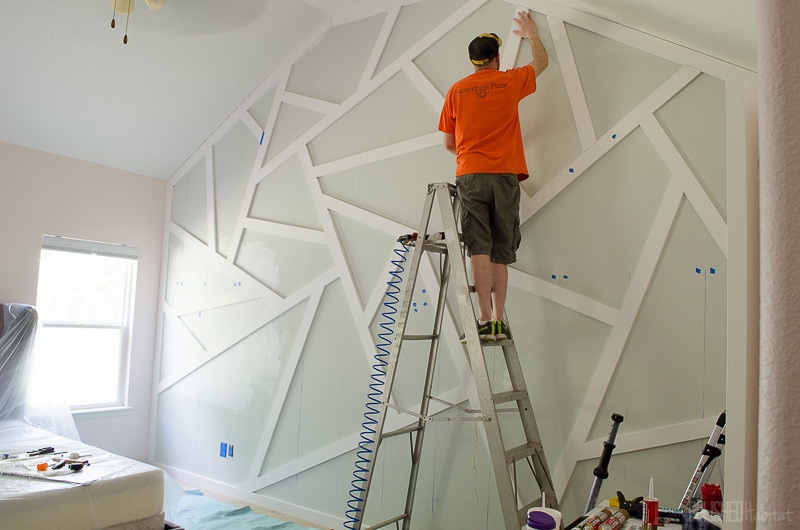
To install the wall, we started off by finding all the studs and marking them with chalk lines. That made it really easy to see where we should nail each piece of wood.
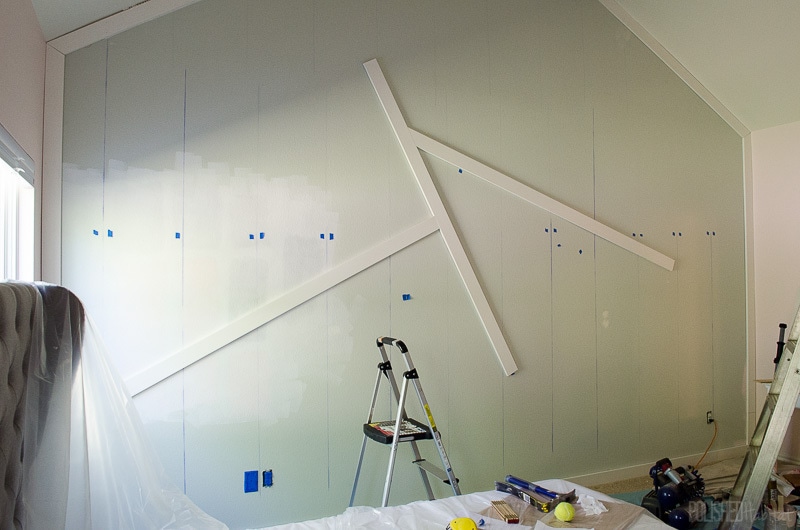
 Then we just went for it! We started with full 8 ft boards, and eyeballed the placement. Each board got a healthy dose of Liquid Nails, as well as actual nails into the studs, to keep everything in place while the glue set. The first few were easy because the angles didn’t need to be precise. After a while, we had to remember how to use a protractor to get the accurate angle of each cut. Yikes. Despite the math issues, we loved seeing each board go up.
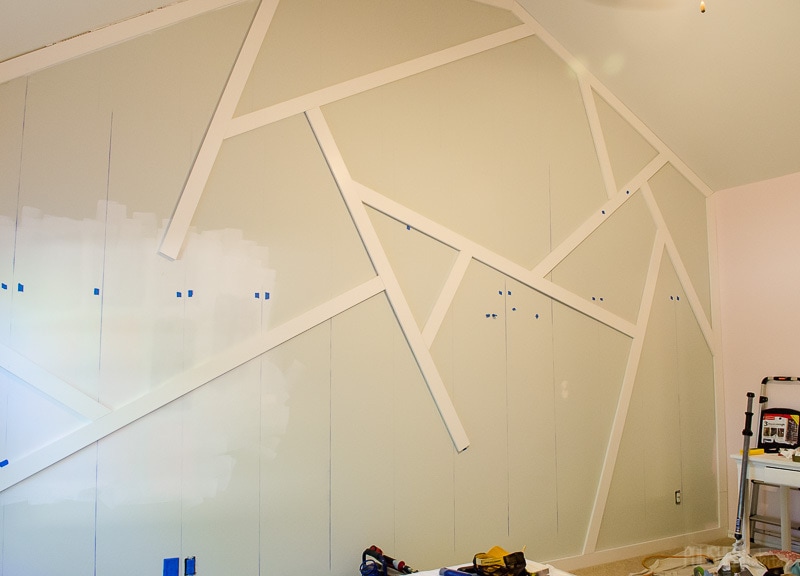
 Here’s what it looked like when we went to bed the first night.
Sunday we were back at work, with lots more protracting. I was able to start caulking along both sides of the boards we put up Saturday in between my high pressure duty of deciding where each board should go.
Remember when I mentioned my rough sketch of what I dreamed the wall would look like? Here is it with the wall in the background. We did it!
 I was hoping we’d have the whole thing painted and done before this post, but we were slowed down by a variety of things, including endless issues with the TV mount install and even tornado warnings!
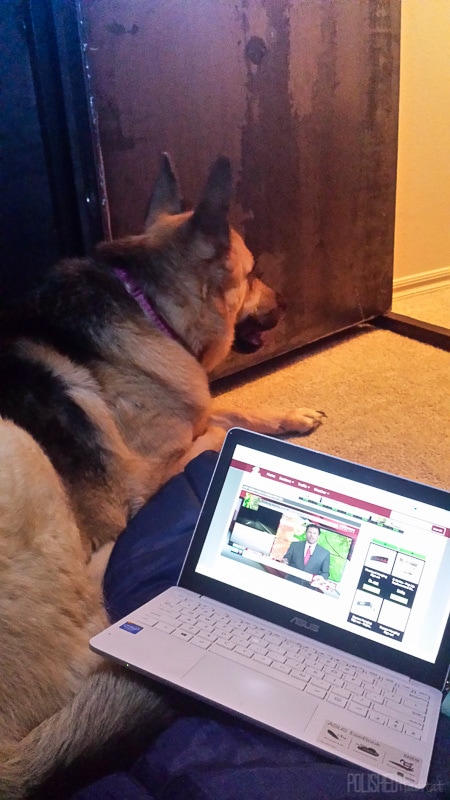
Here’s Maddie on high alert, hanging in the shelter with me Tuesday night.
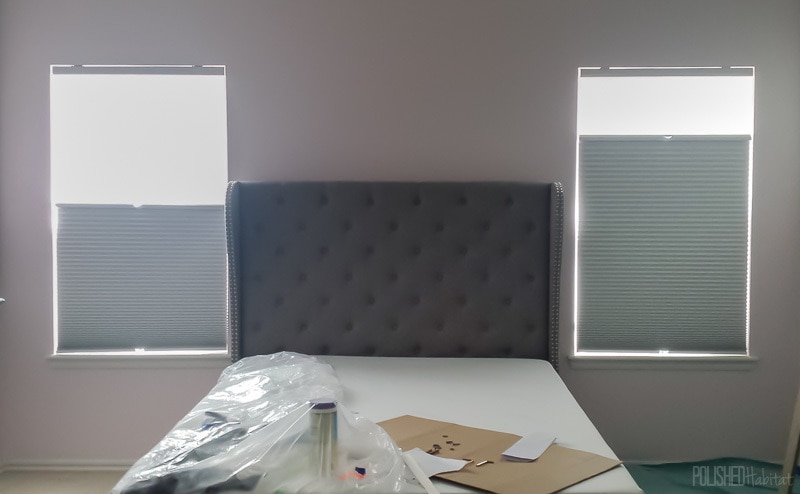
 Between all that fun, we did install the new blinds. Good riddance to the old reddish faux wood! SelectBlinds.com provided new cordless shades for our bedroom. They are AMAZING because we can have them wide open, full blackout, or a nice filtered light that provides privacy, but lets the sun shine in. You can see in the photo below that we had each side set differently. So cool! Once the room is pretty, I’ll make a quick video to show you guys how they work!
We’ve got quite a list of things left to do in the final two weeks. It’s doable, but we are going to be feeling the challenge part of the One Room Challenge.
Paint Wall
Paint & Install Dresser Pulls
Install Fan
Install Drapes
Install TV – Take 2 (new mount on order)
Build 30×40 frames for the Gallery Wall
Buy or Build Frames for Bathroom Door Wall
Gallery Wall between TV & Big Prints???
Pick a Reading Chair (ASAP!)
Install Bedside Lamps (which may be another small building project)
Pick Reading Table & Lamp
Big Secret Art Project
Pick New Bedding
Accessorize
Room Photography
Okay, after typing it all in one place, there may be some heart palpitations happening!
Hopefully, the other One Room Challenge participants have less left on their to do lists than I do. Pop over to Calling it Home, the host of the One Room Challenge, to see who else is panicked and who is breathing easy.

Leslie says
Now, that’s a feature wall! I wish I had the guts (and tools) to install a wall like this in my house. It’s so much fun, and a lot more creative than the original design. Can’t wait to see what it looks like between now and the next two weeks.
Kristin @ Postbox Designs says
Super impressed! I don’t know what was harder…installing the wall or mapping it all out on paper first! That wall is going to be a fantastic focal point!!