If you saw my Summer Blankets post last week, you know I’ve been seriously craving summer color. I’ve also been craving a new dining room table and chairs, which is NOT in the cards anytime soon. Instead of being bummed, I thought I could build a new summer centerpiece! It would draw my attention away from the table, add some color, and inspire me to work with what we have to spruce up the dining room for the warm months ahead. It’s been pretty bare and pathetic since I cleaned all the suitcases, clothes, and other miscellaneous stuff off the table. Because it’s normal to pack in the dining room, right?
I knew I wanted something fairly large for the center of the table, I knew it needed color, and I knew it needed to be CHEAP. While I love the occasional splurge when we are doing room makeover projects, our tree out back is producing peaches and not dollar bills. Plus, I like my splurges to be things that will be used year round and/or improve the value of the house. Pretty sure a summer centerpiece fails those tests big time.
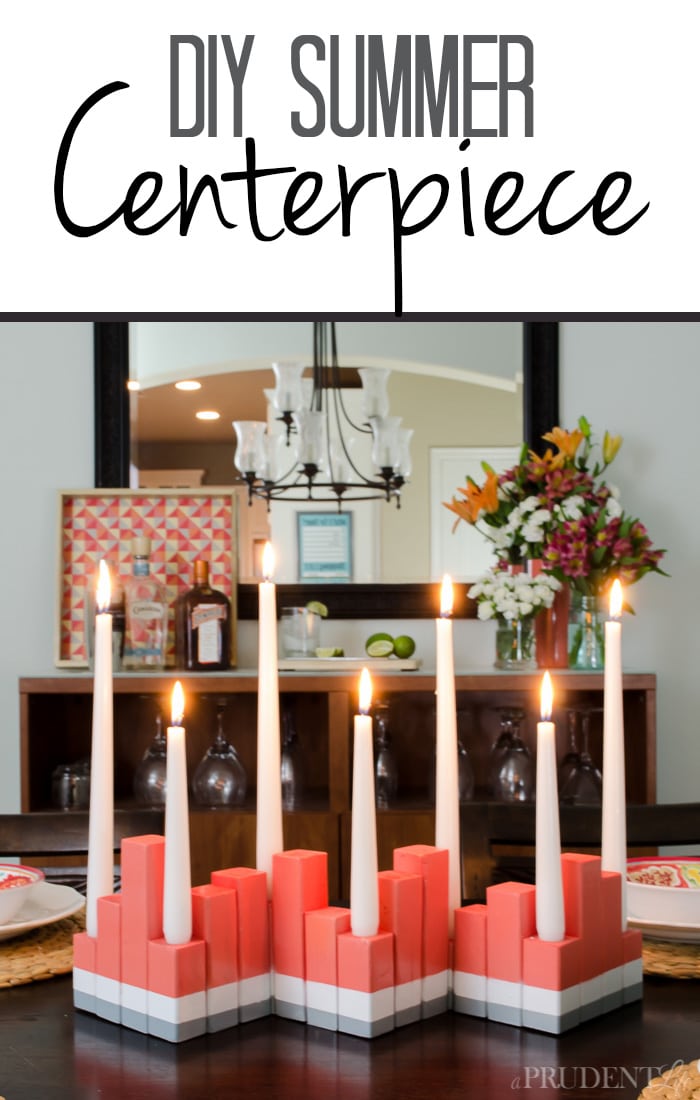
After staring at the table for awhile, I had the idea to build a custom candle holder out of several individual pieces of wood. I might have also been looking for an excuse to do a project in the garage.
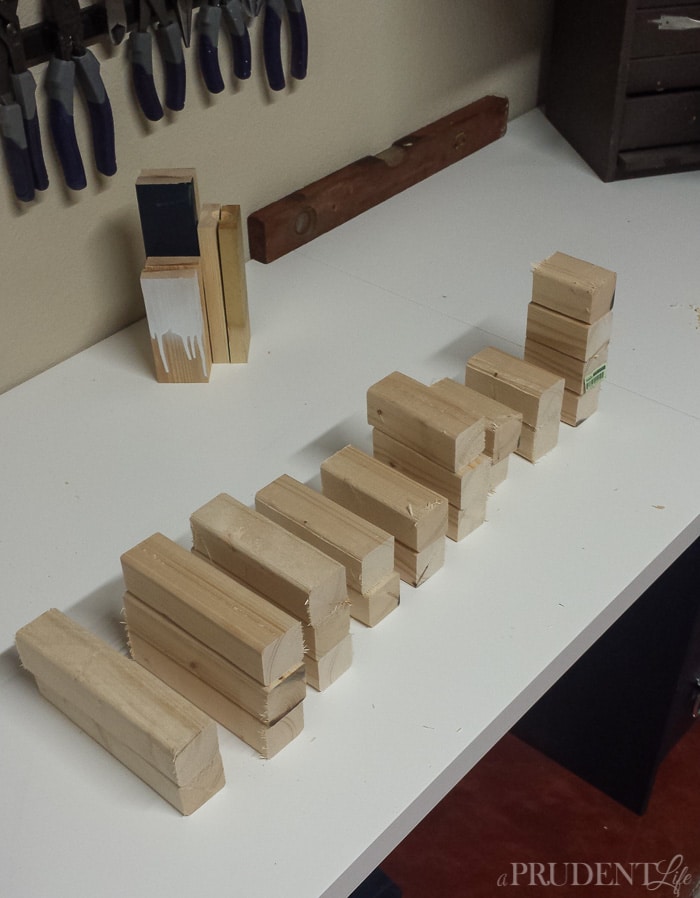
I was hoping to find some scrap wood on hand, but became fixated on the idea of doing square columns. I headed to Lowe’s and found out I could buy a giant 2×2 for $2. THAT was in my budget!
To get started on my centerpiece, I cut up the 2×2 into various heights ranging from 2 1/2 to 4 inches. The great thing about this project is that precision is NOT needed. I should probably pretend I had a plan, but I just chopped at random intervals. When I was done, I had a nice pile of building blocks. Some of the edges were pretty rough so I did some light sanding to smooth them out.
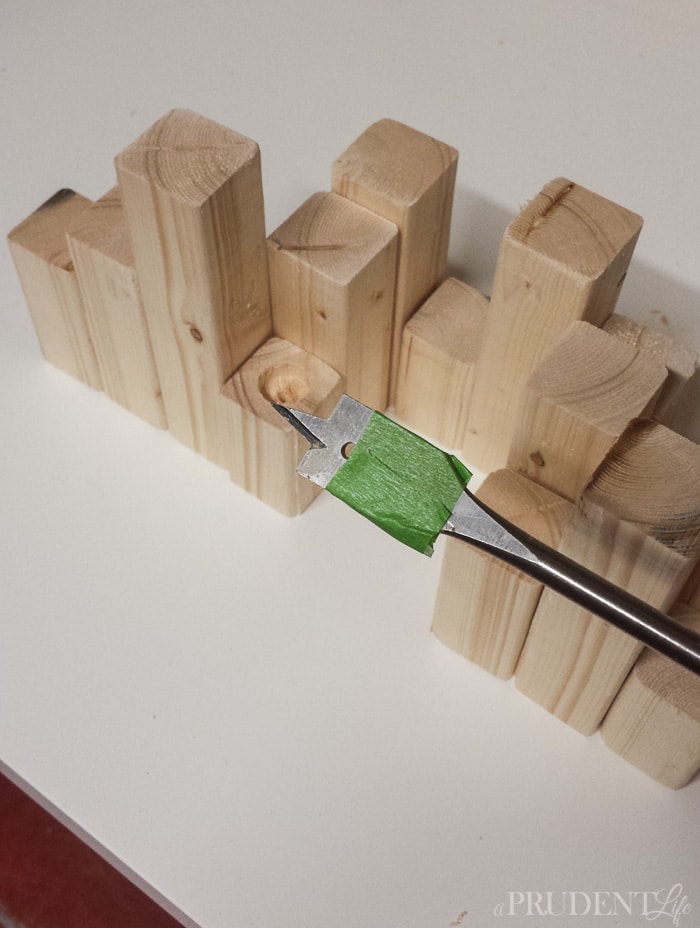
I wanted the centerpiece to be a candle holder, so I found a drill bit that matched up with the size of the tapered candles I have. The 3/4″ bit was perfect for me!
I picked out 7 of the shorter pieces of wood and drilled straight into the center to create an opening for my candle. And by center I mean as close as I could eyeball – no measuring required. To avoid drilling a 3/4″ hole in my hand, I held the wood with a clamp. It would be a shame to mess up those pretty pink nails!

BONUS TIP: If you need to make several holes the same depth, you can mark your drill bit with a piece of brightly colored tape. Even when the drill is spinning, you can see the color change!
Next up, it was time to start construction! I didn’t really want to try and nail everything together, but I also didn’t want to wait for wood glue to dry. Since there were so many pieces, no one has time to wait for a day between each section!
Thank goodness I was digging through my adhesives and spotted some Gorilla Glue Super Glue (NOT the regular Gorilla Glue)(affiliate link). A quick read of the packaging told me it was the perfect solution. It only requires 30-60 seconds of clamping to hold and then is fully set 24 hours later. I was hopeful and it worked out better than I even expected.
I started gluing pieces together, going for more randomness. My cheap clamps from Harbor Freight were lifesavers.
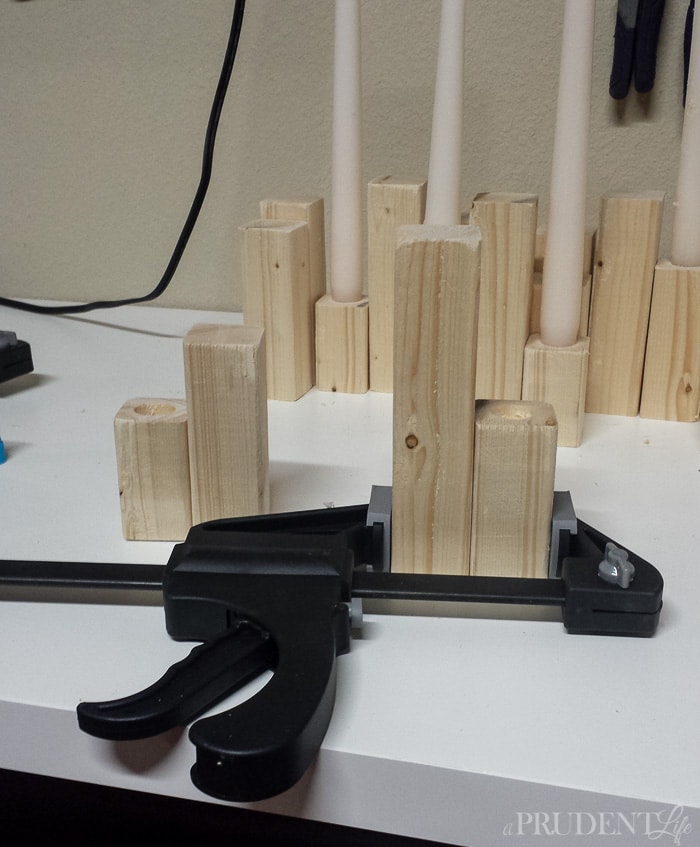
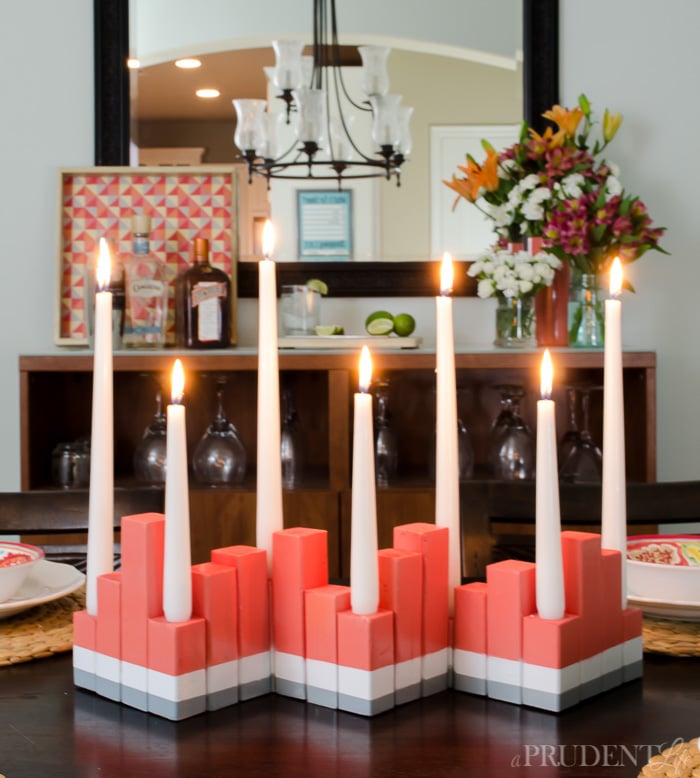
After playing around with some different options, I attached the blocks in a zig zag pattern and LOVE the way it turned out.
Then I was stuck and couldn’t decide what color to paint the new centerpiece. I kept wanting to stain it, which would have totally defeated the purpose of bringing some color into the dining room! I found my answer in the spray paint aisle at Home Depot! Rust-Oleum has a new gloss Coral color and it only took me 2.7 seconds to add it to my cart. PS: This post is NOT sponsored in any way, I just can’t stop buying Rust-Oleum spray paint!
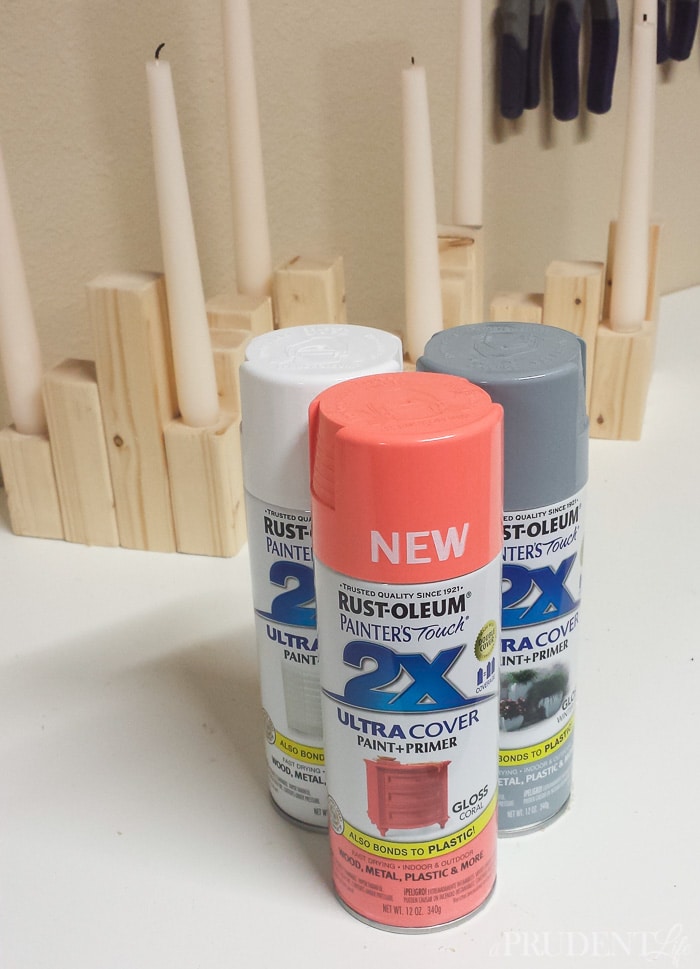
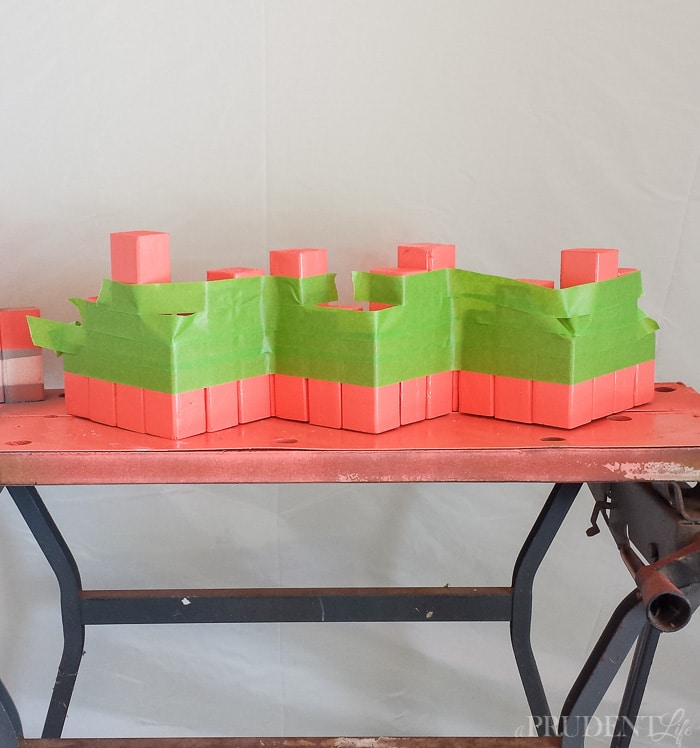
I painted the whole thing coral, then taped off the top so I could add a white stripe to the bottom.
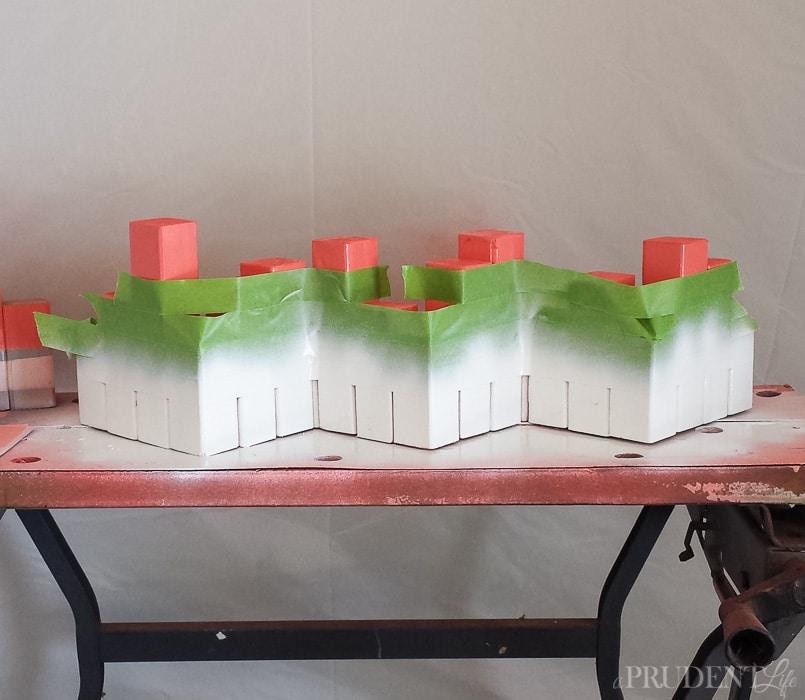
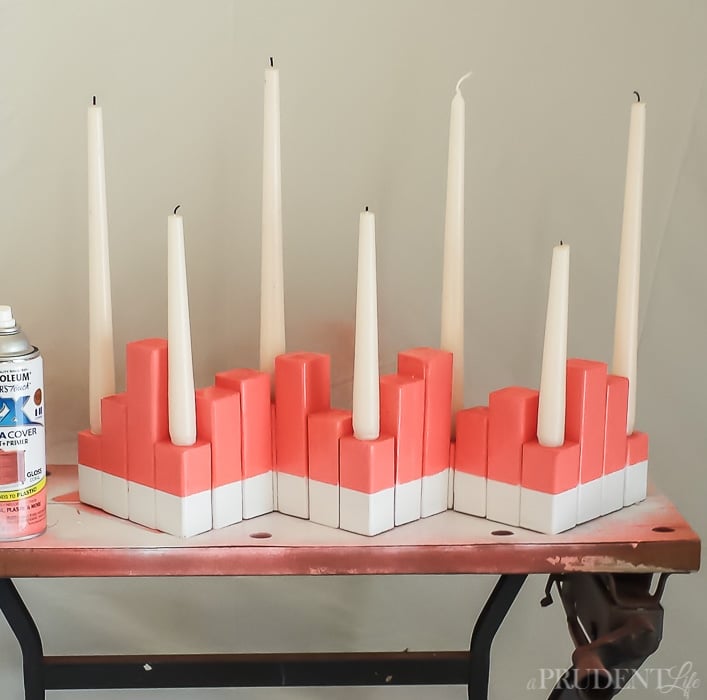
I thought it was still missing something, so added the candles to get a better idea of what my new summer centerpiece was going to look like.
Yep, something was definitely needed.
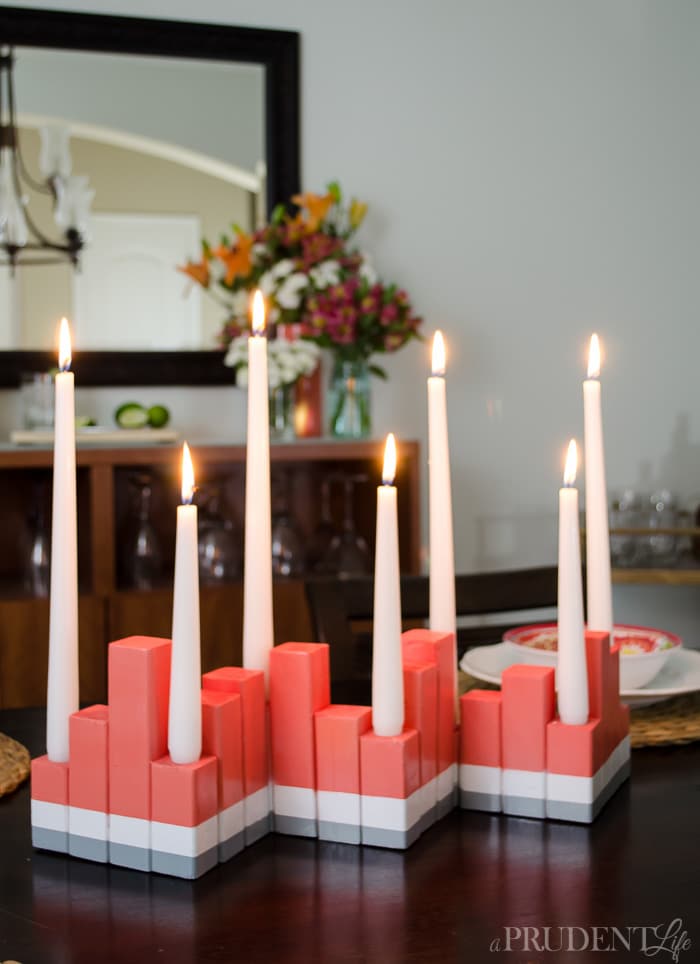
A gray stripe at the bottom was the perfect touch!
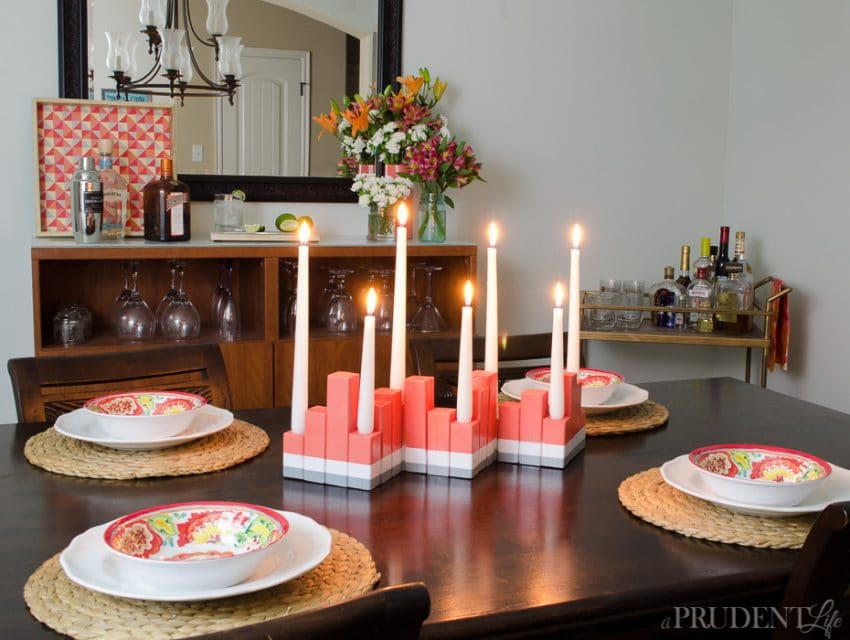
To really change the feel of the room, I needed to layer in the coral color. I found fun patterned bowls in the summer BHG collection at Wal-Mart. For $2.48 each, they were right on budget. I layered them with our normal white plates and some placemats we already owned.
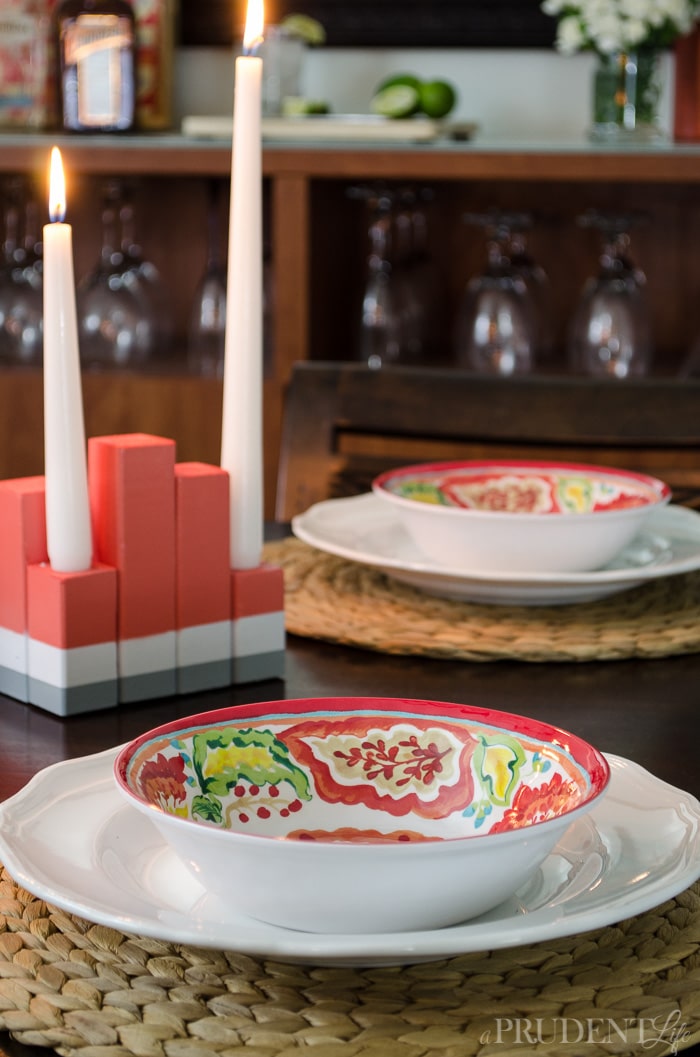
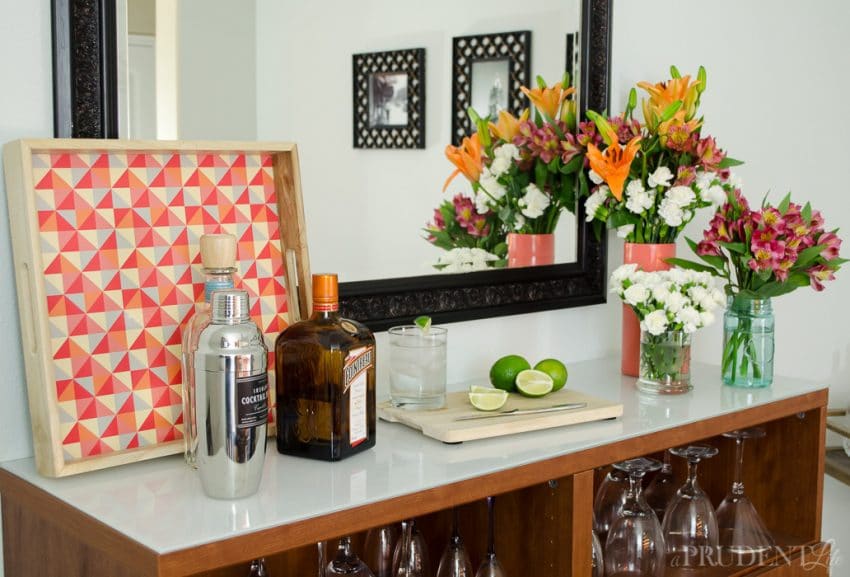
I got really lucky and found a clearance tray at Hobby Lobby for $8 that was the perfect color. Instead of laying it flat, I’m storing it upright as art. It will come in handy when I need to transport margaritas to the back patio! The last thing I needed was some fresh flowers to really say SUMMER! I used my monogram vase, a mason jar, and a dollar store vase I sprayed with the same Rust-Oleum coral I used on the centerpiece.
I’m pretty happy with the way everything came together on the cheap. I also love that the coral color can transition all the way into fall. Consider my urge to buy a new table officially quenched…for now!
If you love my summer centerpiece, I’d love you to put a pin in it!
Post shared at: Remodelaholic

Sarah Vogel says
OMG!!! I have the EXACT same place mats on OUR dining room table!!!! I knew we were meant to be friends!!! Love the centerpiece and the coral pops…so summery! You are so creative!! (And happy for you that you got to use your new workbench!! 🙂 ) Now, time for a party!!!
Melissa George says
So, question for you….Did we buy these fabulous placemats at IKEA? I couldn’t remember for sure where I got them! And if you lived closer, I’d totally invite you for that party you mentioned.
Sarah Vogel says
Yes! They came from IKEA, although I scored mine at the local Goodwill for 50 cents apiece with the tags still on!! Never used. They look awesome with everything you’ve decorated with on the table and sideboard. And, yes, I guess you’ll just have to say a long-distance “Cheers!” to me….maybe someday????!!!! Enjoy your new space there!
Corey @ TinySidekick.com says
Oh my goodness! Staring at your dining table made you think of that? Can you come stare at mine and tell me what you think? Love how this turned out. I did indeed put a pin in it and love the pop of that fabulous color!
Melissa George says
Thanks so much! The staring method is hit and miss, but I’d love to come stare at your gorgeous dining room!
This Design Journal says
Wow, love this. Can easily apply to July 4th party centrepiece I think. Thanks for sharing 🙂
Melissa George says
It would be perfect for 4th of July!
Ritzybee says
I love your style! and how you always make a super cute project on a little budget! I do the same thing! Great tutorial too, I think I’m going to buy a drill now!!
Melissa George says
Well your comment just made my day!! I definitely recommend getting a drill, they aren’t too intimidating and can be used for so much. We use ours as a screwdriver most often, but it was really fun to do this project with it!