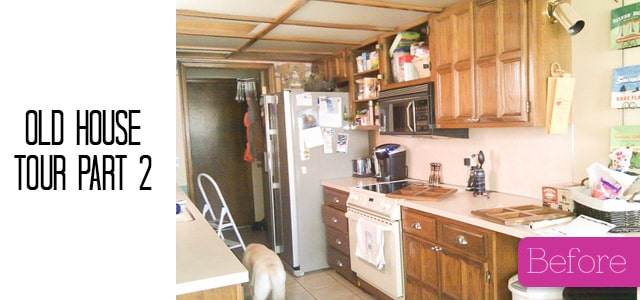
As I promised last week in the old house bathroom before & after post, I’ve got more pictures of the 70’s ranch we called home for 7 years. It’s pretty funny looking back at the before pics of the kitchen and thinking that we lived with it like that for 6 years. Yikes!
But before we get to the kitchen, let’s start on the outside.
The huge advantage to older homes is that they are often in well established neighborhoods with old trees. I loved that! We never made any changes to the exterior, other than frequent trimming of all the bushes!
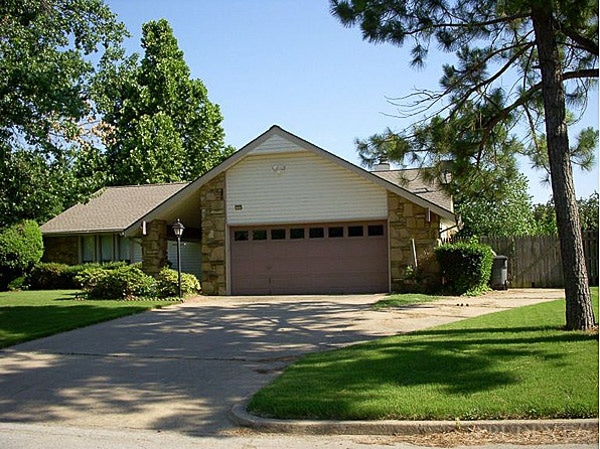
The backyard was narrow, but had some great features. The gigantic shed could have been a guest house. We miss all that storage!
One of the oddest features of the house was the hot tub room. See that room with all the windows attached to the patio? Behind that sliding door was a wood paneled room with carpet and a hot tub. You had two options to get into the hot tub. Either go outside and through the doors, OR carefully climb through the guest bedroom window directly INTO the actual hot tub. It kind of freaked me out because the only window in the third bedroom opened to the hot tub. No direct sunlight OR fire escape!

Fair warning, all the inside pictures are pretty rough quality. Like I mentioned last week, we did these projects with no idea I’d ever be sharing them for the world to see. Obviously it’s a good thing we have a better camera now!
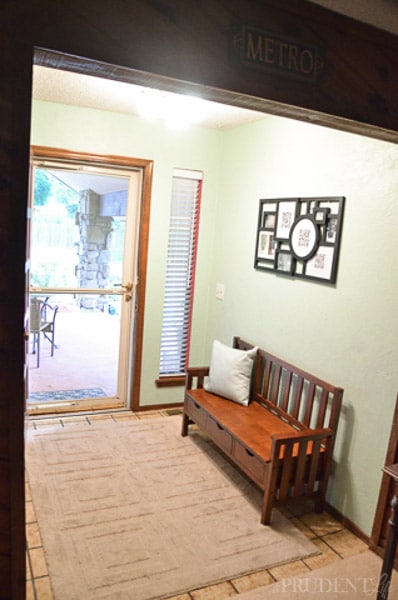
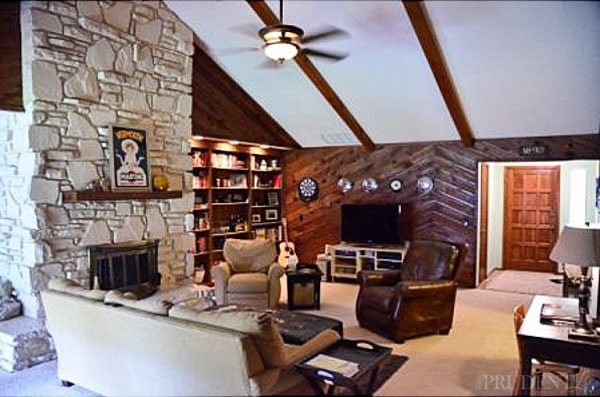
Inside, I loved that there was an actual entryway and the door didn’t open directly into the living space. At one point the walls were covered with three layers of wallpaper, ick! We never changed out the original 70’s tile, but I hid most of it with a big rug.
The view from the entryway was my favorite. The living room was as deep as the entire house, which made it great for entertaining. Oh how I want to go back in time and style those built in bookshelves! Well, really the whole house, but I’d head to the bookshelves first.
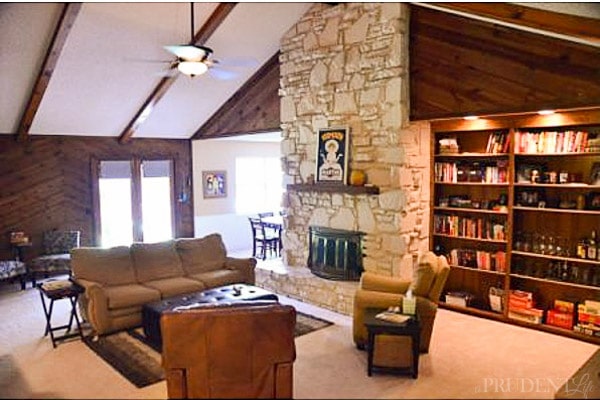
The only bad thing about the layout of this house was that in order to have an open kitchen, you’d have to take out the fireplace. The fireplace is such an awesome focal point that I couldn’t imagine getting rid of it.
The dining area was right between the fireplace and the kitchen. It was another victim of decades of layered wallpaper. Actually, it was sponge paint on TOP of probably 4 layers of wallpaper. We painstakingly peeled away all the wallpaper and added bead board around the bottom.
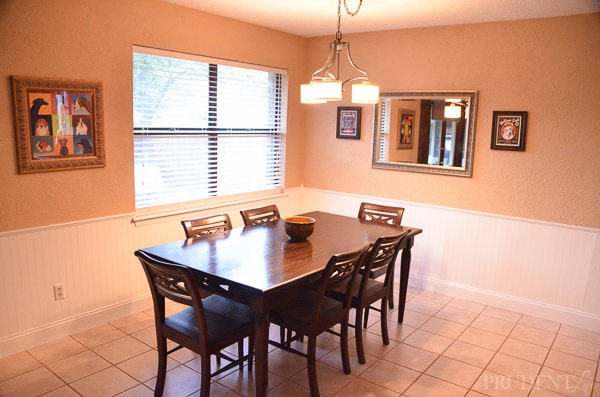
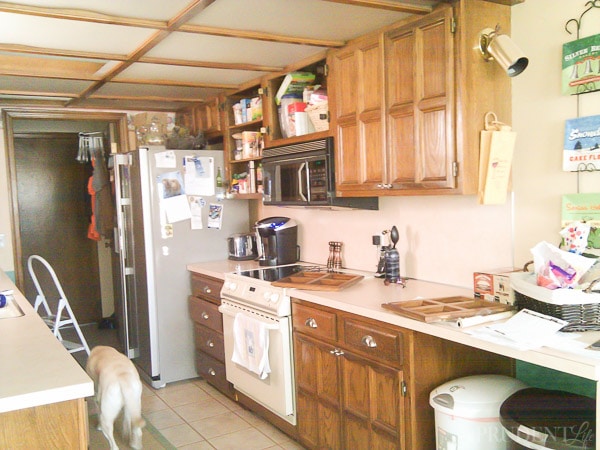
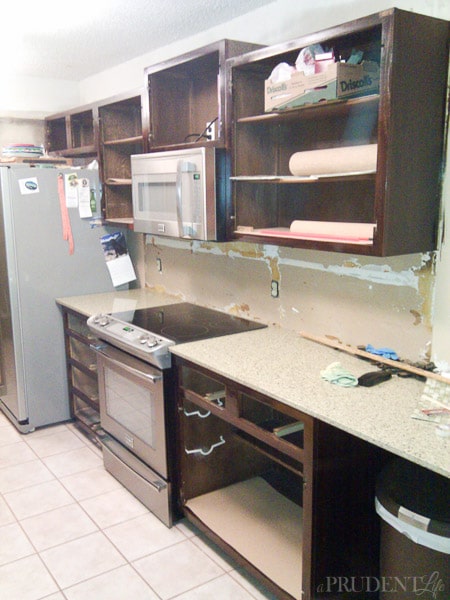
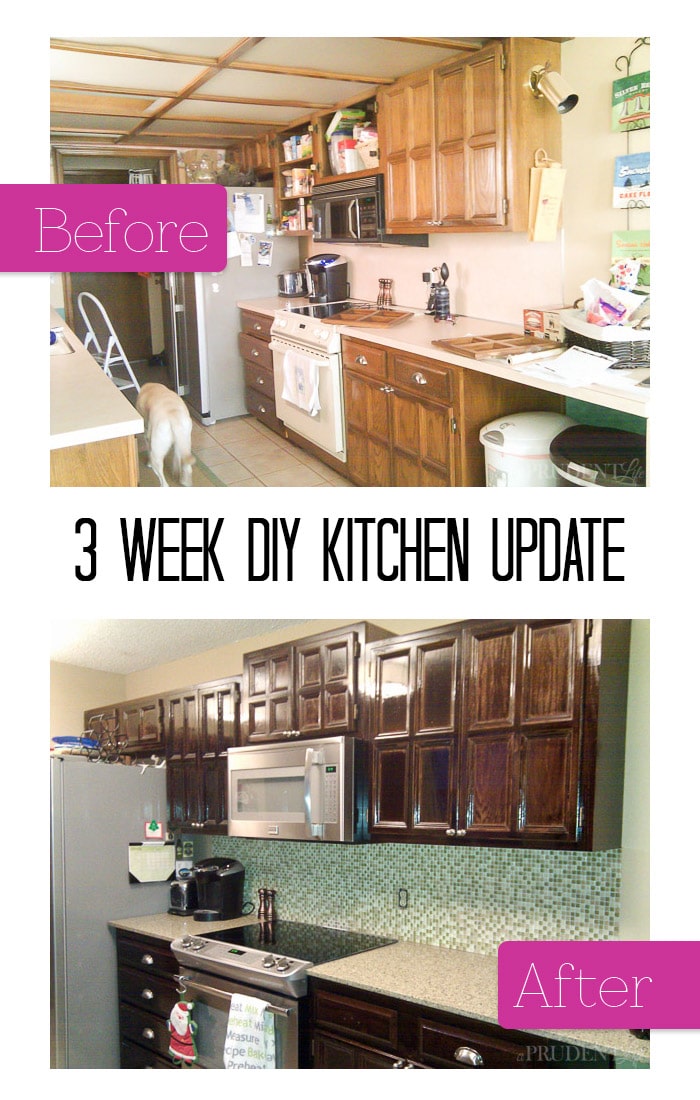
In the kitchen, we started with orange oak cabinets, a wall to wall drop ceiling, and peach laminate countertops. See that little slice of wall at the end that it peach on top and green on the bottom? That’s what the whole dining room used to look like. It was SCARY.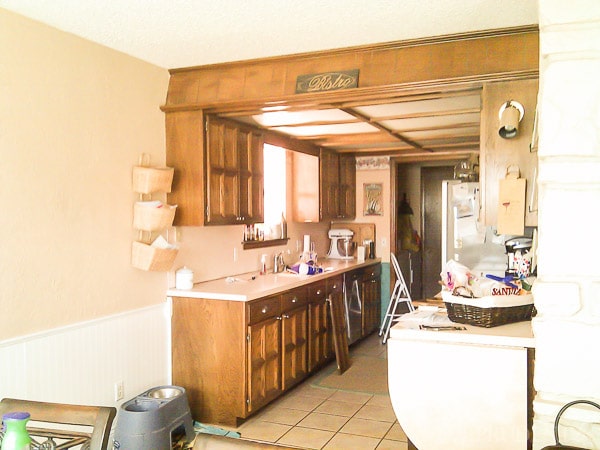
The right side of the counter top had a crazy flap that you could raise for even more countertop space at parties. Good in theory except for the awkwardness AND the minor detail that it wasn’t sturdy. If someone leaned on it, then stood back up, the swing arm that held it up would release and your BRAND NEW ceramic bowl could go crashing to the tile into 900,000 pieces.
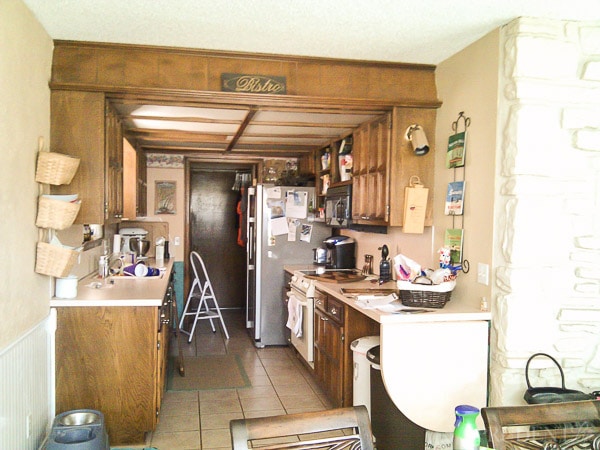
And really, why was there a spotlight on the end of the cabinet? We did have cabinet doors, we just forgot to take before pictures before we started dismantling everything.
Also, notice the Christmas plates on the wall? We did this entire makeover between Thanksgiving & Christmas Eve, which I do NOT recommend. Especially if you’re both working full time and going to school. My great timing is one my husband’s favorite things about me. Or maybe not 🙂
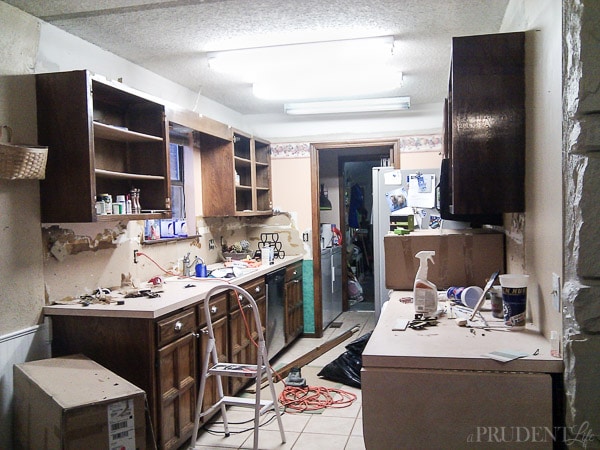
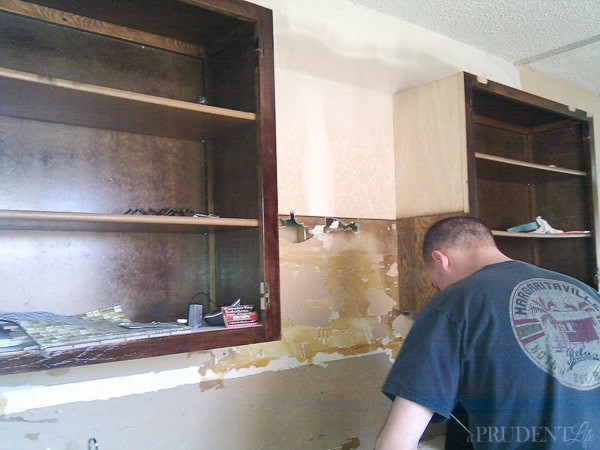
The demo step was scary but fun. We tore down the drop ceiling, removed the laminate backsplash, and took the cabinet doors to the garage for staining.
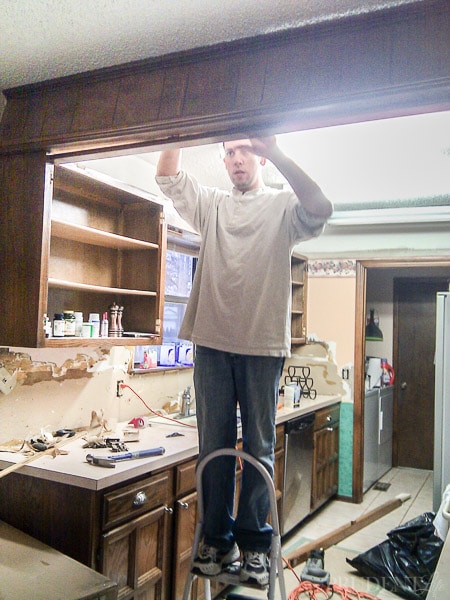
Even with the huge construction mess going on, the room felt bigger with the ceiling opened up!
We were replacing the microwave with a stainless steel version from this decade, which led to one of our best ideas.
We moved the cabinet that goes above the microwave up several inches. The cabinets looked better at staggered heights AND we had more clearance between the microwave and the stove.
Better, right?!? This is also the first look at the countertop. We went with a 2 cm quartz and loved it. We got it at a local company and it ended up being quite a bit cheaper than the big box stores. We wanted solid surface, so did a ton of price and material comparisons. We needed something we could recoup the cost of when we sold the house in a few years.
The only things left at that point were the cabinet doors and backsplash. For the backsplash, we found a great deal on glass mosaic tile and I installed them myself (which gave me the confidence to tackle the pantry at this house). Looking back, the tile choice was really trendy at that time and probably wasn’t the best choice, but it looked pretty good in my 2010 eyes.
For the cabinets, I used a questionable technique. I was looking for a fast fix, so I did a very light sanding, cleaned the cabinets with TSP, and then used a gel stain. It worked on MOST of the cabinets, but in some small areas it didn’t want to adhere. If you’re going forlong-termm quality, don’t start this project 3 weeks before 30 people are coming over and instead take the time to sand the cabinets all the way down. I don’t really regret this decision for our particular circumstances, but proceed with caution before trying it.
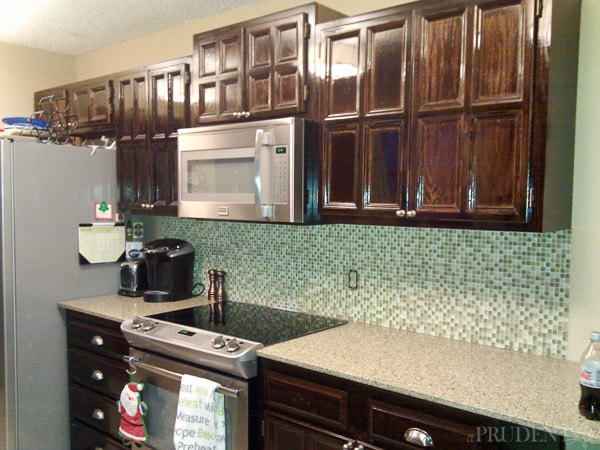
Thank goodness that cabinets weren’t as shiny in real life as they are in these photos!
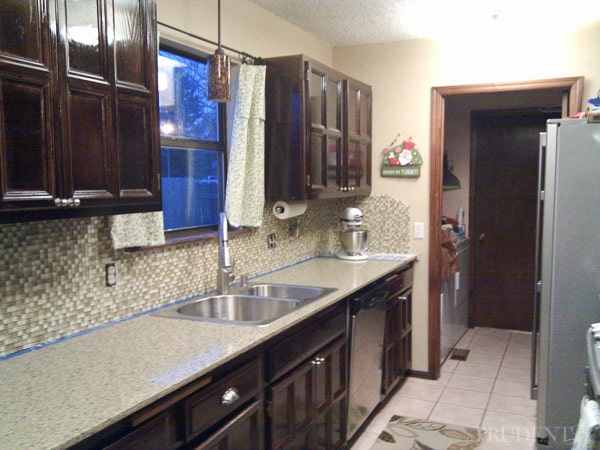
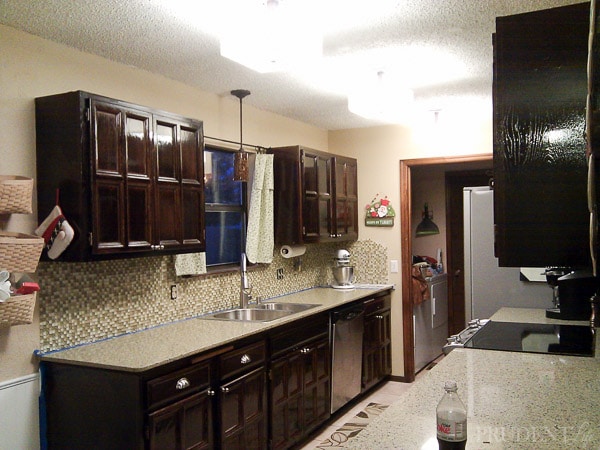
These next two are extra grainy, but the only ones I have that show the light fixtures we used instead of those hideous fluorescents!
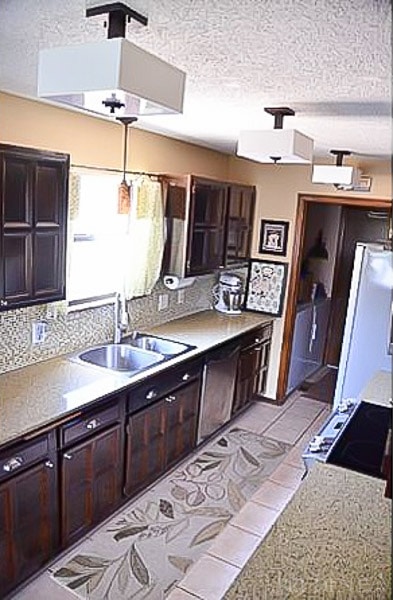

After we realized that it only took 3 weeks of focused evening and weekend effort to modernize the kitchen, we couldn’t BELIEVE that we lived with the before version for so long. Remember when I said my husband loved my timing? Our whole strategy of putting some effort & money into the kitchen was so we (aka 90% I) would be happy staying in this house another few years while we continued saving to build a dream house. Well, that lasted 6-7 months before I was touring model homes again. Eight months after we finished the kitchen, the house had new owners. You can see our current kitchen here!

Katie @ Addicted 2 DIY says
You guys did a great job with the update! The old kitchen seemed like it would feel suffocating, but the new one definitely seemed more open feeling.
Melissa George says
Thank you! Your thoughts are 100% right about how it felt before AND after!
Amanda says
So weird coincidence – I picked up that Metro sign at a Goodwill recently. Where did you get it?!
Melissa George says
Hmmm. I am trying to remember, but it’s not coming to me! I know we’ve had them since our first house, so pre-2004 🙂 We had both a Metro and a Bistro sign that matched. I sold the Bistro last year, but keep the Metro. It’s still so fun!