I had a major epiphany back in September. I was going through the house, gathering things for a garage sale when this realization happened. For the longest time, I’ve left things displayed that I don’t love. I thought that it was better to keep them until I found something better.
But I was wrong!
During the garage sale prep, I took the generic art off the wall in the guest room. I talked about why it was a bad purchase a few months ago. Since I had publicly declared my dislike for it, I figured it was time to send it out the door. With that art in the garage sale pile, I felt lighter.
That’s when it hit me. Being surrounded by things that didn’t feel like me was WAY worse than the fear of having empty walls. I pranced around the house taking all kinds of things off the walls and being happy they were headed to new homes.
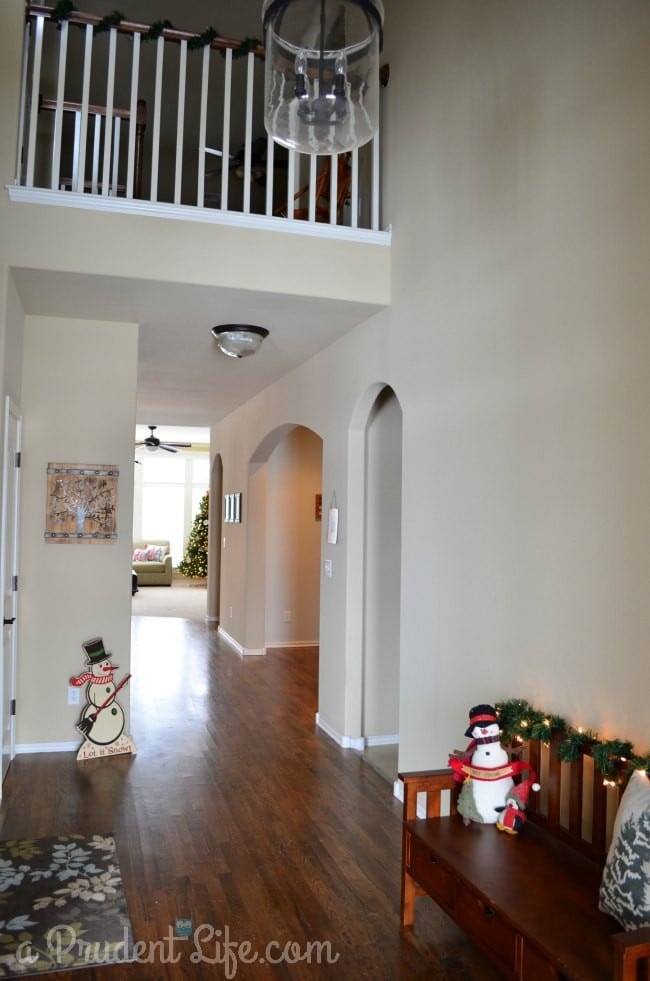
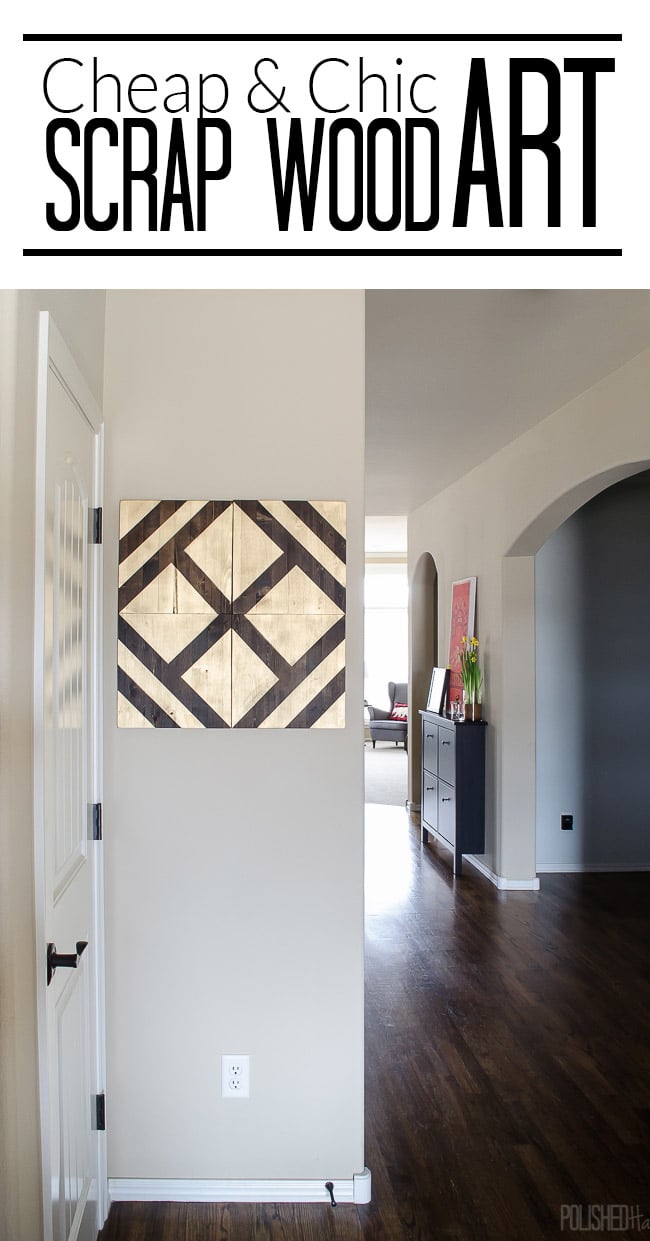
Which brings us to today’s project! I wanted something to fill the void left when I sold the artwork on a little wall that faces the front door. It was a 3D metal tree on a wood background. It was probably the hardest thing to sell because it wasn’t that I hated it on it’s own. But it also was too rustic for the direction I’m going with our decor. And something about people being greeted with art that didn’t feel like me was super-frustrating.
I found a photo of it in an old Christmas post.
Right before Christmas, I decided to play with some scrap wood leftover from the closet to see if I could come up with new art for that wall.
Spoiler alert, it worked!
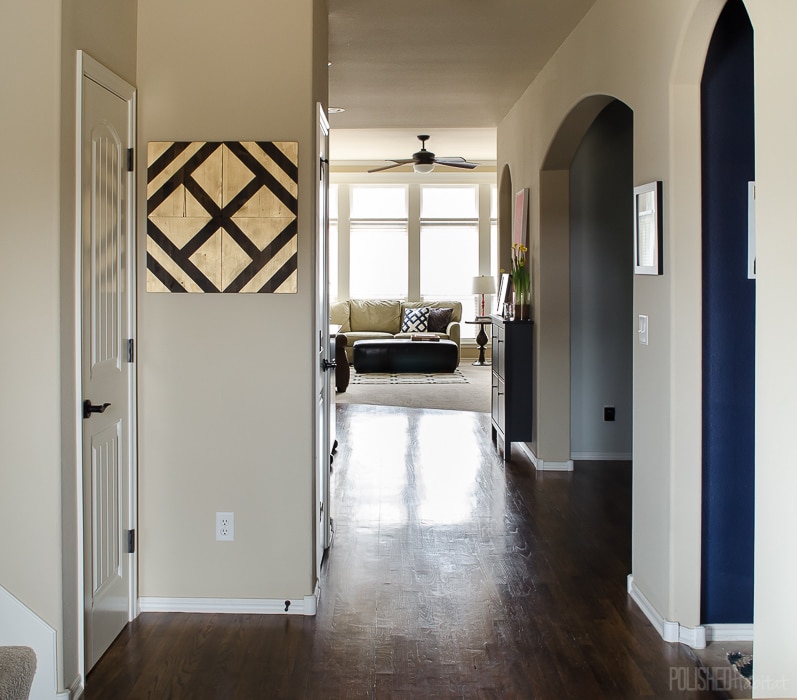
The angle of the photo is a little different, but it’s crazy how little changes are turning our house into home. The peek of navy you see from our little garage entry has a huge impact, along with the addition of a shoe cabinet further down the hallway. It’s always reassuring to see that we are making progress!
So back to the art project…it’s SO easy!
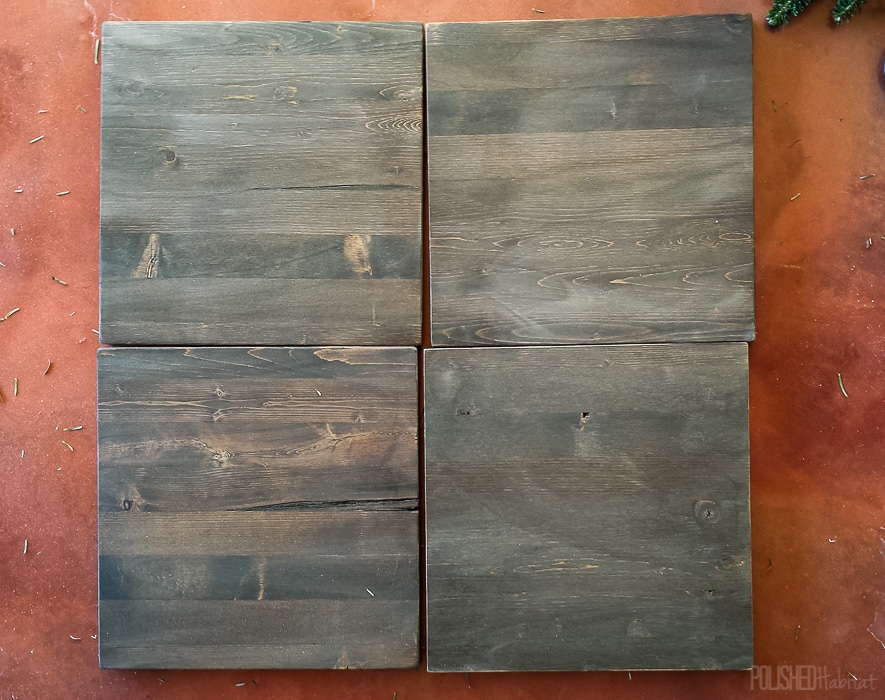
We had some leftover wood from the closet that was 11 3/4″ wide. We cut 4 pieces to 11 3/4″ long to come up with four squares. If you don’t have wood or a saw, don’t fret. You can buy one board and have it cut for you at the store – both Lowe’s and Home Depot generally provide this service. Look for a big saw and a doorbell to ring for service.
Once you have four squares, either paint or stain a base coat. This will be color of your lines. Mine look black in the above photo, but I used a deep brown stain we also had leftover from other projects. I sanded my boards both before and after the staining process, so they’re a little dusty in the photo below.
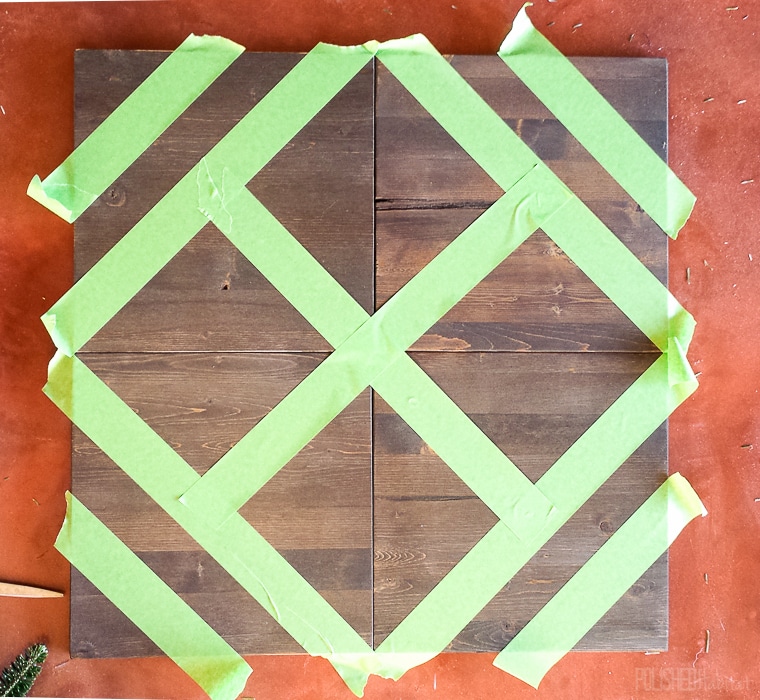
I should probably confess that I had NO idea what I was going for, and was just improvising as I went. I was going to hang a wreath on the four stained pieces of wood for Christmas and call it good, but I felt like I could make something that wasn’t seasonal. So I looked around the garage and found some wide 1.88″ frog tape (Amazon affiliate link).
I started off by placing the pieces that go diagonally across each piece of wood. Then I decided to connect them with a big X across the middle. I was liking it, but the corners were too bare, so I put another piece of tape across each one. Now, some people would probably measure these things, but I just eyeballed everything. This is why I’m a cook and not a baker.
I rubbed all the tape down well and then crossed my fingers that it was warm enough for my spray paint to work.

After two quick coats of my trusty Rust-Oleum Gold (Amazon affiliate link) spray paint, I peeled up the tape to see how everything looked. I only waited a few minutes between spraying and peeling off the tape. I loved what I saw and was ready to get it on the wall as soon as the paint finished drying.
To hang the new art, we attached command hooks to the back of each piece of wood. Boom. Done with no nails!
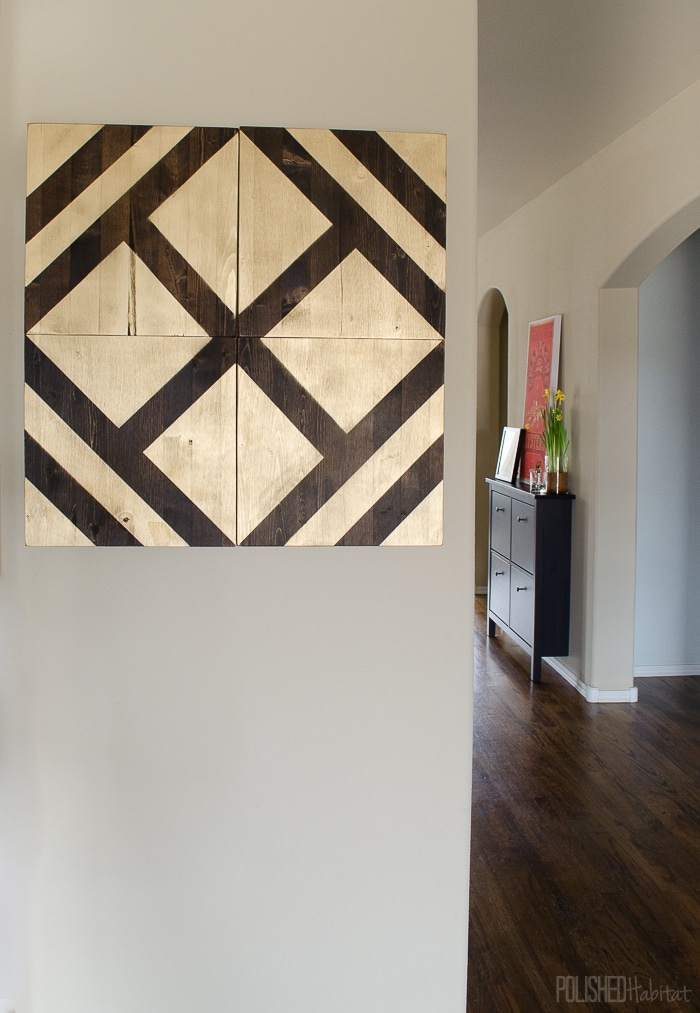
The gold is GOOD. I love that the lines look black from far away, but have depth and grain when you get closer.
I couldn’t be happier that I came up with something I like for this space without spending ANY money. Mark this one down in the win column!

Lauren@SimplyLKJ says
I think we can all relate to those kind of decorating mistakes! Love how the diy turned out.
Katie @ Addicted 2 DIY says
That is super fun and such a great idea to do with scraps!
Angela, Blue i Style says
I LOVE how the art turned out! And it’s amazing the transformation from just a few changes around your entry way!