
Sometimes a well-styled vignette can happen by accident, while other times it takes a bit more planning up front.
Looking to display a few family photos, some precious collectibles, vintage trinkets or a special piece of art? Well, hanging a floating wall shelf might be the perfect solution, especially for a small wall or nook!
I am thrilled to be back here sharing more styling tips with you guys and today, I’ll be dishing five simple tips for how to style a floating shelf. Whether you hang one shelf, two shelves or even 5, these pointers will give you some direction and guidance while working to overcome your fears of creating that beautiful, well-styled “shelfie”!
How to Decorate Floating Shelves
Step 1: Pick a color scheme
This is a great starting point when looking to style or decorate any given space. Ask yourself…
What colors do I love?
How do I want the space / shelf to feel?
How will it flow with the rest of the house?
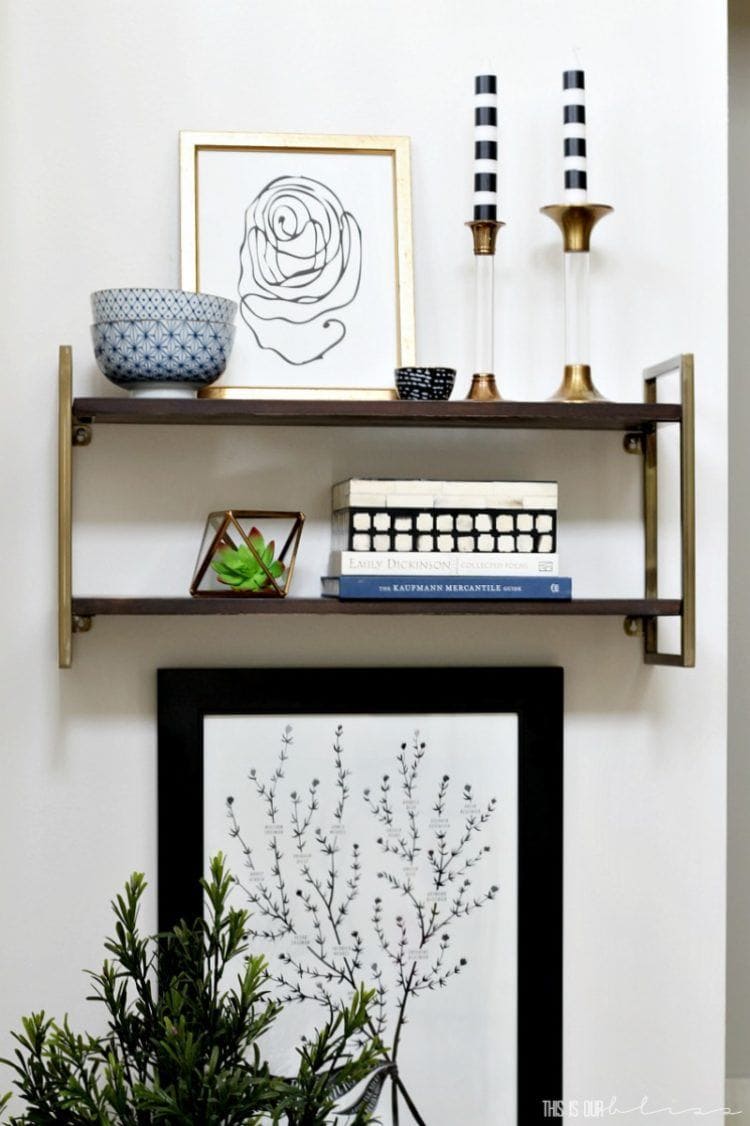
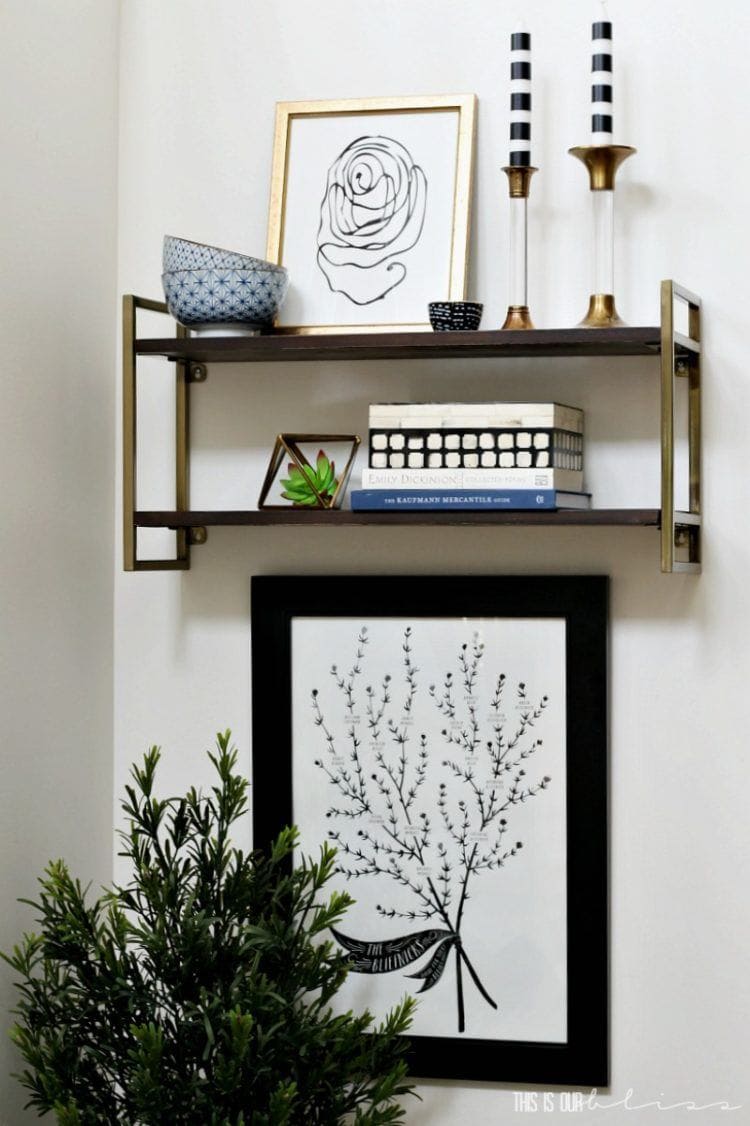
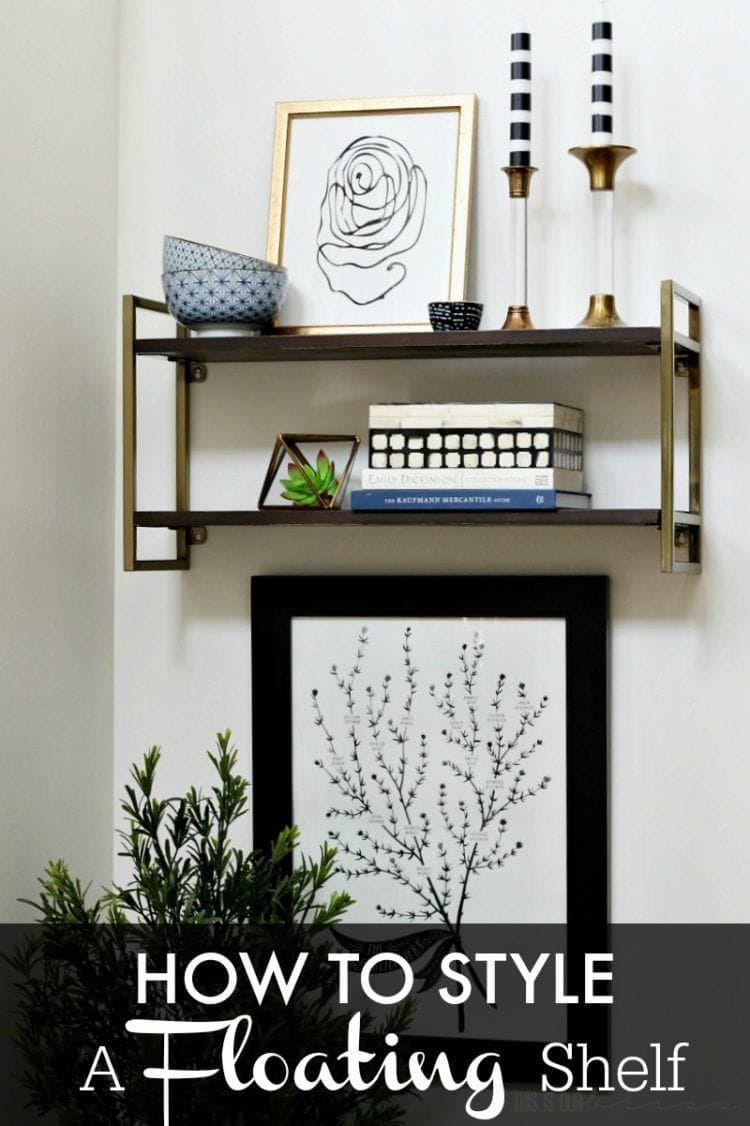
In this case, I stuck with my go-to classics – black, white and hello, gold, but decided to also throw in a pop of blue!
After incorporating navy blue into our dining room last fall and then more recently deciding to go bold and blue with an IKEA bookcase makeover that now sits in our mudroom, I decided a couple blue pieces would work well on these shelves, too.
When the majority of the pieces in your vignette are neutral, it is easy to swap in different accent colors as the seasons change and for various holidays. I can already see the color changing in my head!
Step 2: Create imaginary diagonal lines
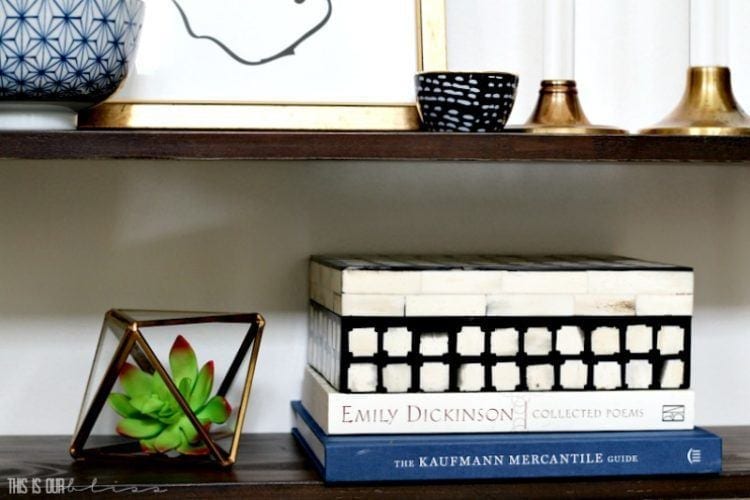
Here, I am using 2 shelves so I essentially wanted to envision an “X” across the shelves. What this means is you want to stagger your like pieces [i.e. same size, same shape or same color] so they are not directly on top of or below one another. You are creating balance by doing this.
Let’s take my pops of blue that I mentioned earlier. If I am going to have the stack of blue bowls on the top left, then I want to place the blue book on the bottom right.
This also goes for the gold…if I want to place the gold candlestick holders on the top right, then the gold faceted terrarium should be placed on the bottom shelf on the left side.
And finally, the black and white was also spaced out similarly. I could draw a diagonal line from the black and white art print down to the black and white trinket box.
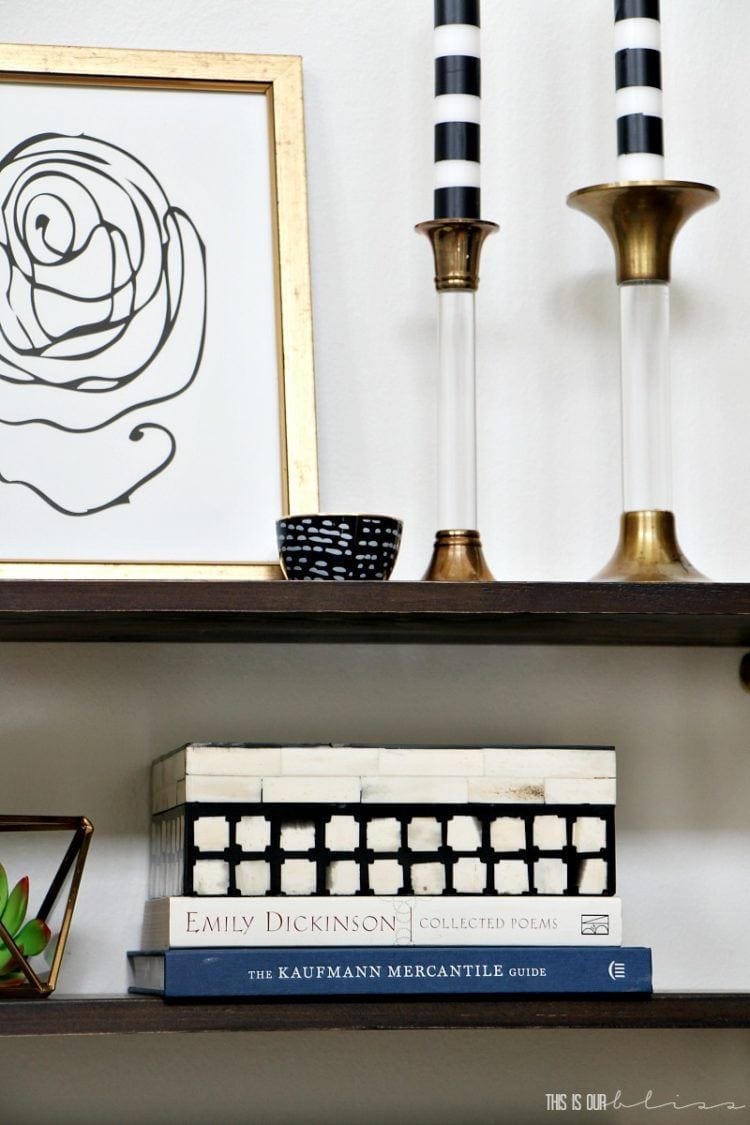
Let’s use shape as a final example. Notice how the art print is not centered on the top shelf, but off to the left a bit?
I did this so that it would be placed diagonally from the rectangular box and stack of books on the lower shelf.
You can definitely place pieces in the dead-center of a shelf, but you want to make sure you don’t have a similarly shaped, colored or sized object directly below it.
The goal is to make people’s eyes follow a zig-zag pattern or an “x” pattern here since we are working with two shelves.
Step 3: What to put on floating shelves
I recommend shopping your house when deciding what to put on floating shelves! Remember, the key here is to use simple pieces. Here are the various items I’ve used to style my shelves:
- books
- candlestick holders
- art prints
- greens or florals
- vases or terrariums
- bowls
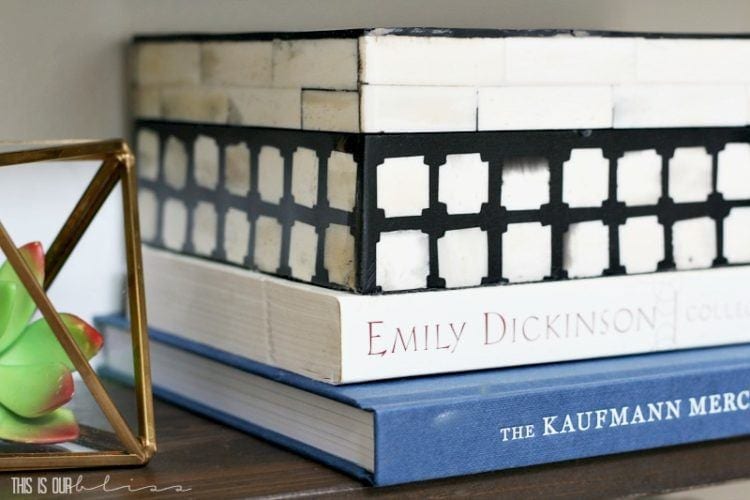
- decorative boxes
Remember, you don’t have to go out and buy all new items when preparing to style a shelf or nook. Start with what you have and work your way from there!
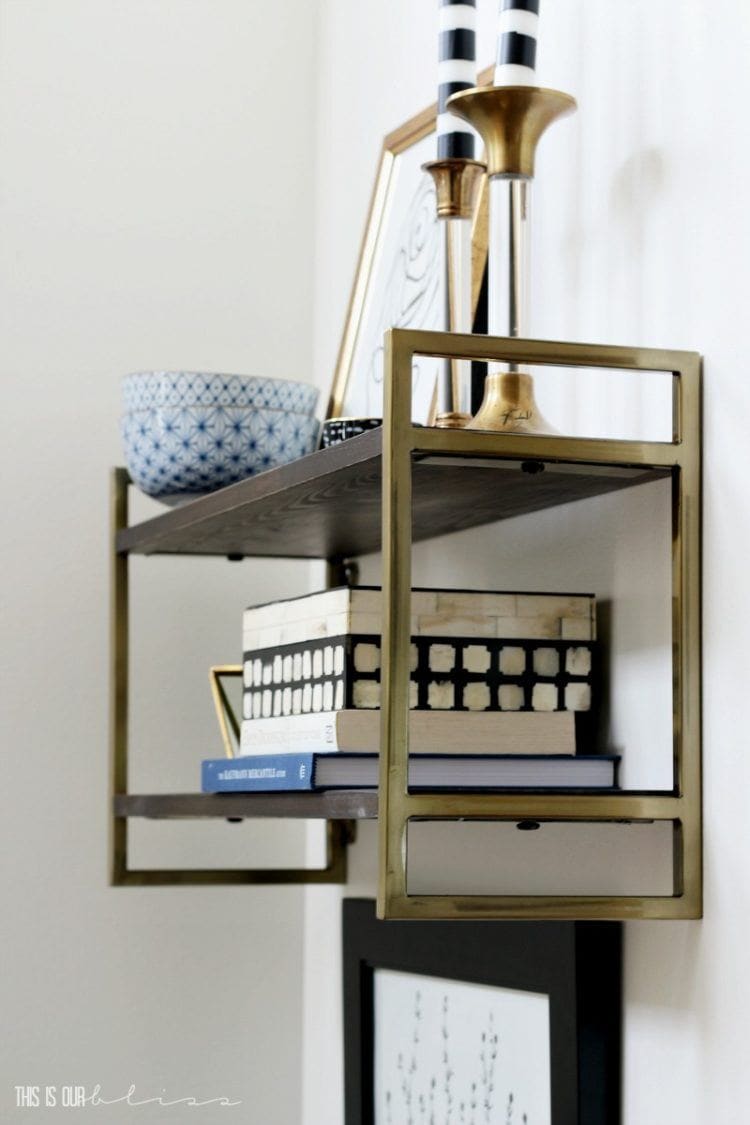
In my case, I bought this wood and metal double floating wall shelf and then styled it with existing pieces from our home.
While shopping the house, I went around and gathered nearly three times the amount of pieces that actually landed on the shelf to stay. You want to have multiple options right there near you to play around with, so it’s better to grab more than enough.
It will definitely save you some time if you don’t like how something looks and have to stop and run around to grab more things!
Think simple, but don’t be afraid to incorporate a few pieces that are interesting and unique. For example, patterned bowls and boxes or even striped candlesticks! There’s nothing wrong with going bold and packing some visual interest into your vignette.
Step 4: Stack & layer
In order to create varying levels of height across your shelves, you can simply stack items on top of each other.
Here I placed a decorative box on top of two stacked books since I wanted the bottom right side to be taller than the terrarium on the left. Similarly, you also want varying levels of depth on your shelf.
When placing your items on the shelves, don’t set everything out side-by-side. It’s best to stagger pieces by placing them slightly in front of one another.
Notice how I placed the blue and white bowls in front of the left side of the art print and the black and white dish is sitting in front of the right edge. By doing this you are creating another zig-zag pattern from the front to the back of the shelf.
Step 5: Don’t forget the wall space above & below
Although floating shelves are supposed to…well…um…float, you don’t want the shelves to feel like they are stranded all alone in the middle of the ocean.
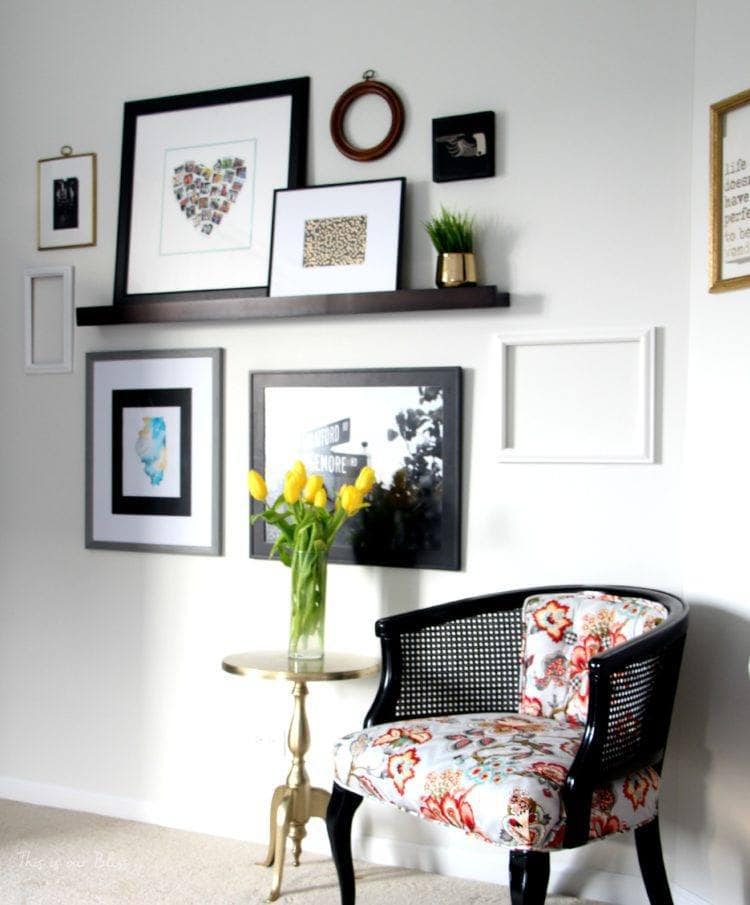
To help fill in the empty space on your wall, hang frames above and below to create a gallery wall that incorporates your floating shelf.
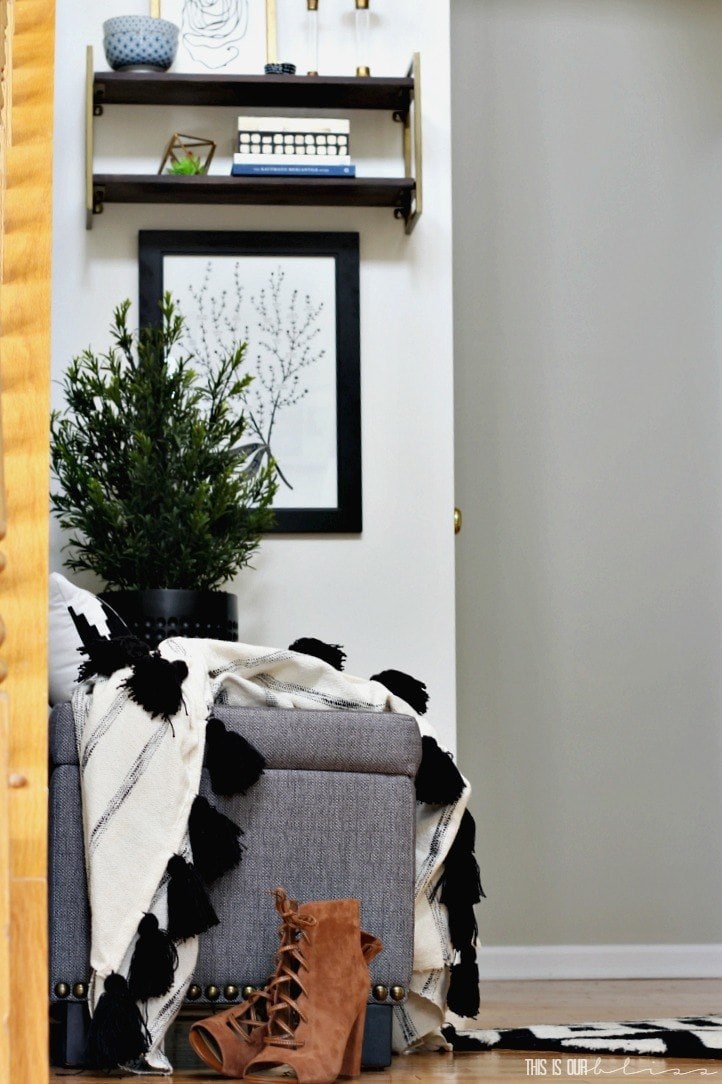
I hung this custom family tree art print beneath the floating shelves to cover more wall space and “fill in” the empty spot.
This piece is such a special one and decided it would be a great addition to the entryway for friends and family to see when they step inside our home.
Here you can see that frames were hung around all sides of one long, floating shelf on a wall in the guestroom of our last house.
There are so many ways to amp up the style of any shelf in your home. The concept of a floating shelf is nice because it doesn’t eat up as much space as a bookcase, yet adds a bit more personality to your wall than a single piece of art.
It is a great way to display keepsakes and unique one-of-a-kind knick knacks, while still being able to lean a piece of art or a special photo on it, too.
Don’t let shelf styling intimidate you. In fact, starting with a couple of floating shelves is a far better place to practice your styling than a big, bulky bookcase anyhow!
Just remember these five simple tips for how to style a floating wall shelf and give it a shot!
The best part is once your floating shelf is mounted to the wall, you don’t have to put any additional holes in the wall [not that I have ever managed to put multiple incorrect holes behind a single frame before!!] since the items simply rest or lean on the shelf. From there, it is just about moving your objects around until it looks just right to you.
There are no rules, just tips to help you get started!
What is your biggest frustration when it comes to styling a shelf? Do you over-think it?!
Thanks, Melissa for having me over here again and thank you, all for reading! I’d love to hear if you’ve found any of my tips helpful! Have a wonderful day!


Sean Mahan says
Great tips! Creating diagonal lines is a pretty awesome one, will sure use it!