During the process of making over my pantry, I learned a lot about painting. On one hand, painting is a DIY task that anyone can tackle to make a relatively quick and inexpensive HUGE impact on their space. We’ve always done our own painting, but I learned that years of experience doesn’t mean you are done learning! I jotted down some interior painting tips during pantry painting week that I hope will help with your next painting project. As a little bonus, I worked with HomeRight on the post. They were awesome enough to sponsor the post and a giveaway of my favorite painting tool!
Lesson #1: Chalkboard paint requires A LOT of stirring.
Stir in every pattern you can think of, including scraping the sides. When you think you are done, keep stirring AT LEAST another 60 seconds! My wall looks great now that it is done, but I thought I had stirred like crazy before dumping my chalkboard paint into the tray. I STILL had to dump it back into the can for more stirring because the pigmentation wasn’t even.
ORC Week #2: I’m All About That Paint
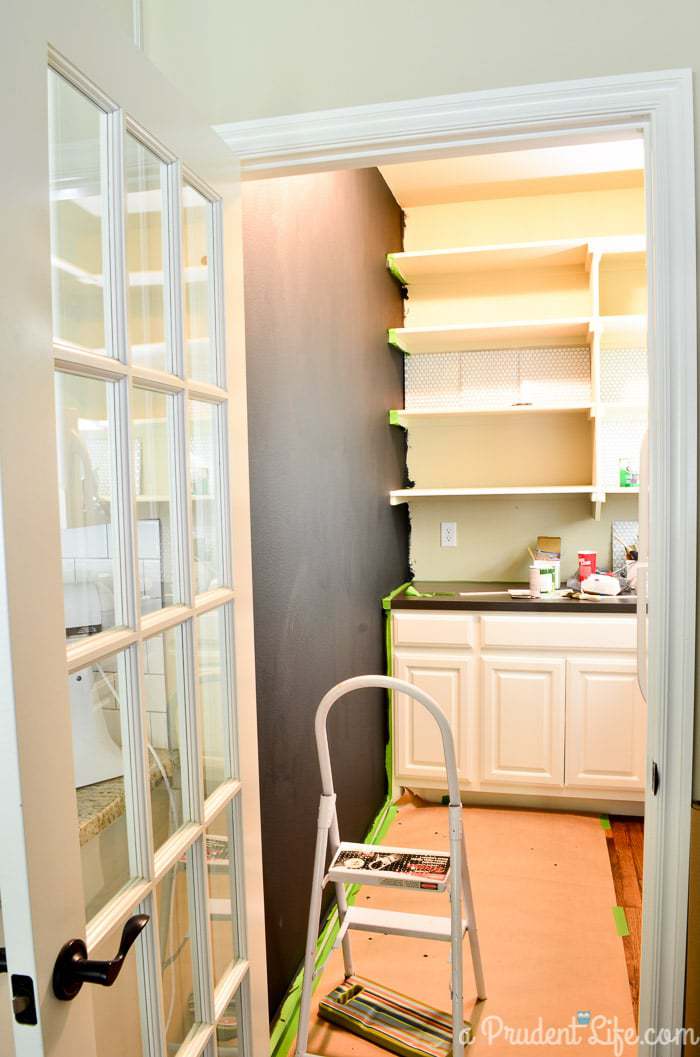
Lesson #2: Start painting shelves from the TOP.
When you start at the top, you can set your paint on the shelf right below the one you are working on. You can also hold on to the lower shelves when climbing on and off the cabinets to reach the top shelf. Can you tell I started at the bottom and regretted it?
Lesson #3: Brushes REALLY do matter.
For a long time, we bought cheap paint brushes because we’re kinda bad at washing them out. Cheap brush = only the teeniest amount of guilt when they go in the trash. At some point this year, I figured since we’re grown up enough to be on our 3rd house, we could handle the responsibility of a $10-$15 paint brush. Holy game changer! I fell in love with a brush from Ace and stand by it being the best ever. The brush was still wet when I needed to work on some of the pantry so I grabbed one of our cheap brushes. I couldn’t handle it! Bristles were coming out, and the brush hardly held any paint.
SO, when I was picking up the rest of my paint at Lowe’s, I splurged on 2 Wooster brushes. A stubby 2” and a 2 ½” angled brush. But you know what? My Ace brush even beats them! The paint goes on way smoother with the Ace version. Same paint, same shelf, WAY better coverage when I switched brushes. I’m hereby dedicating myself to Ace Hardware wooden handled brushes.
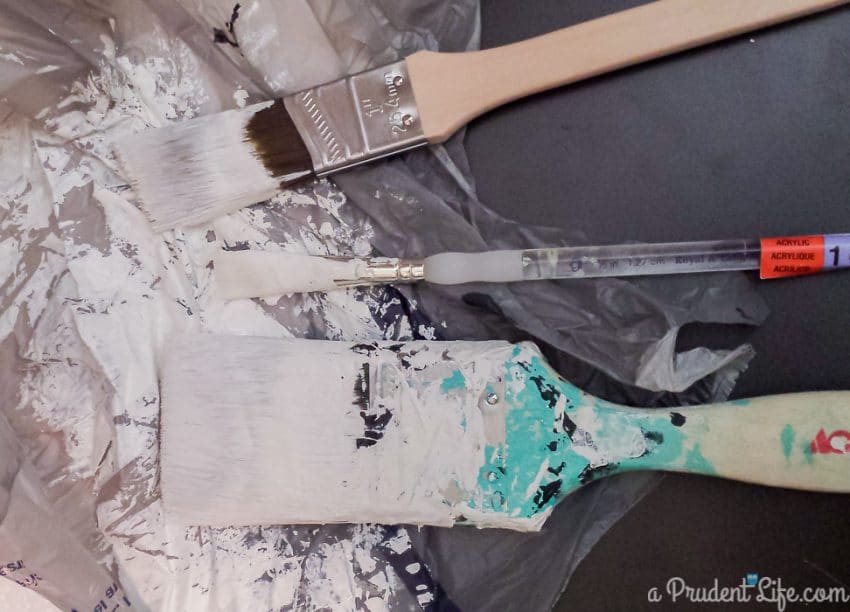
BONUS TIP: Between coats or during emergency trips for more paint, put your brushes in a zip lock bag or tightly wrap them in plastic. It keeps the paint from drying on the bristles and you can pick up right where you left off. The amount of time you can get away with this trick probably depends on your climate, but I’ve left mine for 2 nights and they were still okay when I needed them!
Lesson #4: Gilmore Girls is still just as awesome as ever.
Now, you may think that is a wacky lesson, but me and girls spent ALOT of time together while I was working on the pantry. Painting was much more pleasant with constant witty dialogue in the background. Thank you Netflix! Painting should never be done in silence – crank up the music or play a great TV series to keep you company.
Lesson #5: I am an IDIOT for never buying a nice 3 ft step ladder before now.
My poor husband often comes home to find that I’ve painted the first 8 feet of our walls, but can’t reach the top foot from our little step ladder. Plus, I can’t get the big ladder off the garage wall by myself. Sometimes I just want projects to be done and it’s frustrating not to be able to do them on my own. It finally occurred to me that we could get a taller step ladder that would be oh so handy for so many things! It took me three stores to find exactly what I wanted, but Rubbermaid makes an unbelievably light aluminum version that also has the wide top step so you are more stable. I’m kinda klutzy, so anything to keep me ON a ladder is important! I found my ladder locally at a farm store (Atwoods), but the same model is available at Amazon (affiliate link below). Being suddenly able to reach everything is amazing. I kicked the old, too short, too heavy step stool to the garage and my new one will live in the pantry. Hmm. Maybe I should paint it gold?
Lesson #6: Doing proper clean up is way cheaper and faster than always buying new stuff.
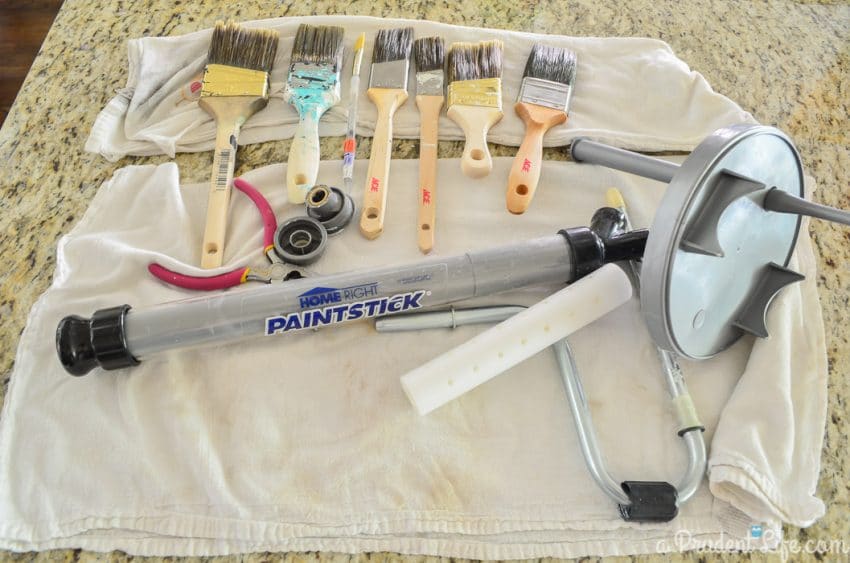
Like I said, we used to purchase products at more disposable prices to avoid clean up. As you can see, I used more paint brushes & tools than one should reasonably need for a 6 ft x 9 ft room, but I just played another episode of Gilmore Girls and put in the time to clean everything. Now they’re all good as new and I don’t have to spend time or money buying new brushes for my next project. Don’t forget to clean out the sink when you are done cleaning brushes so it doesn’t end up painted. If you do forget, try a Magic Eraser. Not that I know that from experience or anything! 🙂
Lesson #7: PaintSticks aren’t just for walls!
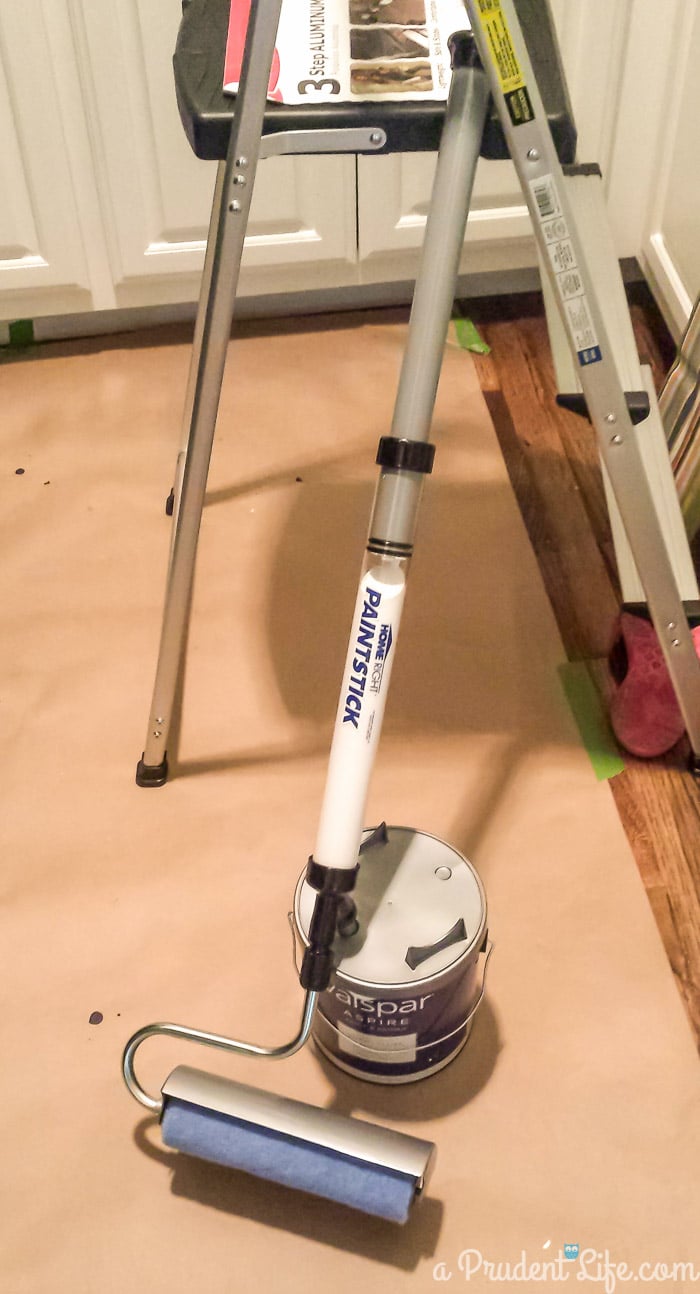
HomeRight makes this magical device called a PaintStick. We purchased our first PaintStick over a decade ago during a Trading Spaces era room makeover in our first house. We went with a Hawaiian theme and the room was BRIGHT yellow. Yikes! The design decision was questionable, but the product purchase was not. We also bought the EZ Twist version of the PaintStick this spring when we updated our office. They look like this:

The genius part about this roller is that you don’t have to use a paint tray at all. There is a little valve and it sucks paint straight from the can into the handle. As your roller gets dry, you twist the handle and it pushes more paint onto your roller. The time and mess saved from not having to constantly get more paint on your roller from a paint tray is invaluable!
When I saw the HomeRight booth at the Haven conference this year, I couldn’t wait to gush over the products we had been using long before the blog. Fast forward a few months and I found out they are now making a Mini PaintStick. I was SO bummed that I didn’t know about it before my laundry room makeover. I knew the long handle on the PaintStick would not be a great match for a small room, so I had to suck it up and go old school for that project.
Anyways, as soon as I learned about the Mini handle accessory, I reached out to my new friends at HomeRight to see if I could try one out. I’m planning on painting a small hallway that leads to our master bedroom and the short handle will be perfect!
You are probably wondering what all of this rambling has to do with the pantry lessons, right?
Well, I was about a gazillion hours into the pantry painting process when I remembered I still had to paint the ceiling white – ugh. I climbed up my trusty new step-ladder and started brushing…and brushing… it was going to take FOREVER. Then one of those delightful little cartoon light bulbs popped up over my head!
My Mini PaintStick had been delivered and was waiting for me to finish the pantry so I could use it in the hallway. Why in the world was a brilliant PAINTING tool still packaged up when I was in the middle of a giant PAINTING project??? I skipped to the entryway to open up my new Mini handle. It was perfect for the small room! I finished the ceiling in something crazy like 5 or 10 minutes. I also touched up the shelves with it since they were the same color as the ceiling. I seriously would have saved a couple hours if I had used the PaintStick first on the shelves. I still would have needed to cut in around the edges, but painting the large shelves took forever with the brush. This little gem of a product can be used for much more than walls.
You can see how it works in the picture below. The paint goes from the can to the handle with zero mess. Once you pull the handle off the paint can, you push the end of the handle in and the paint goes through the handle and into your roller. Brilliant! I know this part of the post was pretty gushy, but I swear it all comes from the heart!
HomeRight was awesome enough to provide another PaintStick PLUS Mini handle for me to giveaway! If you have any rooms to paint, you’ll definitely want to enter this one.
The final pantry reveal is happening THIS WEEK! Make sure you are on the email list so you don’t miss it. That chalkboard wall now has some amazing custom chalk art that I can’t wait to show you!
[metaslider id=3850]
Post shared at: Remodelaholic

Sarah @ 702 Park Project says
I can’t wait to see the reveal! I’m so in love with the glass door!
Courtney @ Crafts by Courtney says
I made sure to enter!! I will be painting the house son and something like this would be great!!