• About Polished Habitat
    • About Me
    • Contact Me / Media Requests
    • Partner with Us / Advertise
    • Terms of Service, Privacy, & Disclosure Statements
    • Facebook
    • Instagram
    • Pinterest
    • Twitter
  • Home Decor
  • Room Makeovers
    • House Tour
    • Space Reveals
  • Cricut
  • Organizing
    • Most Popular Organizing Posts
    • Closet Organization
    • Bathroom Organization
    • Kitchen Organization
    • All Organizing Posts
  • Cleaning
  • Letter Board Ideas

Polished Habitat

Home » DIY & Crafts » Clearance Lamp Customization – Craft Room Project #4

03/03/2014 · 20 Comments

Clearance Lamp Customization – Craft Room Project #4

DIY & Crafts

50 shares
  • Facebook
  • Twitter

If you’ve been to my blog before, you’re not going to be shocked that this post began with a Target clearance find. I think I’ve mentioned that my craft room makeover seeped over into the guest room portion of the room. Although guest room is probably an overstatement since it was pretty much just a bed.

I needed a lamp for the bedside table and was thrilled to find one with the shade included for under $10. I think it was actually $6.48! It would have actually fit in the room okay with no alterations, but then inspiration struck!

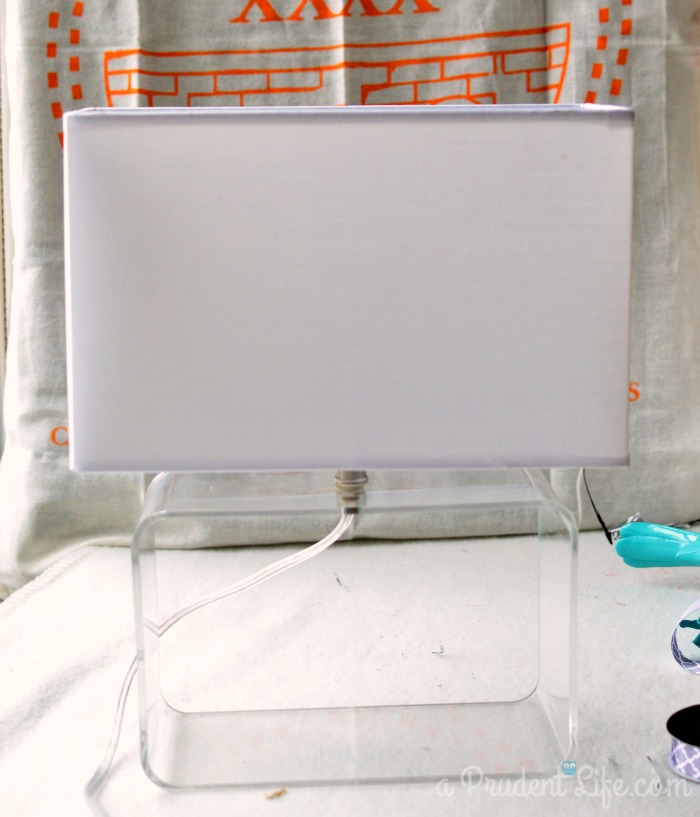
Here’s what my lamp looked like when it came home.

Clearance Lamp from Target Before Updates

To better incorporate the lamp into the rest of the room design, I decided to give it a little gray & turquoise touch. The shade was a really easy update because of the magic that is Liquid Stitch.

Use Liquid Stitch to Attach Ribbon to Lampshade

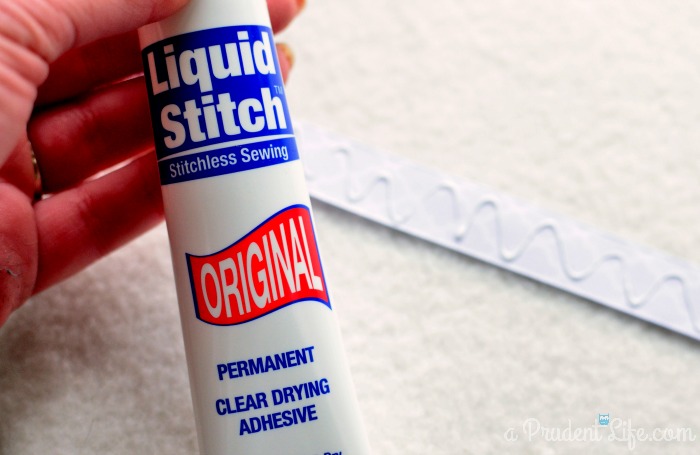
I knew the lamp wouldn’t be used very often, but I also didn’t want it to be a potential fire ball when it is used. I selected the Liquid Stitch as my adhesive because the tube says it is not flammable. I have not tested this claim, so please proceed at your own risk!

Lamp with Ribbon Applied to Shade

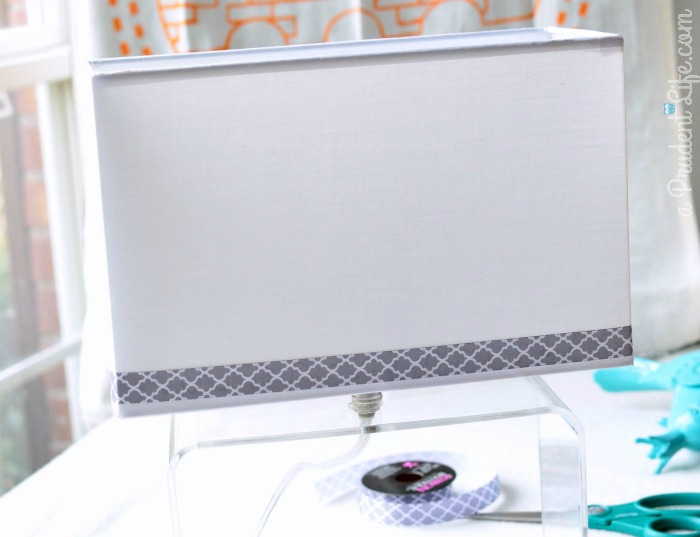
After I applied the band of ribbon around the bottom, I added one to the top. The shade was looking great, but I still needed to figure out how to attach my secret weapon of lamp awesomeness.

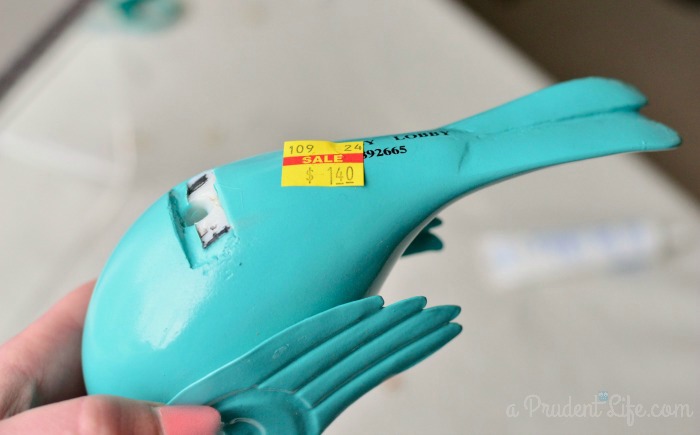
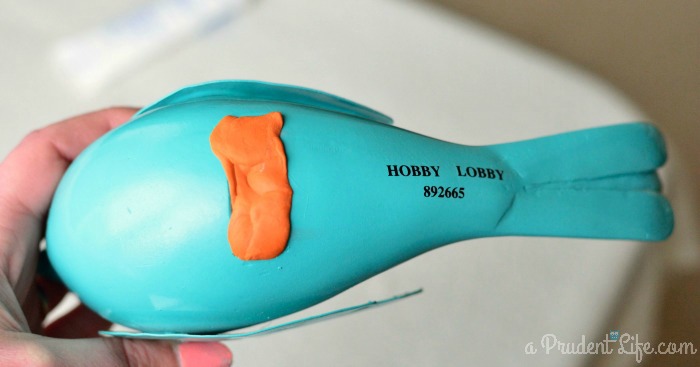
I found this turquoise bird in the Hobby Lobby clearance aisle. I knew I needed to incorporate him into my craft room, but had no idea how I was going to do it. He had seen better days, and was missing whatever base made stand up. I had this wacky idea to mount him inside the opening of the lamp base.

Turquoise Bird - Hobby Lobby Clearance FindExcept that he didn’t stand up! Poor broken birdy. What happened next may have been influenced by the massive amount of spray adhesive I used indoors to make my cork boards. I was on such a roll, I kinda forgot about ventilation. Don’t be like me.

Anyways, I was feeling SUPER creative after the cork boards and went directly into the lamp making. I was totally channeling MacGyver  and got that bird to stand up with my first crazy idea.

Remember that poster putty teachers used at school? I filled in the rectangle opening of birdy with that putty. I thought it would fill the gap and give me something sticky to help him stand up.

Bird Plus Poster Putty

Pretty crafty ninja right? Just wait, it gets better! Birdy was front heavy, so needed something to lean on. A quick look around the house led me to the perfect solution. A metal book ring!

Putty & A Book Ring Help the Bird Stand Up 
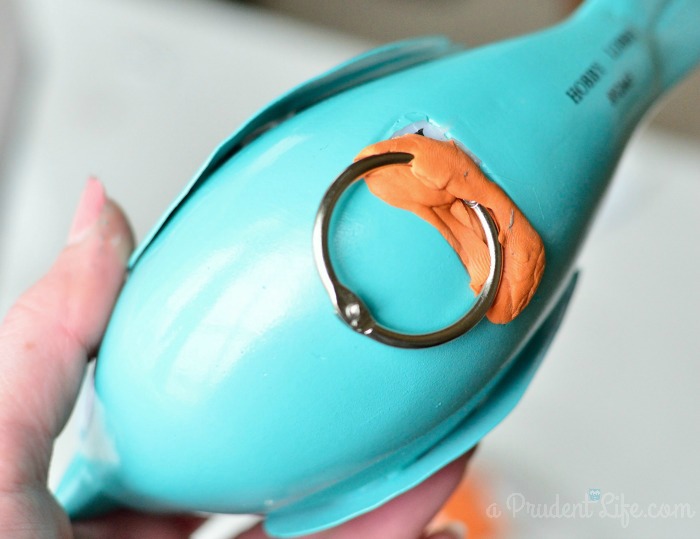
Viola – a bird stand! It wasn’t too pretty from the bottom, but most of it is hidden. I did paint the sides of the putty with silver craft paint just in case anyone looked at it from a weird angle.

I put my bird in the lamp & it was perfect!

Ready to see it all put together?

Making a custom lamp from clearance finds.

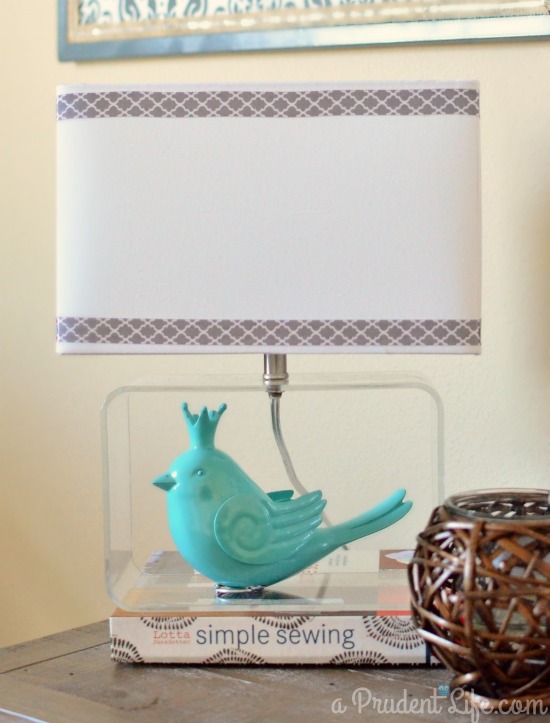
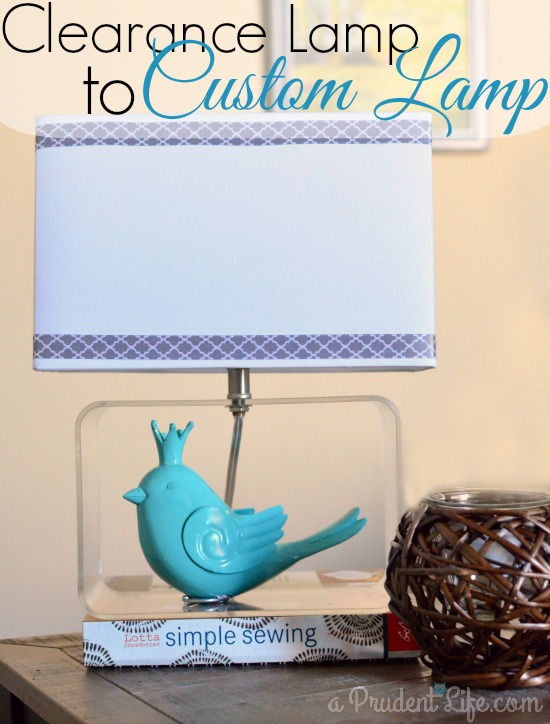
Total cost was only $8! Not bad for a completely one of a kind lamp. Don’t be afraid to think outside the box when you find a random clearance find you LOVE like my birdy. Just be careful not to fill your house & empty your wallet with more clearance finds than you need 🙂

Don’t miss any of the craft room series! 

Craft Room PLUS Guest Room – Reveal Part #1

Craft Room Organizational Details – Reveal Part #2

{Create} Art & Refinished Frame – Craft Room Project #1

Placemat Repurposed into No Sew Pillow – Craft Room Project #2

Cork Board Upgrade:Drab to Fab – Craft Room Project #3

Clearance Lamp Customization – Craft Room Project #4

3 Frugal Frame Updates- Craft Room Project #5

$30 End Table Makeover  – Craft Room Project #6

MORE FROM POLISHEDHABITAT

50 shares
  • Facebook
  • Twitter
melissa

Melissa George

In 2013, Melissa founded Polished Habitat to share her passion for intersecting style and function to make everyday life more beautiful and less stressful. She does this by sharing easy home organization tips, home decor tutorials, and creative ideas to help readers think outside the box, no matter their budget. Her work has been featured in print in Better Homes & Gardens and Room to Create Magazine, and online by HGTV, House Beautiful, Buzzfeed, & more. In 2018 & 2019, Melissa was named as a Style Maker by Better Homes & Gardens. In 2019, Polished Habitat was shortlisted for the Amara Blog Awards Best Interior Styling Blog - International. Read more...

« March Goal Planning
Spring Flower Vase – Expressions Vinyl Contributor Post »

Comments

  1. Courtney @ Crafts by Courtney says

    03/03/2014 at 8:56 pm

    What a great deal you got on this lamp and bird!! They extra touches worked out great!! That lamp share is perfect!!

    Reply
    • melissa@polishedhabitat.com says

      03/03/2014 at 9:00 pm

      Thanks Courtney! I usually don’t have too much luck with the Hobby Lobby clearance, but that little bird was worth all the times I walk away empty handed.

      Reply
  2. Jodie says

    03/04/2014 at 9:51 am

    Target clearance strikes again! Looks great! : )

    Reply
    • melissa@polishedhabitat.com says

      03/04/2014 at 9:58 am

      Ha – I knew you would appreciate the Target clearance 🙂

      Reply
  3. Katie @ Addicted 2 DIY says

    03/04/2014 at 1:40 pm

    You’re so funny! This turned out awesome! The bird is the perfect touch!

    Reply
  4. Erin says

    03/05/2014 at 11:22 am

    I really love your lamp makover. It has inspired me to give something like that a shot in my family room.

    Reply
    • melissa@polishedhabitat.com says

      03/05/2014 at 11:27 am

      Thank you Erin! I’d love to see what you come up with! It’s so fun to customize pieces.

      Reply
  5. Angie In My 30s says

    03/06/2014 at 9:21 am

    i looooove little birdies, how adorable is that?! Great job!

    Reply
    • melissa@polishedhabitat.com says

      03/06/2014 at 9:29 am

      Thank you Angie!

      Reply
  6. Amanda Michelle says

    03/06/2014 at 6:31 pm

    This turned out so cute! I love the little bird too.

    Reply
  7. Lisa at Mabey She Made It says

    03/10/2014 at 7:11 pm

    What a fun lamp! I love the touch you gave the shade too. Thanks for linking up to the Do Tell Tuesday party!

    Reply

Trackbacks

  1. Radiant Orchid Bathroom Closet Reveal says:
    03/04/2014 at 8:43 pm

    […] Clearance Lamp Customization – Craft Room Project #4 March 3, 2014 […]

    Reply
  2. Placemat Repurposed into No Sew Pillow says:
    03/05/2014 at 2:57 pm

    […] Clearance Lamp Customization – Craft Room Project #4 says: March 3, 2014 at 10:10 am […]

    Reply
  3. Craft Space in Guest Room says:
    03/08/2014 at 12:09 pm

    […] also by Granny. I updated the frames to coordinate with the room. The cute birdy lamp details are here. The table under the birdy lamp was also customized. More details on that next […]

    Reply
  4. Best of the Weekend! - Little Miss Celebration says:
    03/14/2014 at 7:00 pm

    […] Clearance Lamp to Custom Lamp by A Prudent Life […]

    Reply
  5. $30 Nightstand Makeover – Craft Room Project #6 says:
    03/17/2014 at 8:09 am

    […] color of the wood top looks perfect with my birdy lamp. I love mixing things that are a little rustic with items that are a little […]

    Reply
  6. DIY Art for a Craft Room says:
    03/17/2014 at 11:53 am

    […] Clearance Lamp Customization – Craft Room Project #4 […]

    Reply
  7. Cork Board Upgrade:Drab to Fab – Craft Room Project #3 says:
    03/17/2014 at 11:56 am

    […] Clearance Lamp Customization – Craft Room Project #4 […]

    Reply
  8. Picture Frame Makeover says:
    03/17/2014 at 12:02 pm

    […] Clearance Lamp Customization – Craft Room Project #4 […]

    Reply
  9. Organizing a Craft Room says:
    03/27/2014 at 9:01 pm

    […] Clearance Lamp Customization – Craft Room Project #4 […]

    Reply

Leave a Reply Cancel reply

Your email address will not be published. Required fields are marked *

Welcome!

In 2013, Melissa started Polished Habitat to share her skill of mixing decor & organization to add style & function to everyday life at home.

Her work has been featured in print in Better Homes & Gardens and Room to Create Magazine, and online by HGTV, House Beautiful, Buzzfeed, & more.

In 2018 &  2019, Melissa was named as a Style Maker by Better Homes & Gardens. In 2019, she was also short-listed by the Amara Blog Awards for Interior Styling, International Division.

Need to reach Melissa?
Email: Melissa @ PolishedHabitat.com

Affiliate Disclosure

Polished Habitat is a participant in the Amazon Services LLC Associates Program, an affiliate advertising program designed to provide a means for sites to earn advertising fees by advertising and linking to amazon.com.

Copyright

Please keep in mind that all text and images on this blog are the property of Polished Habitat (formerly A Prudent Life).

Projects are for personal use only.

Photo Use Policy

You are welcome to share 1 image for an online round up or feature if you clearly link back to my post and use nopin code.

You are not permitted to remove watermarks, crop or edit my photos, use my images without credit, print my images, or share more than 1 image online without my written permission.

The 1 image used can NOT be a collage image or any image I have created that includes text. Please email me with any questions about acceptable use! THANK YOU!

Copyright © 2023 · polishedhabitat.com