• About Polished Habitat
    • About Me
    • Contact Me / Media Requests
    • Partner with Us / Advertise
    • Terms of Service, Privacy, & Disclosure Statements
    • Facebook
    • Instagram
    • Pinterest
    • Twitter
  • Home Decor
  • Room Makeovers
    • House Tour
    • Space Reveals
  • Cricut
  • Organizing
    • Most Popular Organizing Posts
    • Closet Organization
    • Bathroom Organization
    • Kitchen Organization
    • All Organizing Posts
  • Cleaning
  • Letter Board Ideas

Polished Habitat

Home » DIY & Crafts » How to Make a Custom Dry Erase Board Without a Custom Budget

06/21/2019 · 6 Comments

How to Make a Custom Dry Erase Board Without a Custom Budget

DIY & Crafts

504 shares
  • Facebook
  • Twitter

Post Contains Affiliate Links - You pay the same price, I get a small commission. High Five!

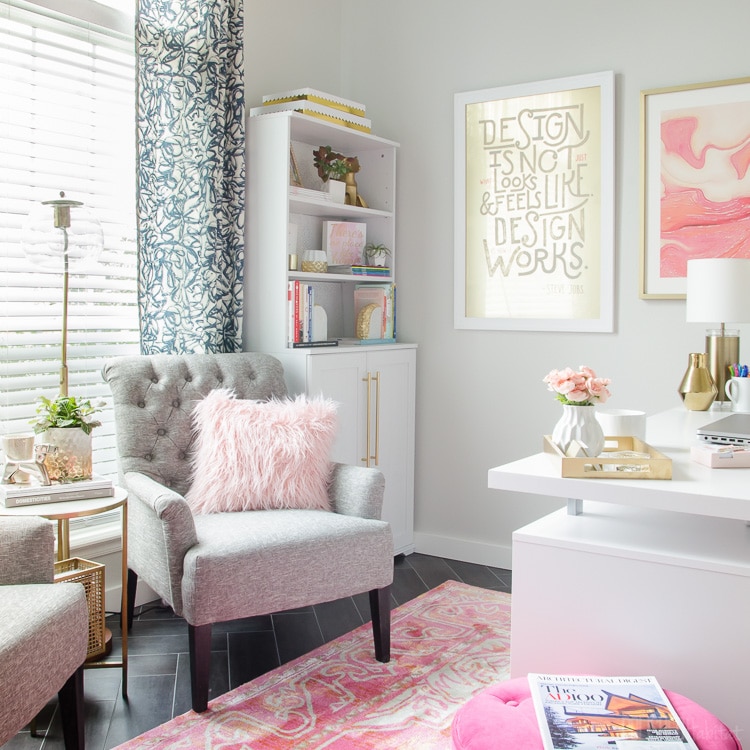
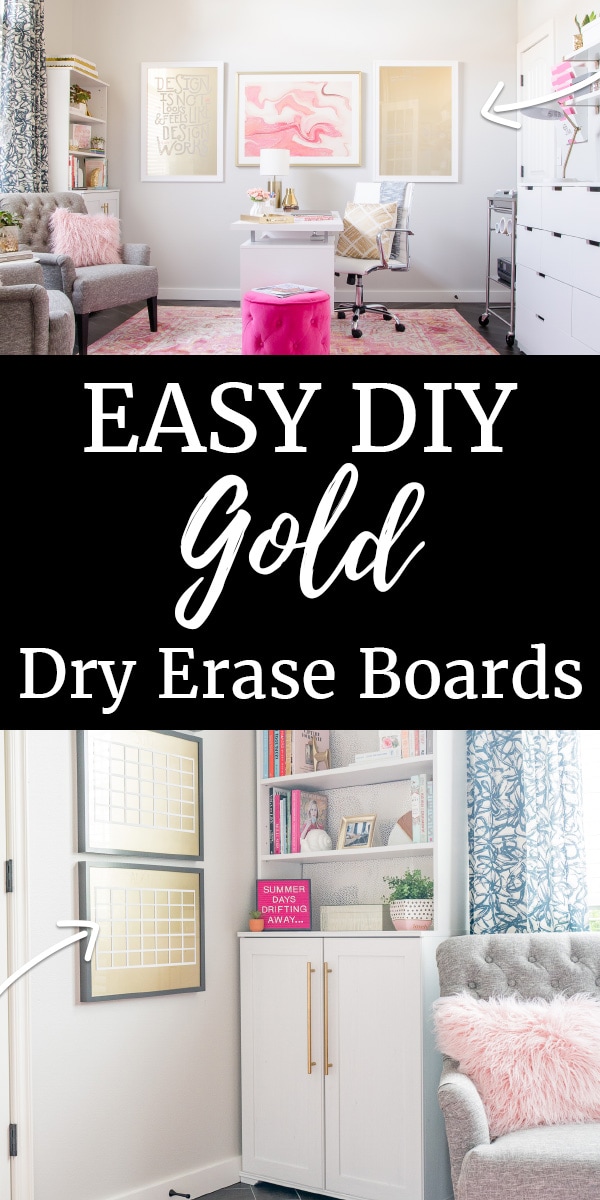
During my office remodel, we DIY gold dry erase boards. They look great on the walls, but also help me stay organized. They also add tons of glam to the office, even though they were cheap. That’s a win in my book!

To make your own board, start with a picture or poster frame in whatever size you would like.

Tap on the front before purchasing and make sure it is real glass. If you leave dry erase marker on the plexiglass too long, it will etch the surface.

Next, you’ll need spray paint in your desired color.

I used a gold mirror effect spray paint. It’s the secret sauce that makes the surface of my boards reflective and rich. You’ll also need a clear, matte topcoat spray. 

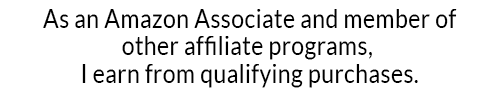
Since the project uses spray paint, we put up our HomeRight Spray Shelter to protect the garage floor and cars from over-spray.

gold-dry-erase-board-tutorial-2

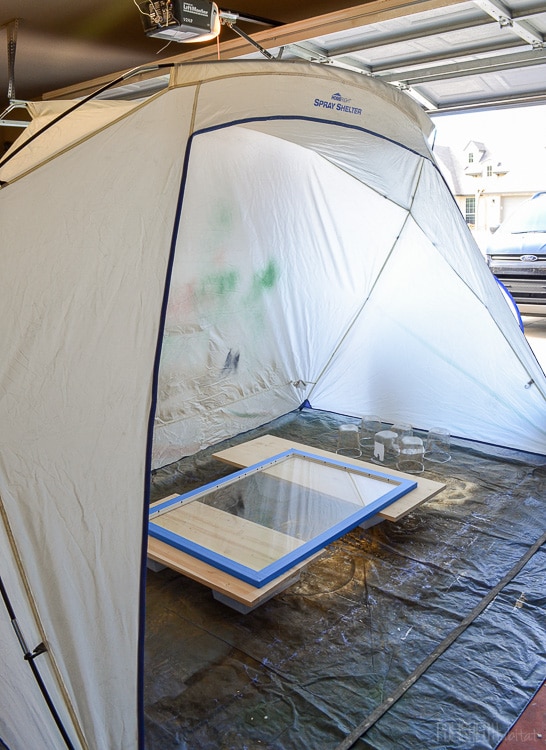
Remove the glass from your frame, if possible. If it’s being endlessly stubborn, that’s okay too. Just use painters tape around the back of the frame to protect it from over-spray.

You need to be working on the BACK of your glass.

Shake up the gold mirror finish paint, and apply a light coat using a sweeping side to side motion. Make sure your spray extends all the way to the end of the glass.

gold-dry-erase-board-tutorial-9

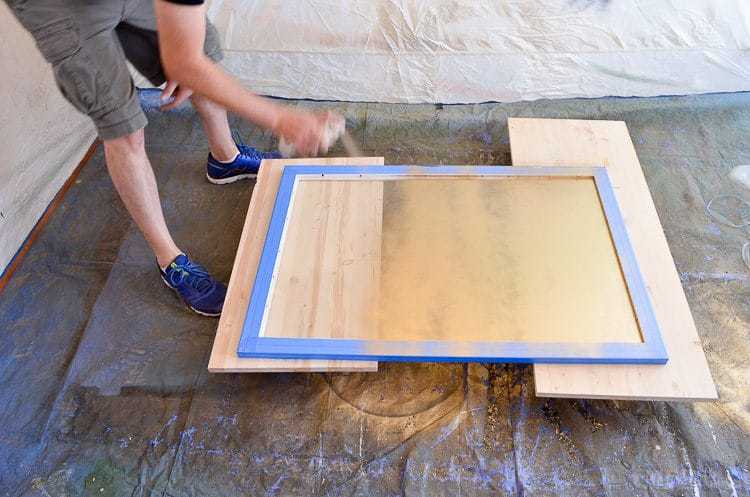
After one minute, it’s already time for the 2nd coat.

For the second coat, we switched directions as you can see in the photos.

gold-dry-erase-board-tutorial-10

Add three additional coats, one minute apart, continuing to alternate directions between coats.

A few minutes after the 5th coat of gold is applied, spray on the matte clear topcoat.

This IS mandatory. I didn’t do it the first time, and learned how easy it is to mess up the gold finish without the sealer.

The hardest part is next. Walk away and let that sealer dry for 24 hours before you continue.

Patience is difficult when you’re ready to see your project!

When the sealer has cured, you just have to put the back on your frame and hang it on the wall. So easy!  

Pink and white office - tons of organization and storage!

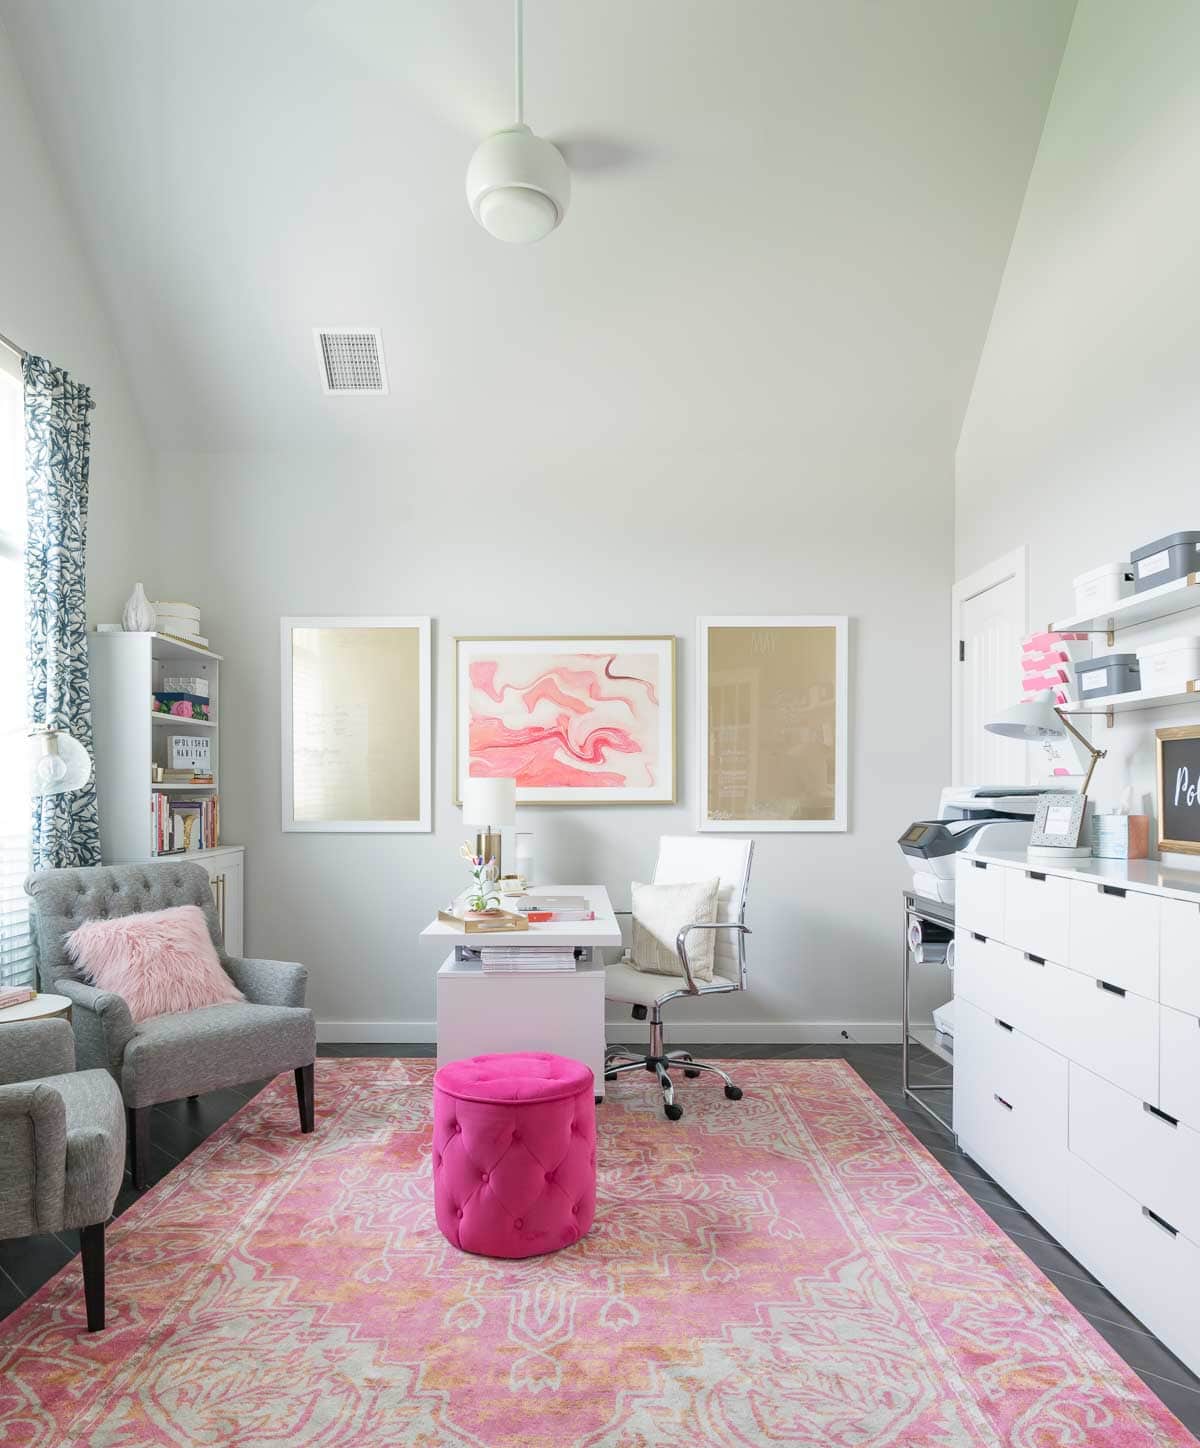
Corey lettered a quote onto one of the boards for me to add some extra inspiration. 

Home office an ugly mess? This before and after makeover added feminine style along with tons of organization to make office dreams come true.

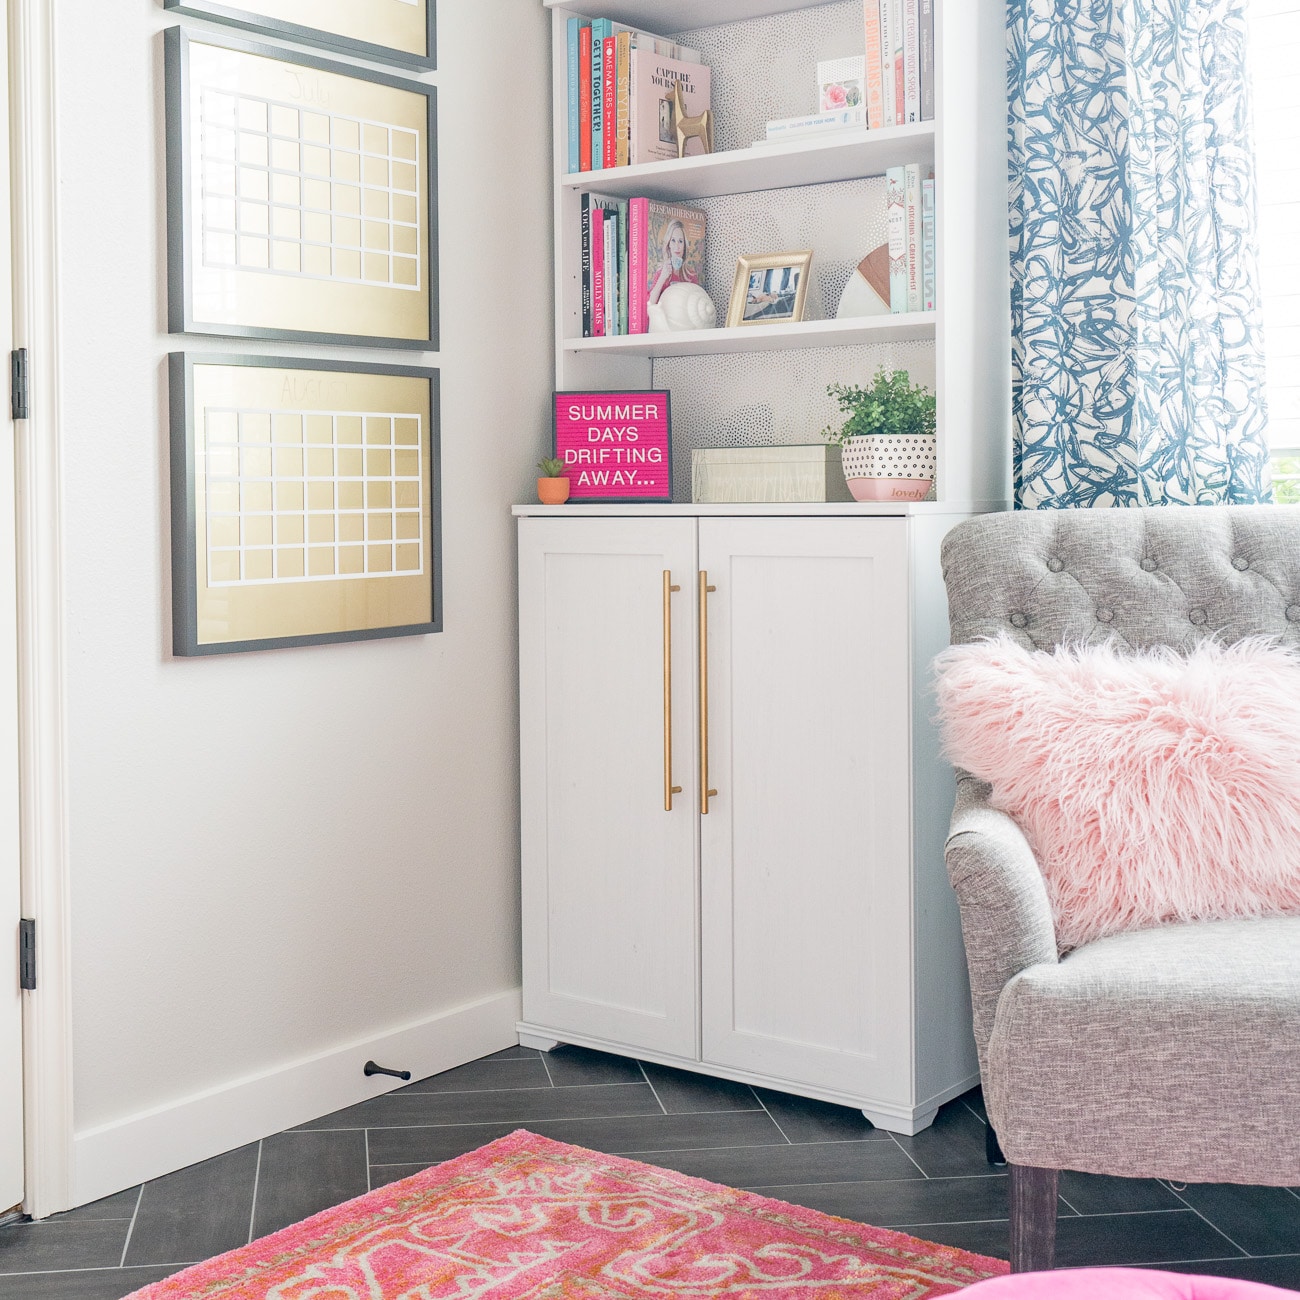
We also made three smaller gold dry erase boards to use as calendars. I started with 16 x 20″ IKEA RIBBA frames, and followed the same steps above.

Then, I cut a grid out of white vinyl using my Silhouette Cameo machine and applied it to the front of my glass. If you don’t have a vinyl cutter, you can get the same effect using a roll of white striping tape. 

gold-dry-erase-board-tutorial-23

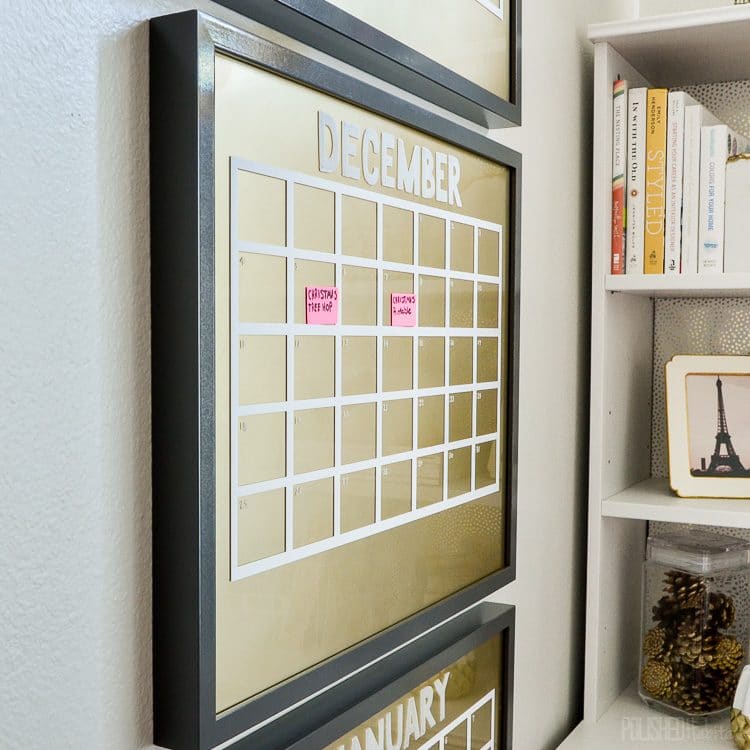
The month name and date numbering was done with a white dry erase marker. I left space below the grid to add any notes or reminders.

Each RIBBA frame sits on a 1×4 mounted to the wall. This wouldn’t work with all frames, but they have the perfect deep back.

gold-dry-erase-board-tutorial

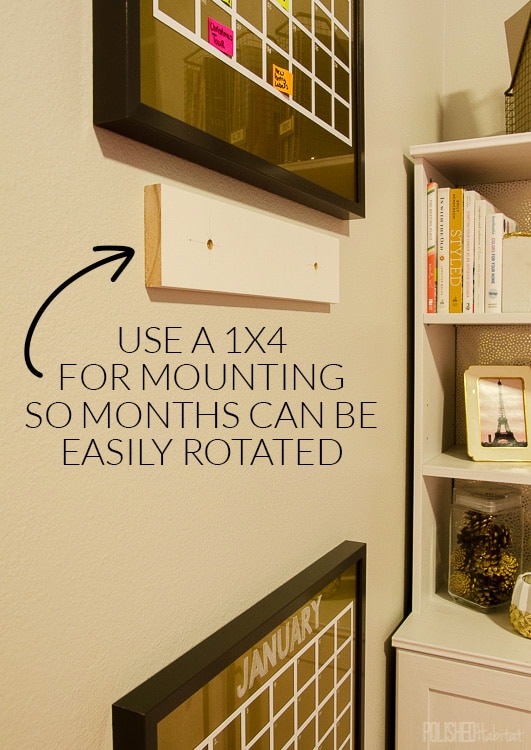
When I was brainstorming calendar solutions, I kept finding ideas online that would leave me rewriting everything each time a month changed.

With my three board system, as each month passes, the boards just move up a slot on the wall. The top board will get erased and reused as the bottom board. Each board ends up in use for a full three months.

White bookcase with pink letterboard that says Summer Days Drifting Away

I’ll use a mixture of writing directly on the boards, and Post-It notes to keep the schedule updated. The Post-It’s are perfect for planning out my blog posts, as post dates can change. When that happens, I’ll just move the sticky note.

Are you going to try this? Let me know what color board you’ll be making in the comments below!
Gold Dry Erase Boards in a pink and white office


MORE FROM POLISHEDHABITAT

504 shares
  • Facebook
  • Twitter
melissa

Melissa George

In 2013, Melissa founded Polished Habitat to share her passion for intersecting style and function to make everyday life more beautiful and less stressful. She does this by sharing easy home organization tips, home decor tutorials, and creative ideas to help readers think outside the box, no matter their budget. Her work has been featured in print in Better Homes & Gardens and Room to Create Magazine, and online by HGTV, House Beautiful, Buzzfeed, & more. In 2018 & 2019, Melissa was named as a Style Maker by Better Homes & Gardens. In 2019, Polished Habitat was shortlisted for the Amara Blog Awards Best Interior Styling Blog - International. Read more...

« How to Keep the House Clean While Remodeling
Roanoke Ranch Remodel – The Back Story »

Comments

  1. maria says

    11/12/2016 at 12:27 am

    Beautiful room!
    What was the matte clear top coat spray you used? Was it also Rustoleum?

    Reply
    • Melissa George says

      11/12/2016 at 8:11 am

      It was!

      Reply
  2. Andrea says

    11/12/2016 at 4:17 am

    Such a neat idea – I just need to work out where to put them in the house now….

    Reply
    • Melissa George says

      11/12/2016 at 8:11 am

      Thank you! Hope you find a spot for them!

      Reply
  3. Andrea says

    06/21/2019 at 5:28 pm

    With lots of extra frames I can’t wait to try this. BTW, can you share your source for the long gold bar pulls on your cabinets?

    Reply
    • Melissa George says

      06/22/2019 at 6:31 pm

      Yes! They’re from Amazon! You can find all the details here: https://www.polishedhabitat.com/cheap-cabinet-hardware/

      Reply

Leave a Reply Cancel reply

Your email address will not be published. Required fields are marked *

Welcome!

In 2013, Melissa started Polished Habitat to share her skill of mixing decor & organization to add style & function to everyday life at home.

Her work has been featured in print in Better Homes & Gardens and Room to Create Magazine, and online by HGTV, House Beautiful, Buzzfeed, & more.

In 2018 &  2019, Melissa was named as a Style Maker by Better Homes & Gardens. In 2019, she was also short-listed by the Amara Blog Awards for Interior Styling, International Division.

Need to reach Melissa?
Email: Melissa @ PolishedHabitat.com

Affiliate Disclosure

Polished Habitat is a participant in the Amazon Services LLC Associates Program, an affiliate advertising program designed to provide a means for sites to earn advertising fees by advertising and linking to amazon.com.

Copyright

Please keep in mind that all text and images on this blog are the property of Polished Habitat (formerly A Prudent Life).

Projects are for personal use only.

Photo Use Policy

You are welcome to share 1 image for an online round up or feature if you clearly link back to my post and use nopin code.

You are not permitted to remove watermarks, crop or edit my photos, use my images without credit, print my images, or share more than 1 image online without my written permission.

The 1 image used can NOT be a collage image or any image I have created that includes text. Please email me with any questions about acceptable use! THANK YOU!

Copyright © 2023 · polishedhabitat.com