Wondering where to put things in kitchen cabinets? This is the post for you!
 When we moved into this house five years ago, I tried to plan out the best use of each kitchen cabinet. I got a few of them right, but not all. Since I’m all about efficiency and organization, it seemed nuts that I hadn’t fixed the problem areas.
If you’re in the same boat with scary things happening behind cabinet doors, I’ve got some new kitchen oganizing ideas for you!
Before I started, I listed out all the little annoyances that I wanted to address, such as the disaster of a serving cabinet, measuring cups not being convenient to where we use them, and the stand mixer attachments not having a set home.
To customize this project to your own space, I’d recommend keeping a little notepad in the kitchen. Over a few days of cooking, jot down all the things that could work better for you.
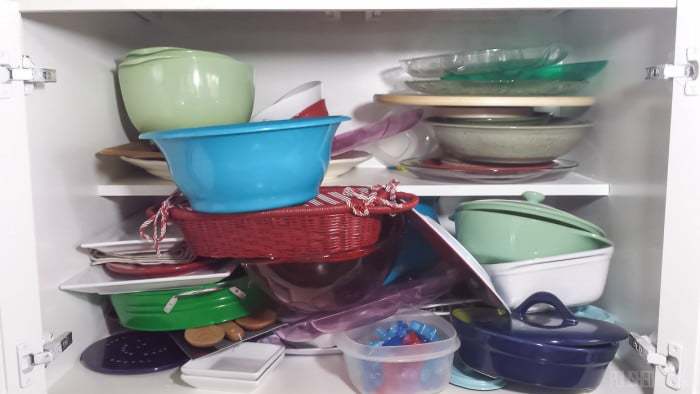
I don’t have before pictures of everything, but I wasn’t kidding about the serving cabinet situation. Anyone else in this same boat?
Kitchen Organizing Solutions
Before I started emptying out cabinets, I made a new plan for what made the most sense to be stored in each section.
This will be your next step when after your problem list is finished.
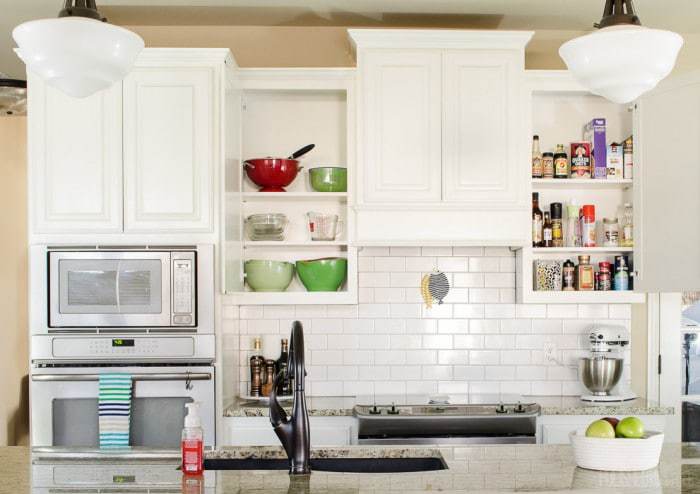
It seems obvious in retrospect, but I realized that everything we need for preparing food should be in the zone between the stove and sink.
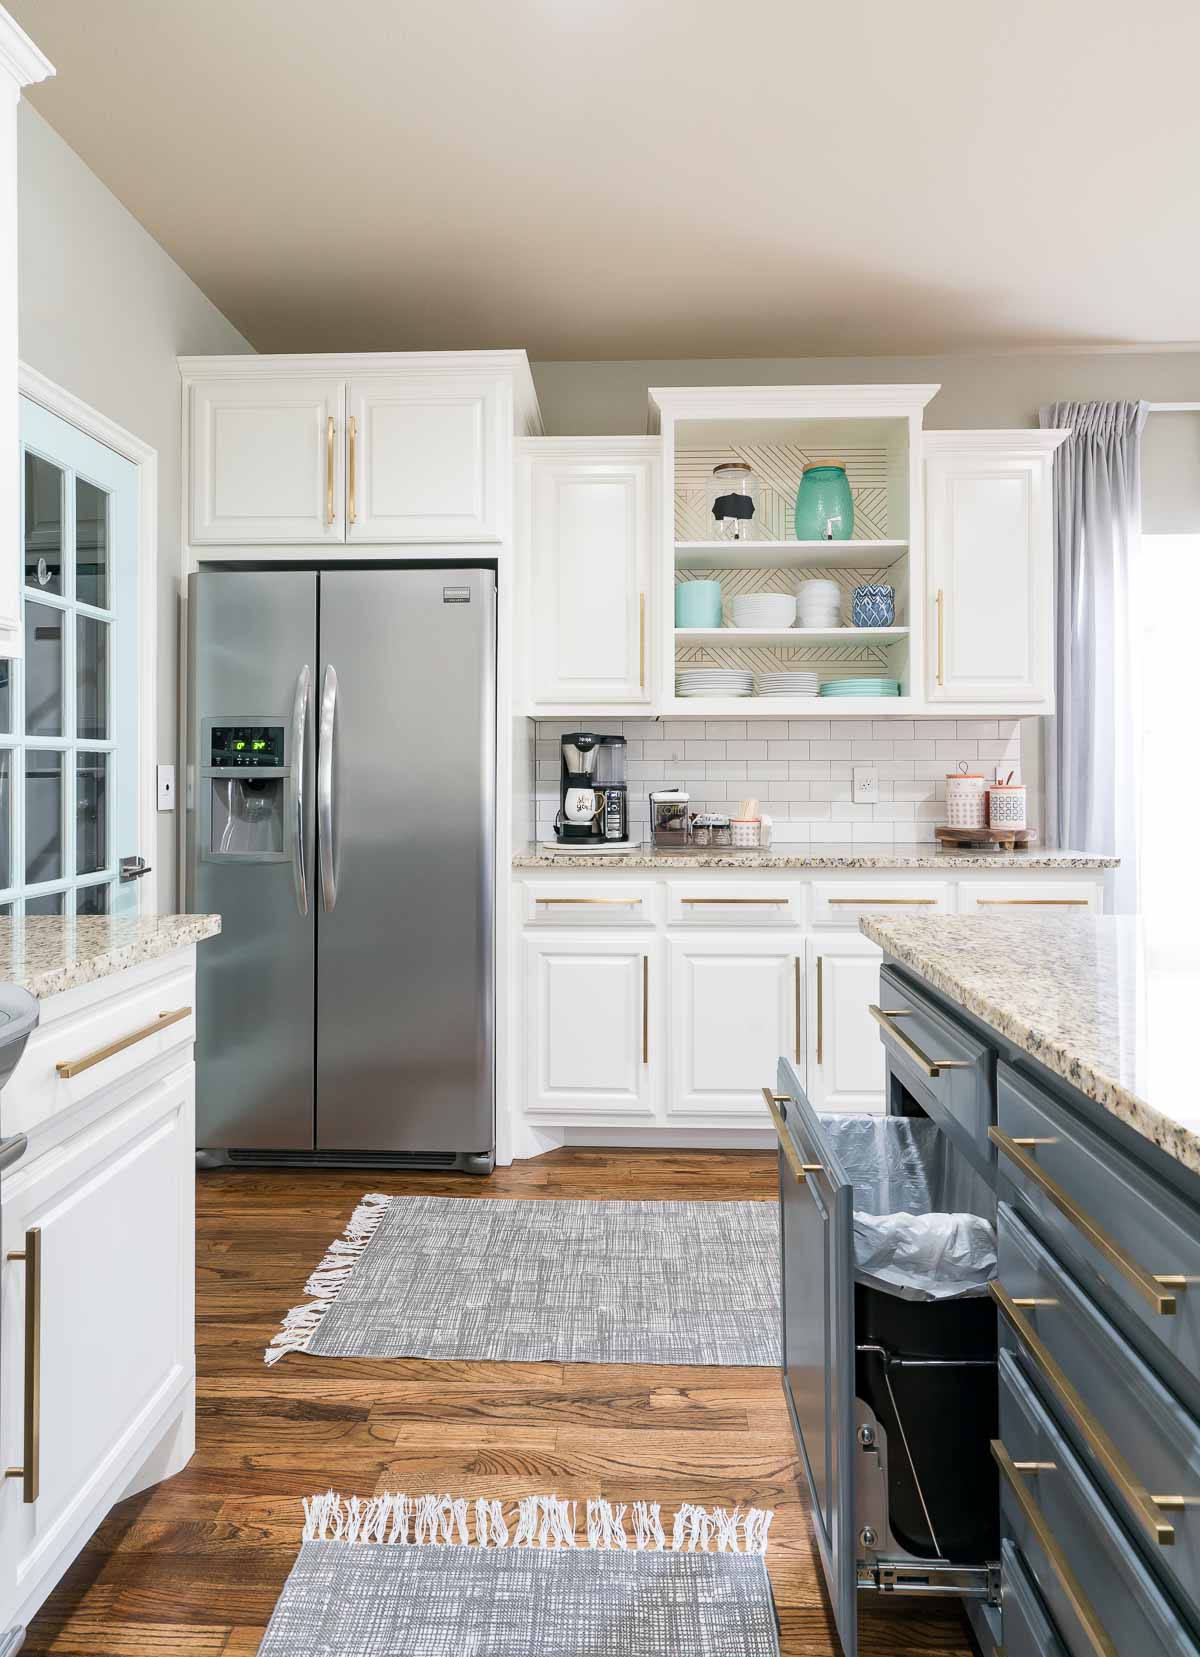
Things for serving and storing food could then be together on the secondary wall with the fridge.
 The cups have always been next to the fridge, so it made perfect sense for the plates and bowls to join them. Imagine that, everything together!
The “pretty” dishes went in the center cabinet, and plastic items got a new home in the cabinet closest to the window. That’s the same cabinet that used to hold the mixing bowls and measuring cups/spoons.
The section below the cups was previously for small kitchen appliances. You’ll see where they ended up in a moment, but this cabinet is now the perfect Rubbermaid container space.
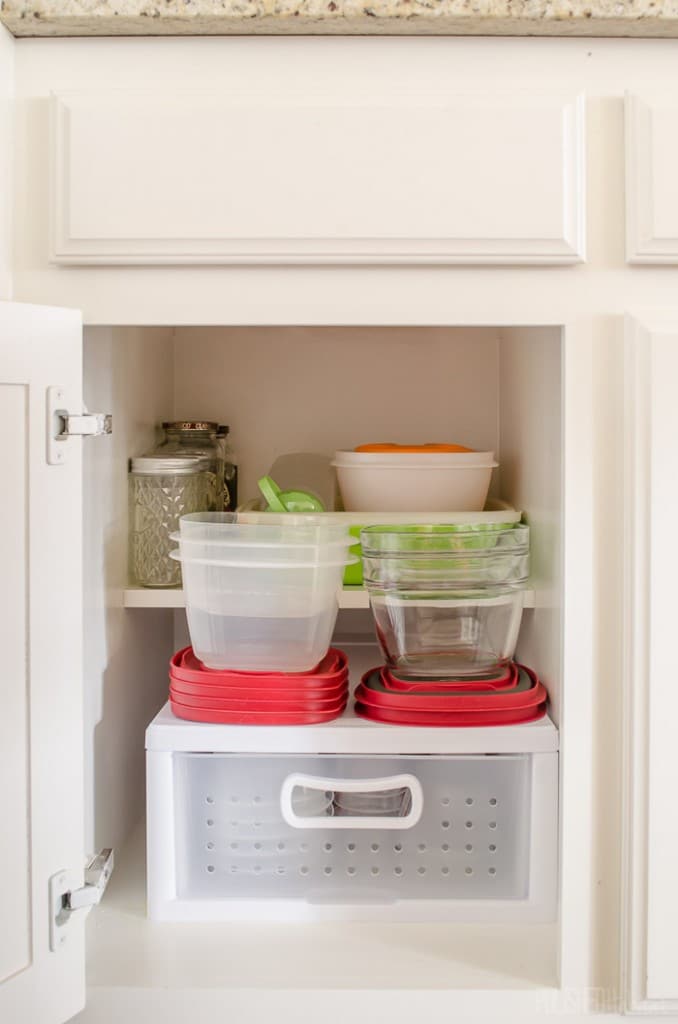
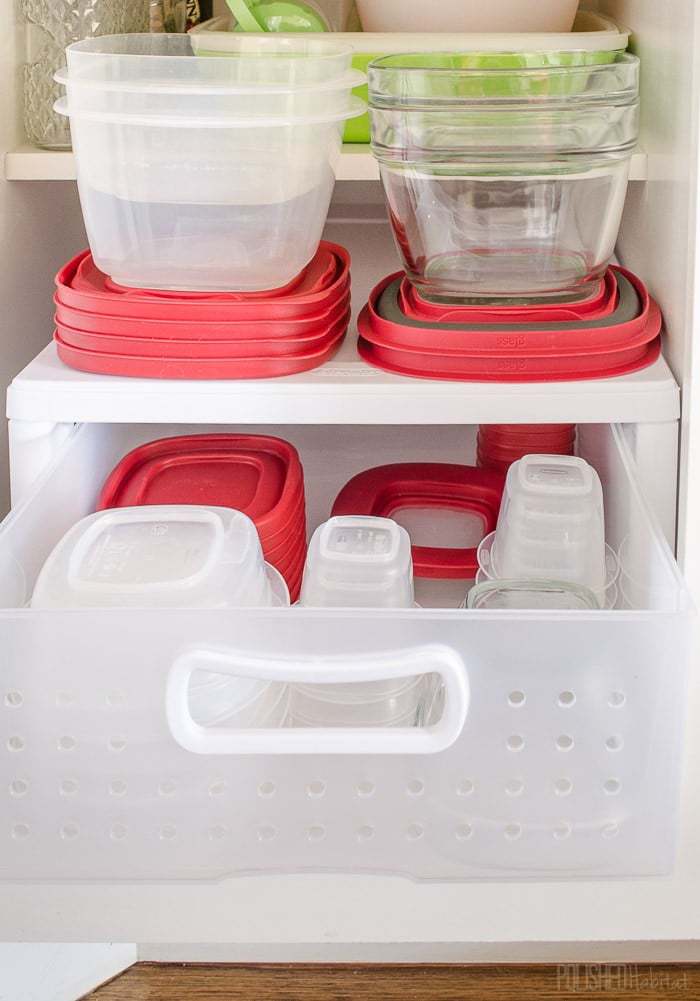
I added a storage drawer for the smaller containers and stacked the larger ones on top.
Over the past few years, I’ve switched to using these Rubbermaid containers with stackable lids. They are almost life-changing and completely affordable on Amazon. The glass ones are a little pricier, but not outrageous.
Get rid of your mismatched containers via donation or garage sale and use the stacking lid versions. It’s a small change that makes dinner clean up much more pleasant!
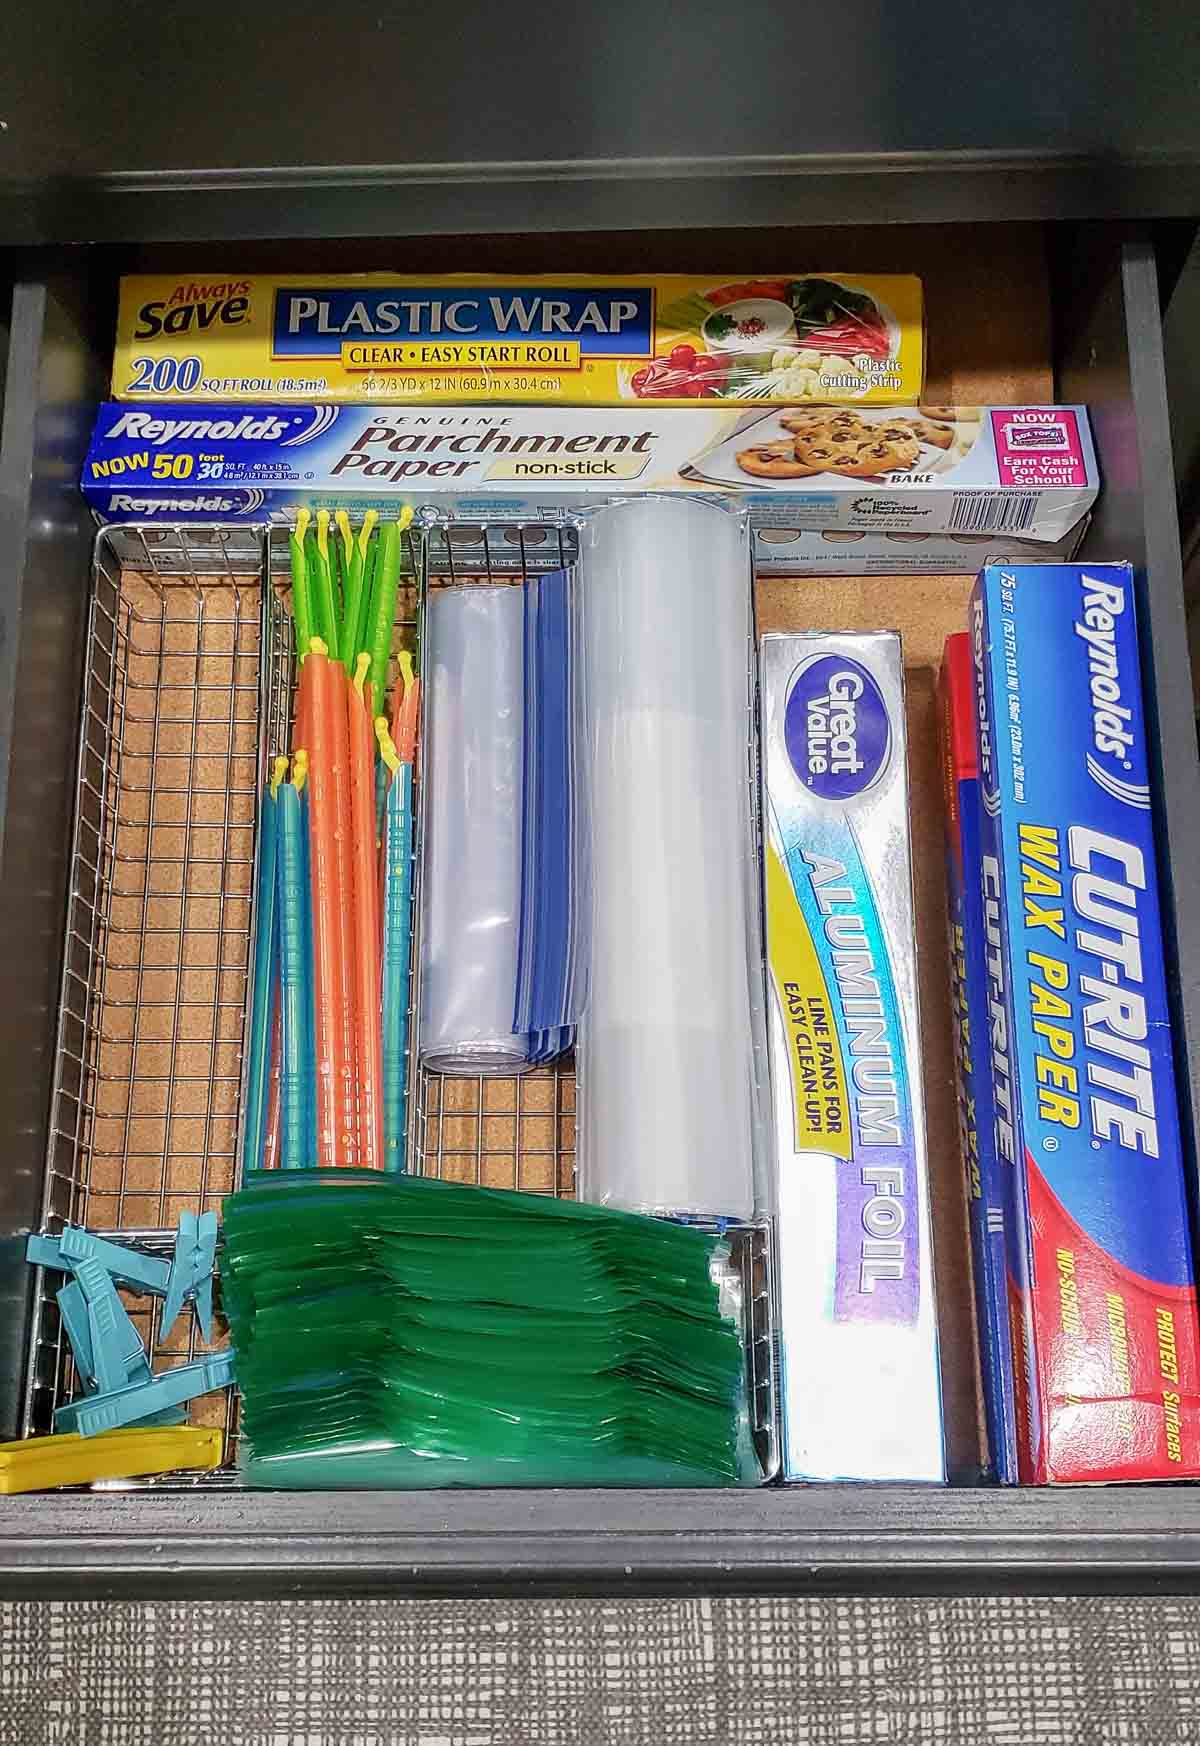
That takes care of the storage bins, but what about storage bags and wrap? A utensil organizer placed in a drawer is the perfect solution!
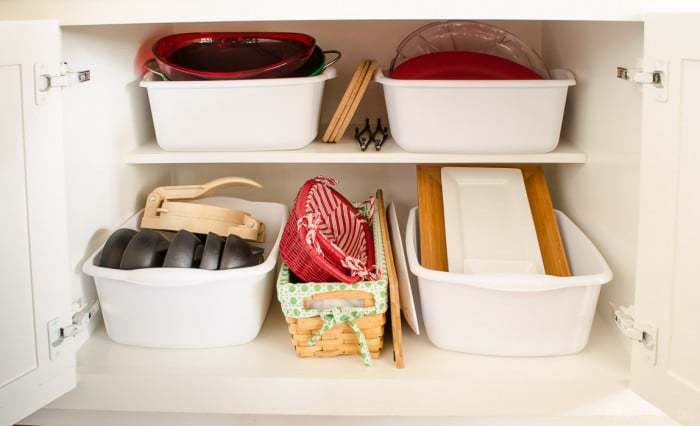
Ready to see what the former servingware CABINET OF DOOM looks like now?
I used four dish pans (even cheaper in store at Target) and separated the contents of the cabinet into groups. It isn’t my prettiest organizing project ever, but holy cow, I can find everything I need!
I even came up with an assortment of mexican food items that had been in three different cabinets for one of the bins.
Holiday specific items were moved into the cabinet above the fridge, and a pile of items we never use went to the garage sale box. SO MUCH BETTER.
Moving to the other wall, all the mixing bowls and strainers went to the cabinet that previously held our plates and bowls. The cooking items like oils and seasonings stayed in the same cabinet, but I did take every one of them out so I could clean the shelves.
I also checked expiration dates and found a disturbing number of items best by 2011. Wow.
While I had everything out of the cabinets, I moved the middle and top shelves down to better suit my height, or lack of it! I’m 5’4″ and the shelves must have originally been installed by an NBA star.
Don’t miss adjusting the height of your shelves as needed if possible in your space!
Since I dream of marble counters, but don’t want to pay to replace all the granite, I found a little marble lazy susan at World Market.
It’s perfect for daily use items like the salt & paper shakers and olive oil. Since I’ve never committed to a paper towel holder, they look so much better sitting on marble than they did randomly placed on the counter.
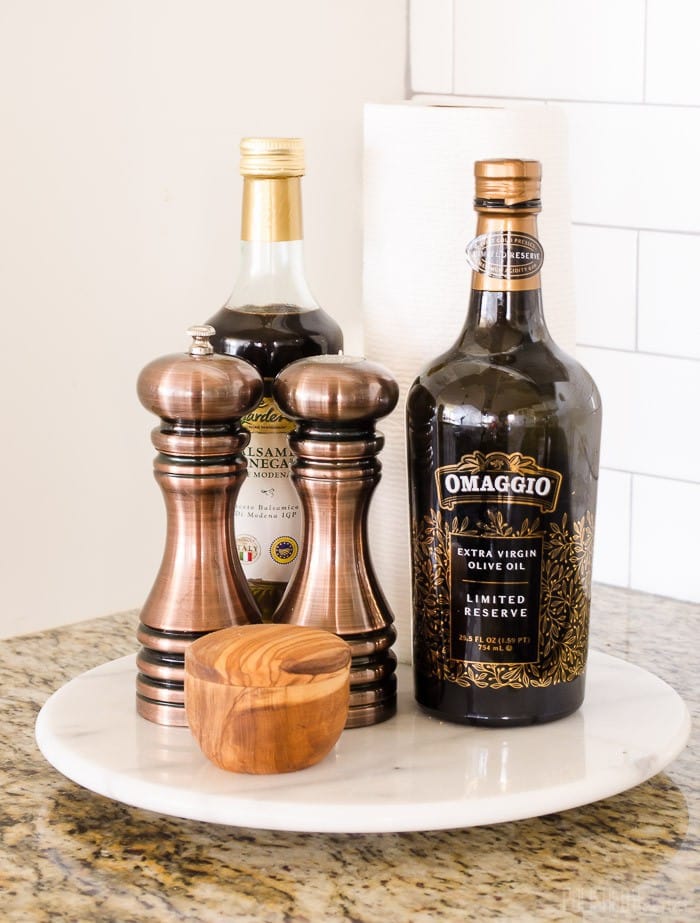
Update: This is STILL one of my favorite additions to the kitchen and one we use daily! For under $20, the individual items look so good grouped together.
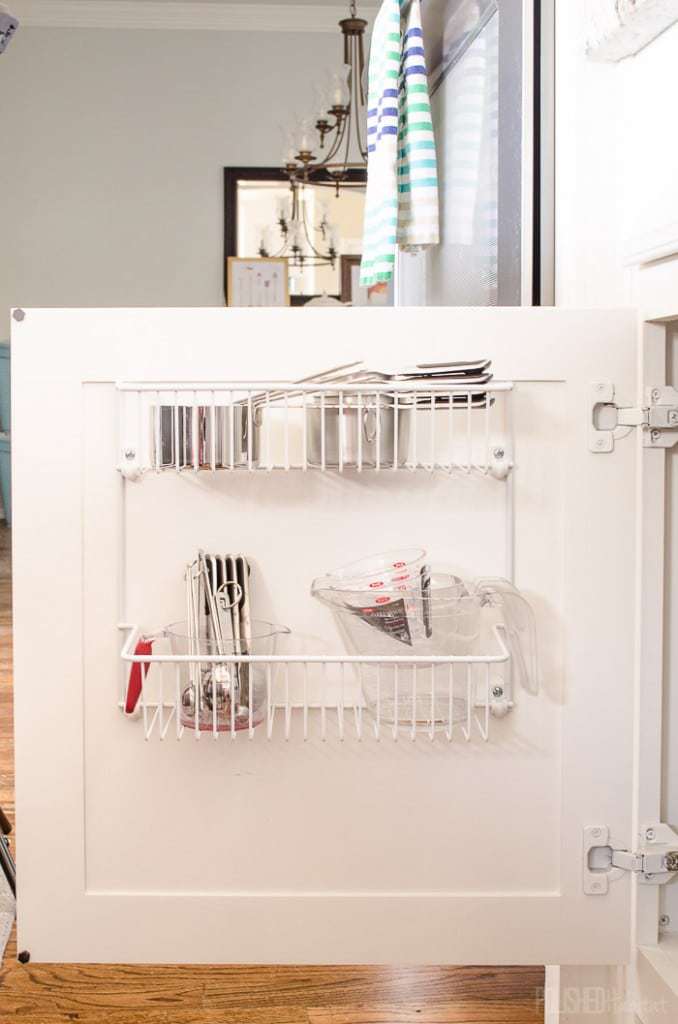
Under this section, I added a cabinet door shelf to hold the measuring cups and spoons. I’m beyond excited that they now have one set home and in a location that makes sense!
Update – I still love having these items on the door, but the organizer I used is open on the sides and things fall out more often than I would like. I might replace them with this version. Also, this option is perfect if you are renting.
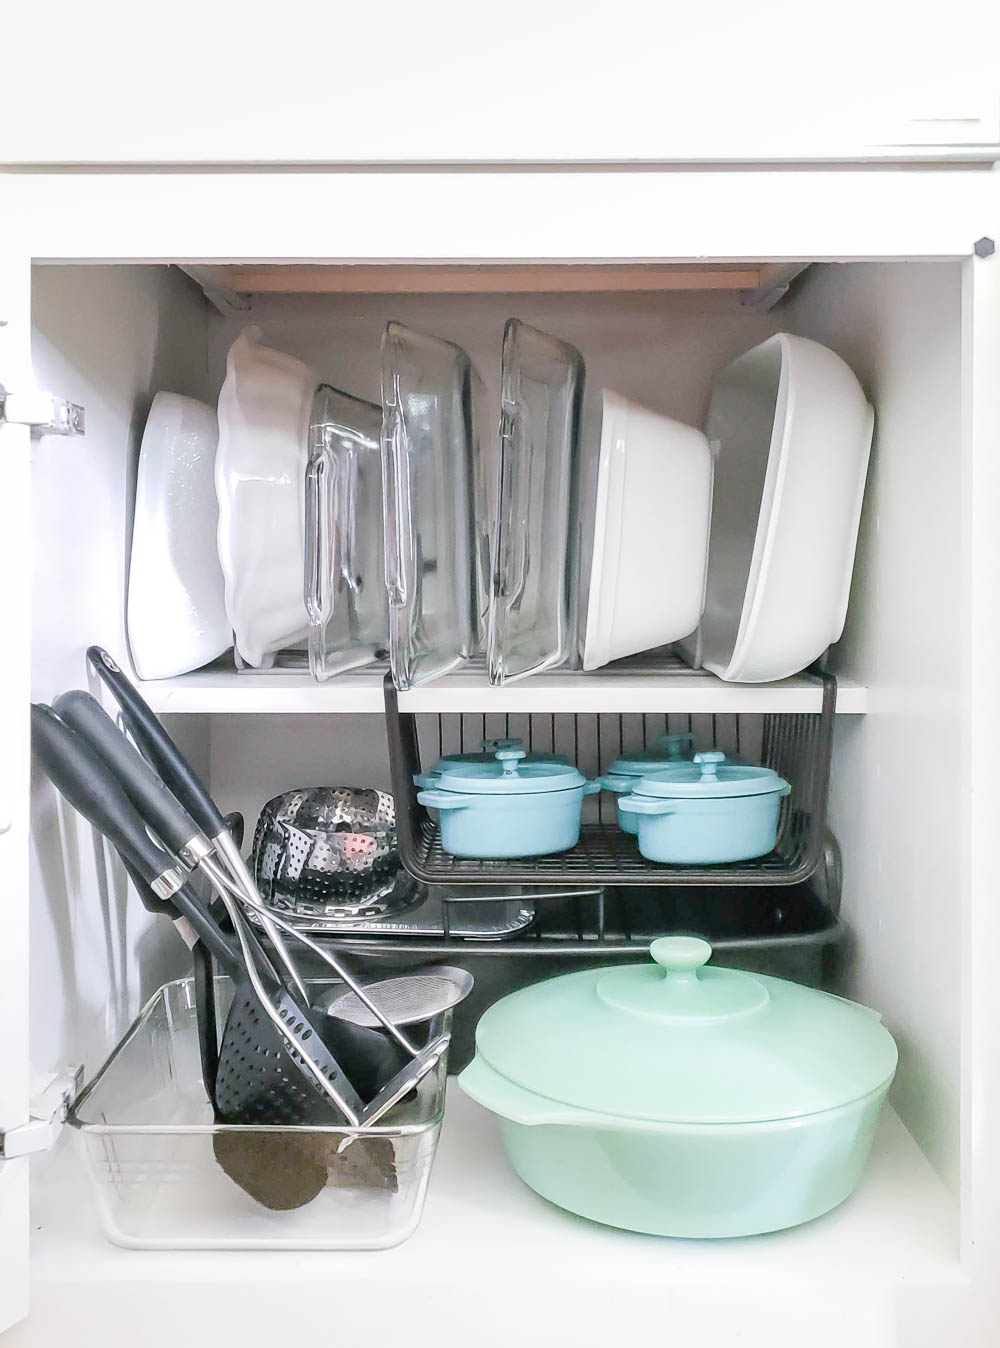
The inside of the measuring device cabinet holds all the baking dishes (cookie sheets are above the microwave).
I wish I had a picture of this cabinet before, because the turkey roaster was front and center. Which made no sense since we only use it once or twice a year.
Now my clear Pyrex dishes that we use all the time are the easiest thing to grab. I was also able to make room for the casserole dishes that were previously buried in the disaster cabinet.
Adding a pan organizer and shelf basket helped maximize the storage in this small cabinet.
On the other side of the stove, the spices live in the drawer, which I HIGHLY recommend.
Even when we had limited drawer space at our prior house, I found a way to make a drawer for spices. It’s just so much easier to see them all at once. If you absolutely don’t have drawer space, I’d use something like this cabinet door/wall rack so they could all be vertical.
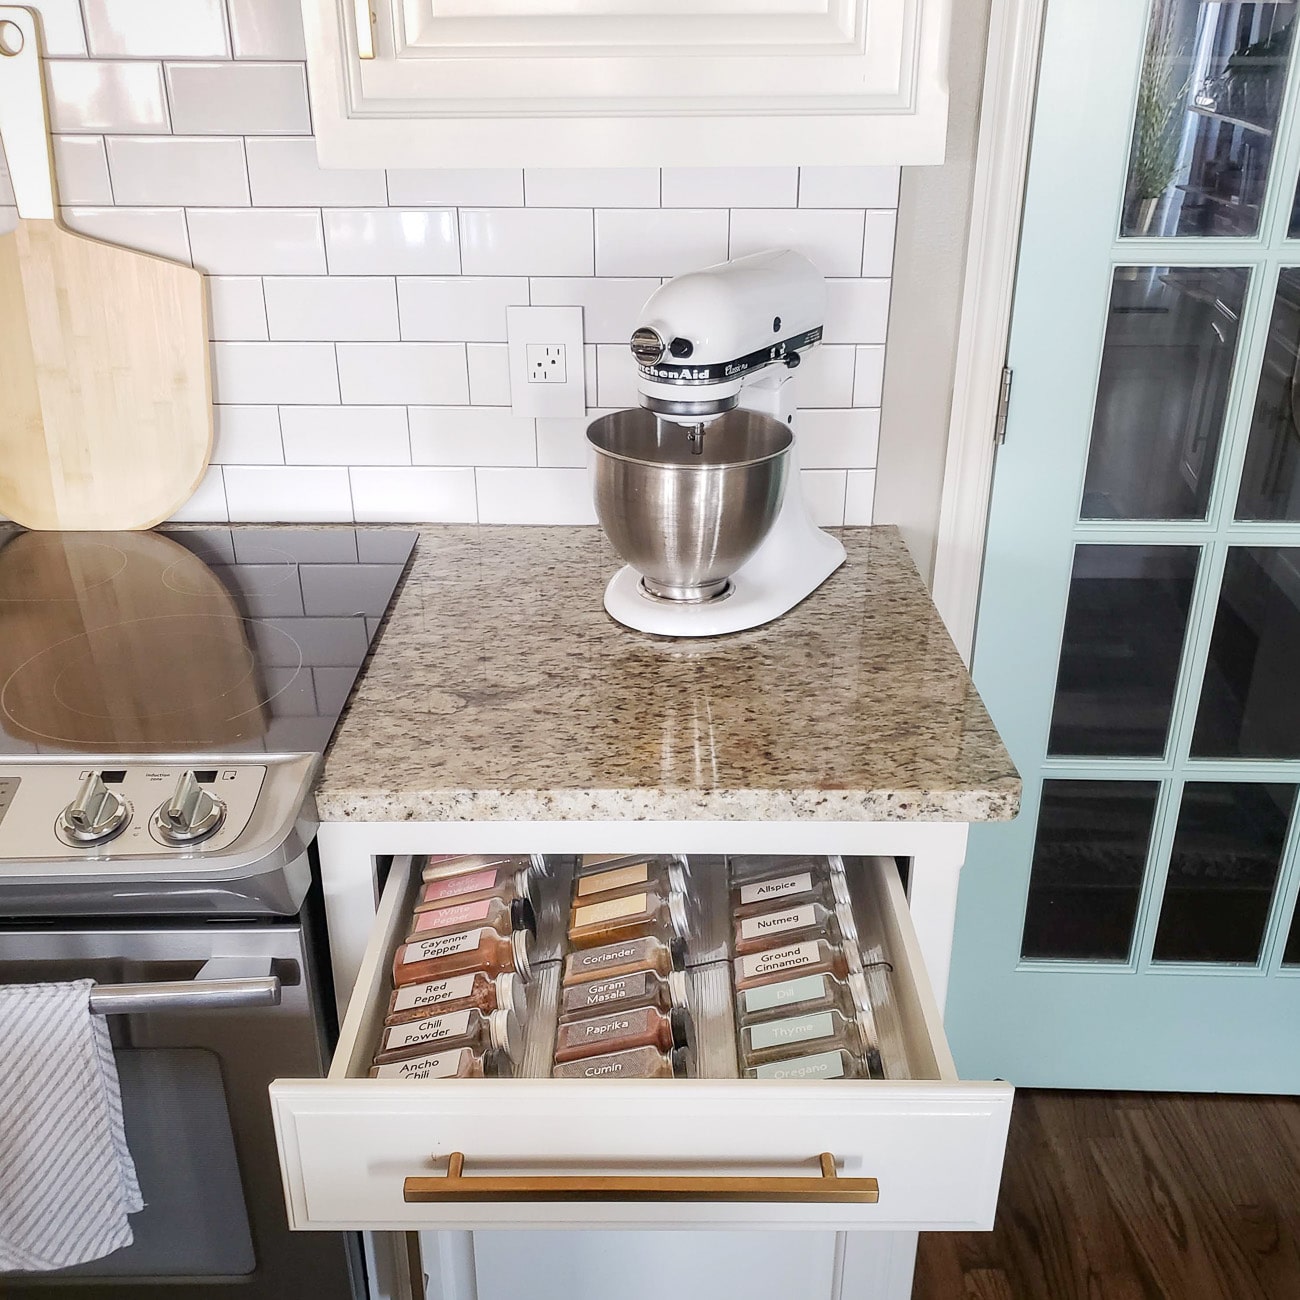
All the details on the spice drawer organization can be found here.
Below the spices, I solved another big problem. What the heck do you all do with mixer attachments?
I LOVE my KitchenAid mixer, but the attachments are bulky and we never seemed to put them in the same spot. It was more of a “wherever we can shove them” scenario, which wasn’t the best when we needed to use them the next time.
Now they live in a door-mounted rack right below the mixer. Imagine that! And the extra food processor blade is now in the same cabinet as the food processor. Insanity!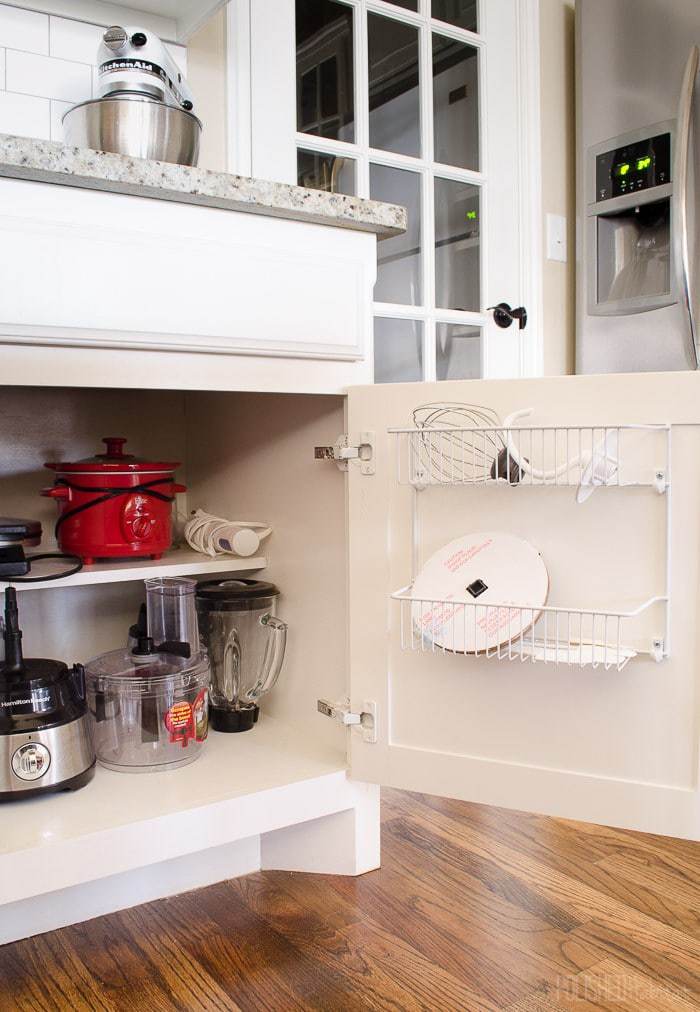
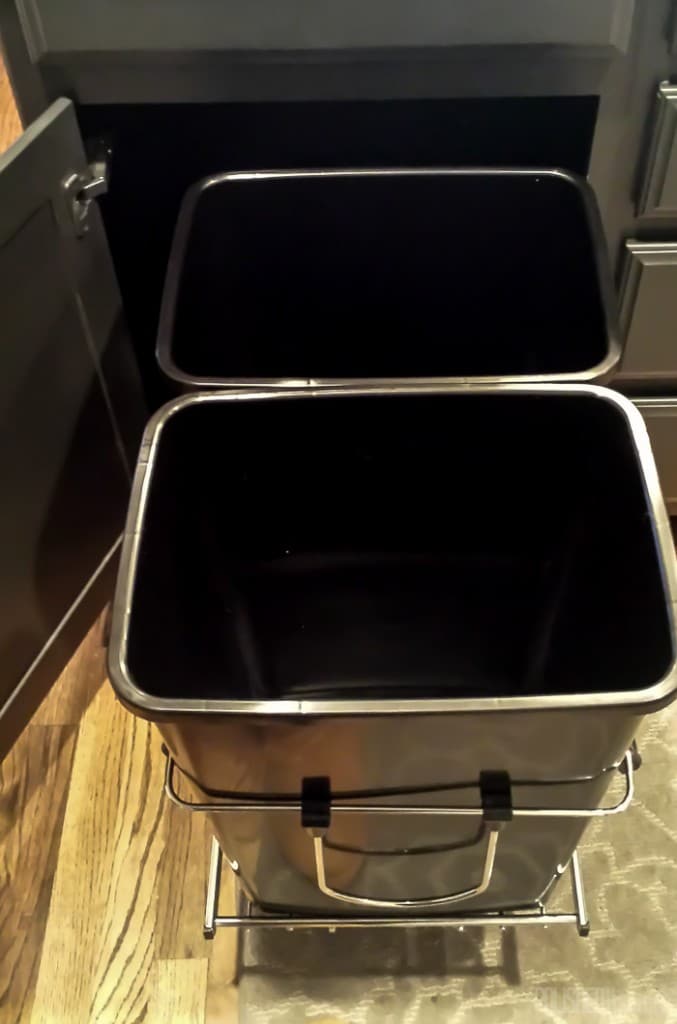
And then there was the crown jewel, which prompted all this organizing in the first place. With the plastic containers in their new home, I finally had room to install an under cabinet trash can!
In a moment of partial frugality and partial stubbornness, we refused to pay an outrageous price for the builder to install the pull-out trash bins. I think their price was something over 4 times what it should have cost. We asked them to leave the cabinet without a shelf so we could buy and install the trash cans ourselves, but four years later we hadn’t done it. Whoops.
Who knew that it was going to be so easy to actually install them?
I used the Rev-A-Shelf 35 qt double bins and was able to install them myself while Corey was at work. The whole thing installs with only four screws and I was pretty shocked I was able to do it on my own in under 30 minutes.
This is HUGE for us because Maddie (the German Shepherd) likes to occasionally catch us off-guard by dumping out the trash and dragging it all over the house while we are gone. It didn’t happen very often, but not only was it a big mess, we were concerned she was going to make herself sick.
On top of the dog issues, the trash can was never convenient when we were cooking. Now, it’s right below the prep space. Handy!
Update: We’ve now attached the trashcan to the cabinet door so it pulls out without having to open the cabinet door first.
See the rest of our kitchen drawer organization next!
After that, don’t miss the other kitchen organizing posts :
Organizing Under the Kitchen Sink
Pantry Organization (including food & my hack for storing plastic Target & Walmart bags)
Organizing the Refrigerator
And even the area around the kitchen sink!
And if you need MORE cabinet space, check out these tips for using an inexpensive shoe cabinet as kitchen storage.
Wondering how to store all those grocery store bags or disposable party ware? Check out the pantry cabinet post!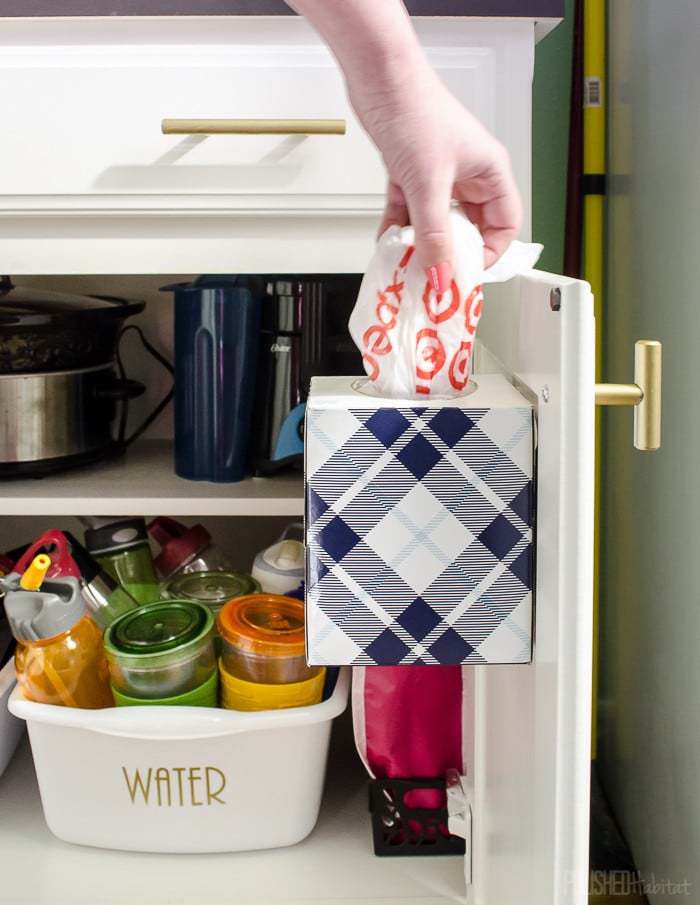

Eva says
I love it!!!Thanks for your help and congratulations from Spain!! 😉
Lesley Smith says
Is it wrong that I feel sick with excitement just reading this post??? We moved house 5 weeks ago and a week later came out to Spain for 6 weeks, so the unpacking was just that – getting stuff out of boxes and into cupboards. We have 2 more weeks before we go back to England and I can’t sleep with excitement at getting this house shipshape and Bristol fashion. Thank you for all the great tips, I love your blog but I’m normally a lurker. x
Melissa George says
Ha – not wrong at all Lesley! I get the same way when I think about getting a space all organized and functional! I’ve been laying awake thinking of all the organization I’m adding to our home office over the next few weeks! Enjoy the rest of your time in Spain!
Sue says
Melissa, I love your organizing tips! I solved the plastic storage issue a couple of years ago by donating most of my 30-year-old Tupperware and getting Gladware. Those snap-together lids keep all the lids together instead of all over the cupboard. But in reading your blog, I found myself thinking, “Wait, spices have expiration dates?” So I had to go check and learned that they DO indeed have expiration dates! (I was only throwing out dried herbs and stuff when their smell or taste lost its potency.) So I went through my jam-packed spice cabinet and the seasonings on the inside of my pantry door and pitched all the stuff that had expired in 2007 or 2009 or 2012. The seasonings I use most often are all fresh, so I was pitching old stuff that I’d used for a couple of recipes long ago and hadn’t used since. None of it had made us sick, but there’s no point in keeping it if you aren’t going to use it. I love your blog and I’ll be visiting often!
Melissa George says
I didn’t think to try this, but it would have been really interesting to test out the taste difference in a fresh bottle and one of our ancient spice bottles! We’ve got a local grocery chain and a Sprouts that sell bulk spices now, so when I just need a little of something, I head to those sections. It’s working so much better for us storage-wise and financially. In one case, I remember the spice being $11.99 for the bottle (yikes!), and we ended up paying something like $0.17 for it getting a small amount from the bulk area. So much better and we didn’t have to deal with a jar of something we use once a year.
Connie says
What a nice job. I just have one suggestion. Spices are suppose to be stored in a cool dry place. You placed them right next to the stove.
Melissa George says
Thanks, Connie! I considered that, but opted for this location for a few reasons. First was just pure practicality. It’s where we use the spices and fits in the natural flow of cooking. When I thought about the potential heat exposure, I realized it was very minimal. We use the left wall oven for daily cooking and the oven next to the spices just for big holiday dinners. The range top is induction, so miraculously only the pan gets hot, not the top of the stove. I ended up pretty convinced that the spices stored in glass doors wouldn’t be affected by the heat. Whew, sorry for the long explanation!
Mari says
Where can you buy the plastic cabinet with the drawer? I would like to also store my plastic food containers in this.
Melissa George says
Hi Mari, I got the drawer in store at Target. We’re still loving having the plastic ware stored like this!
Lauren says
Your storage ideas are great! I have the same plasticware that you have, so I totally need to use your storage idea! Thanks for sharing! BTW, love your kitchen!!
Mandy says
After replacing the mismatched plastic ware with a stackable set, put the old containers somewhere out of the way. They can come in handy for drawer organization or as plant saucers.
Taylor says
Hi Melissa, great post! I’m curious about how you handle your pots and pans, since I don’t think you mentioned those in this article. Thanks!
Melissa George says
Good point, Taylor! I can’t believe I forgot about them! Our cabinet above the microwave came with built in vertical dividers that are perfect for storing baking sheets, cutting boards, and even pan lids. Something like this: http://amzn.to/2sQmc65 would be great if we didn’t have the built-in dividers. The pots & pans are all in a drawer under the microwave/oven combo. We did get rid of any duplicate sizes and ones we never used, which was a huge help in making them all fit. Most of the time, it works great because there is one pot and one pan that we use 90% of the time and they are always on top. Occasionally, I get frustrated when I need whichever pot or pan is on the bottom. I dream of having the right cabinet to install this: http://amzn.to/2rx1qVr. Hope that helps!
Angela says
Your kitchen is now as beautiful inside those cabinets as it is outside. I love organizing and how good it makes me feel, I just don’t get to it often enough. The best thing I ever did in my kitchen though was storing all my Tupperware type containers with their lids on. I got rid of any that didn’t fit and will never own more than I can fit with their lids on so it forces me to not over buy. I did it about three or four years ago and it is my one kitchen cabinet that is always tidy and organised. x
Melissa George says
Thank you so much! Isn’t it crazy how much happier you are opening that one tidy cabinet that the others? Try to tackle just one more this week – whichever one is making you the craziest!
Julie says
Looks great! Doesn’t it feel great when you’re kitchen is organized? I’ve living in my home for almost 7 years now and every once in awhile I’m rearranging cabinets in my kitchen. Especially when I get something new for my kitchen. Plus sometimes I love to change up the look on my counter tops by rearranging appliances and supplies.
Melissa George says
It’s funny how much better just moving things around can make things look and work!
Barbara Compton says
Just 2 things I’d add to all the comments and your reorganization:
1. If lower cabinets have slide out shelves, it’s much easier to reach items in the back.
2. Lazy Susan’s are great for storing spices, oil, vinegar, & other small items for baking.
Love your posts!
Melissa George says
Thank you! Those are both great suggestions!
Sandy says
I’ve started taking everything out so I can rearrange everything. It’s just not right. First I’m seeing what I can donate, throw away or take to our farmhouse. That along may take days. My husband doesn’t mind every surface being stacked with stuff. There’s more than adequate storage in my kitchen including a walk in pantry, but I’ve got it all in there wrong. Could I see how you store your dishes?
Michele says
Great article!
Rubbermaid tip (because I have the same ones from your photo and realized I had been stacking wrong for years): Reverse the stacking order. Stack the taller pieces inside the shorter ones that have the same size “footprint”, you’ll save some vertical space and then you’ll have room to put smaller items inside the empty tall one. I know it doesn’t sound like it would make a difference but it really does.
Melissa George says
That’s a great tip, thanks Michele!
Nosulire says
We’re currently looking at re-doing and designing our kitchen, so this post is fab, as it isn’t all that big. I’m looking to completely change the styling and these are right up my street! Thank you so much for sharing so many amazing ideas.
Tori Raddison says
It’s a good idea to get rid of mismatched containers so that your cabinet looks more organized. If everything looks like it belongs, it’ll look much better. Besides that, they’ll be stackable as well!