• About Polished Habitat
    • About Me
    • Contact Me / Media Requests
    • Partner with Us / Advertise
    • Terms of Service, Privacy, & Disclosure Statements
    • Facebook
    • Instagram
    • Pinterest
    • Twitter
  • Home Decor
  • Room Makeovers
    • House Tour
    • Space Reveals
  • Cricut
  • Organizing
    • Most Popular Organizing Posts
    • Closet Organization
    • Bathroom Organization
    • Kitchen Organization
    • All Organizing Posts
  • Cleaning
  • Letter Board Ideas

Polished Habitat

Home » DIY & Crafts » DIY Nautical Art – Anchor

05/02/2014 · 28 Comments

DIY Nautical Art – Anchor

DIY & Crafts

20.9K shares
  • Facebook
  • Twitter

I feel like I say every project is my favorite – but this one REALLY is my new favorite. Unlike the Shim Tack Sunburst Mirror,  my anchor cooperated with me every step of the way. And it was inexpensive. And it’s downright awesome. I’m pretty humble about this one – can you tell? 🙂

Every time I go to Target I drool over the nautical collection they have right now. In fact, I’m hoping some of it goes on clearance soon! In the meantime, I wanted to make my own nautical art. I had the crazy idea to make an anchor image out of twine!

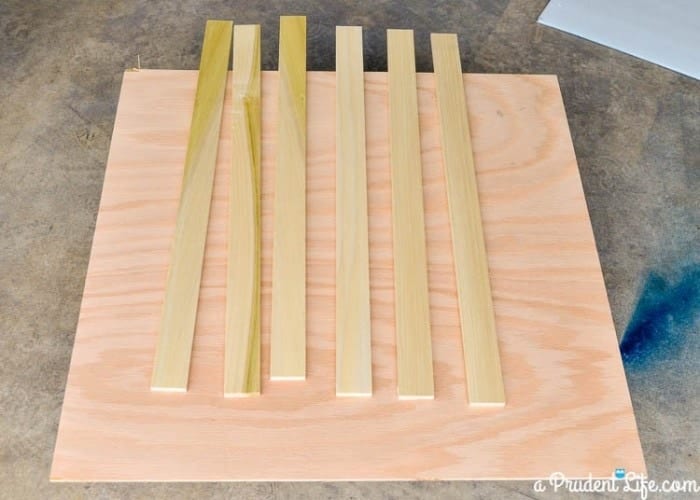
I picked up a pre-cut 24″x24″ piece of wood and several 1″ x 24″pre-cut pieces to use as the frame, along with twine & navy blue spray paint.

Make Your Own Nautical Art

The first step was spray painting the wood navy and letting it dry. I also spray painted the frame pieces aged copper (although they didn’t stay copper for long).
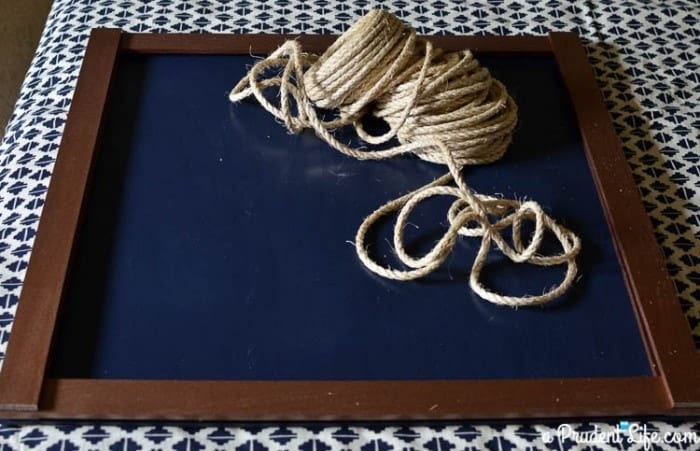
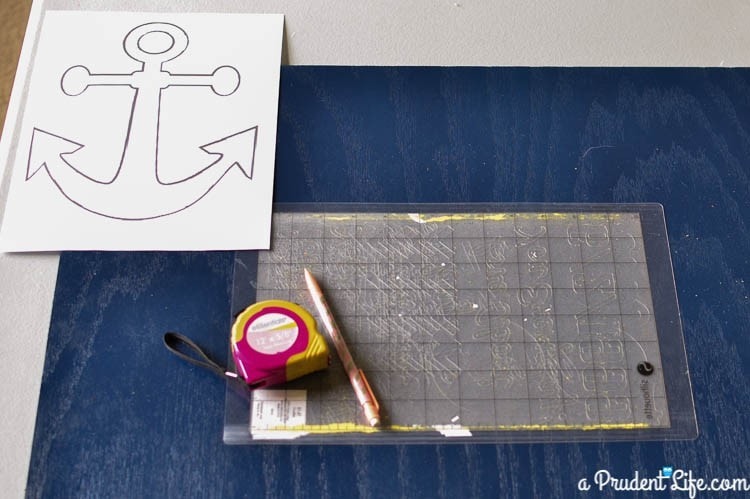
DIY Nautical Art SuppliesI found a small anchor image online to use as my guide, and printed it as large as my printer would allow. This is where I got really lucky. I realized that exactly doubling all the measurements on my guide anchor would be the perfect fit! Don’t try to be lucky like me. Figure out how big you want your finished product, then scale your guide appropriately.

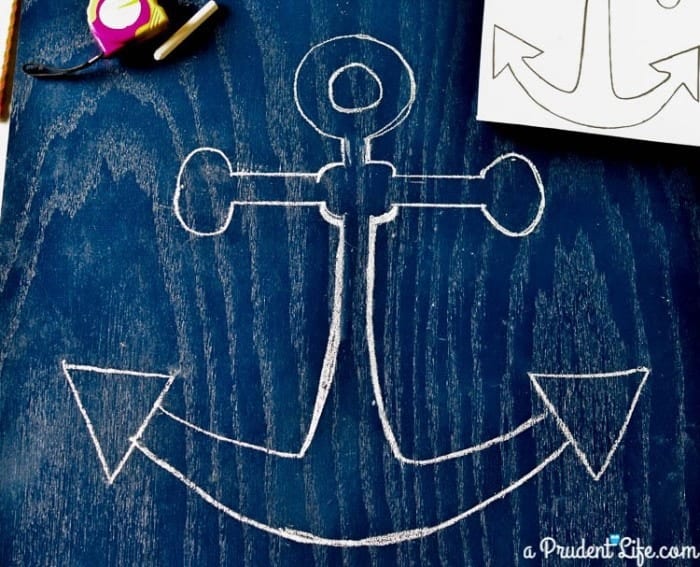
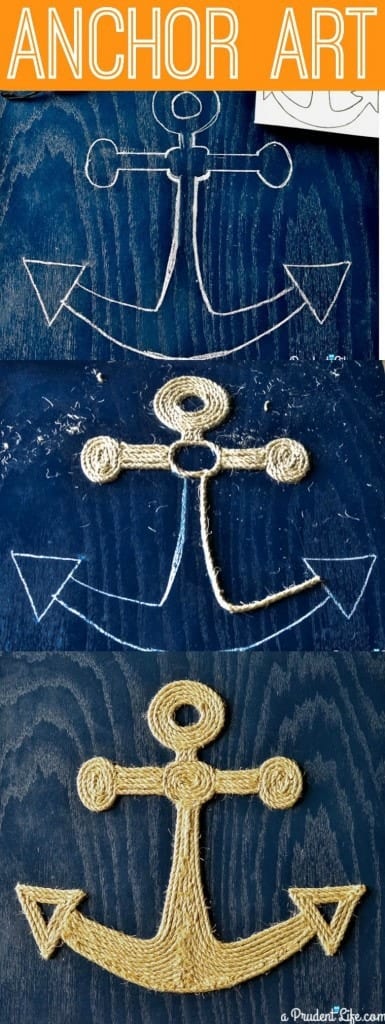
DIY Nautical Art SuppliesI was to lazy to find a yard stick, so I used my Silhouette mat as a straight edge 🙂 The pencil didn’t show up at all on the dark blue background, but chalk was an easy solution. The chalk outline doesn’t have to be perfect because it will all be covered up with rope.

Using chalk as a templateI was pretty shocked that I was able to sketch it out so easily using my guide image. Once I had the outline done, the real fun began! I used hot glue to attach one piece of rope at a time. You’ll need some good, but inexpensive scissors to cut through the twine.

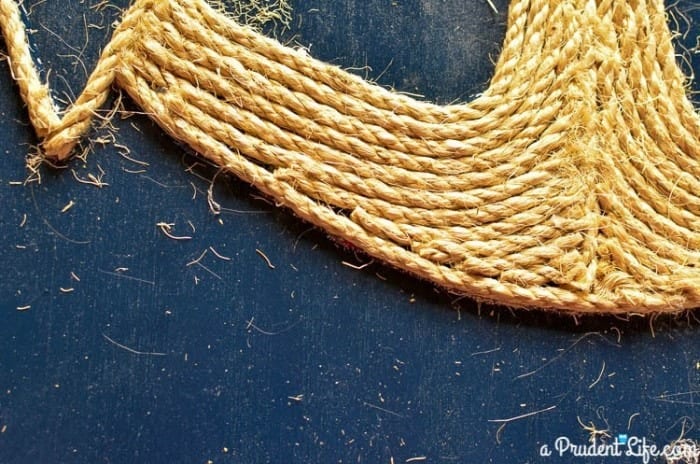
Each ring in the circle is a separate piece of rope. Make sure you stagger the end points of the rope to make the seams less noticeable.
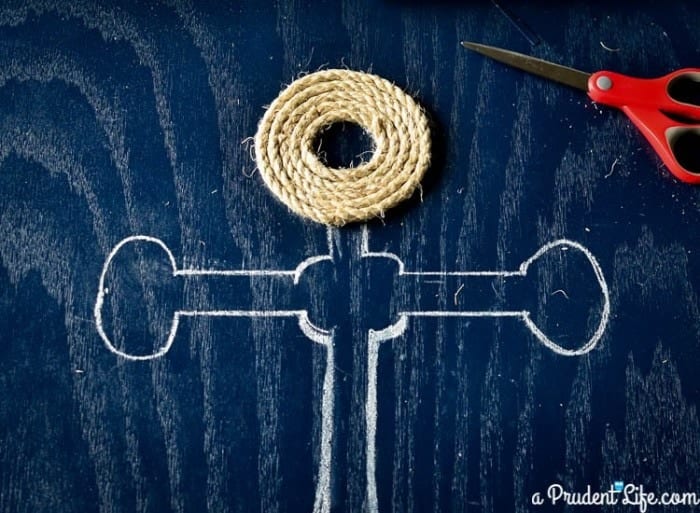
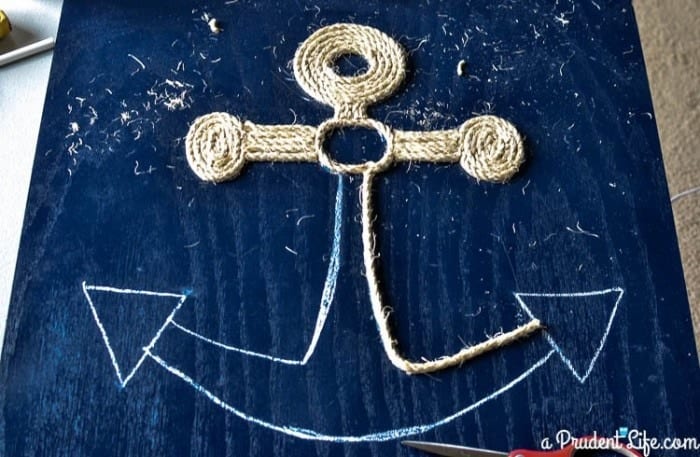
Hardware Store Nautical Art ProjectIt gets kind of messy with all the rope debris!

Easy anchor art from twineAs you can see in the picture below, there were some small gaps along the bottom. They were easily hidden by squirting in some hot glue and then carefully filling in the gap with an unraveled piece of twine. My twine was normally three strands thick, but I could unravel it to get a double or single piece.

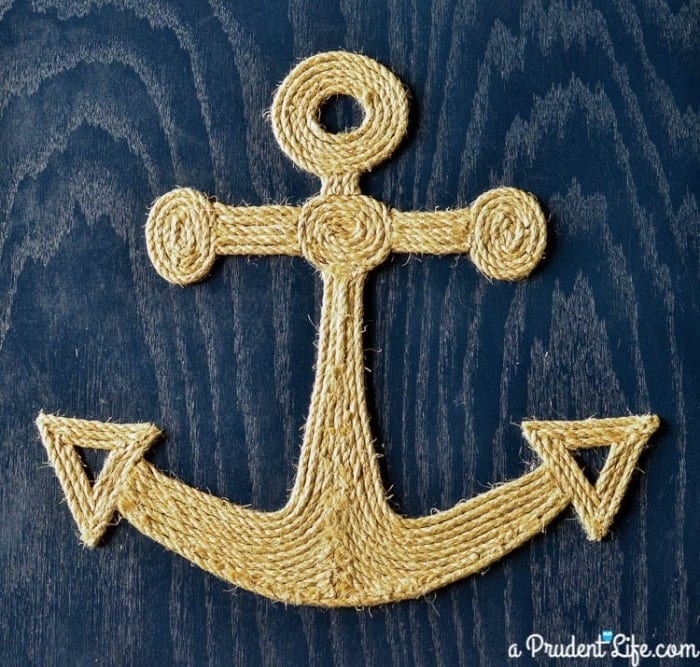
Make Art from TwineOnce I filled in all the gaps, it looked like this. Fun, right?

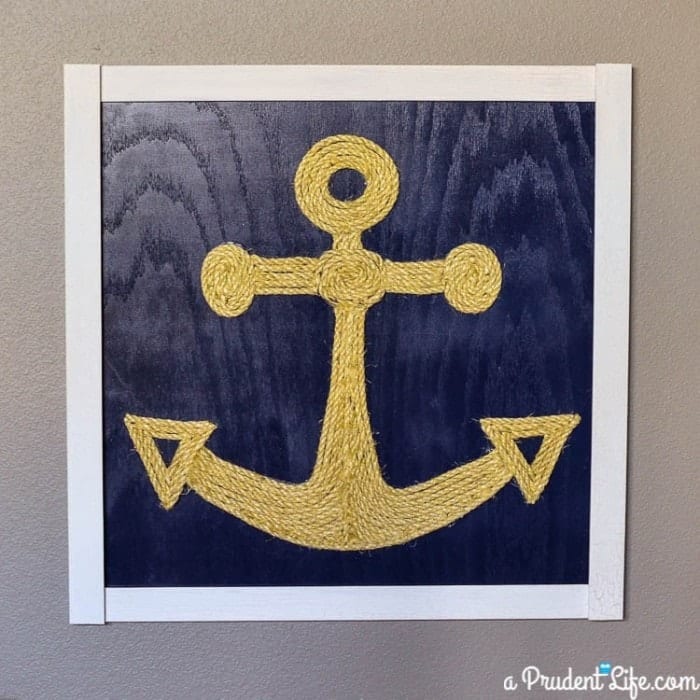
Make your own nautical artFor the frame, I opted to paint it white with some DecoArt Chalky Finish paint I already had on hand.  I hot glued the horizontal pieces directly to the backer board. When those were set, I glued the vertical pieces right on top of the horizontal ones. This method meant there were NO cuts required for this whole project. Everything was straight off the shelf! The overlapping look wouldn’t work for every project, but I like it for this one!

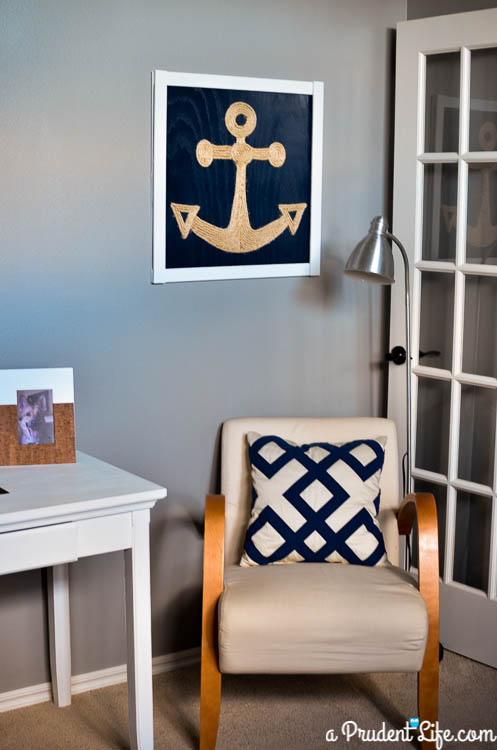
Easy Nautical Artwork - No Tools Required! I loved the piece so much, I incorporated it into the office. I hung it up with Command Picture Hanging Strips. It’s a little high on the wall, but the chair is temporary (borrowed from the craft room). I expect the “real” office chair to have a higher back.

Anchor Art Made from Twine

The whole project took a couple hours and cost somewhere between $10-$15. One package of twine was plenty – I still have some left! I love that it was inexpensive, because sadly I know the nautical trend won’t last forever. I normally prefer things that are more “inspired by” a trend instead of something so obvious, but when I had the idea for the rope anchor, I just couldn’t pass up trying it out!

Make you own nautical art out of twine - no tools required tutorial!

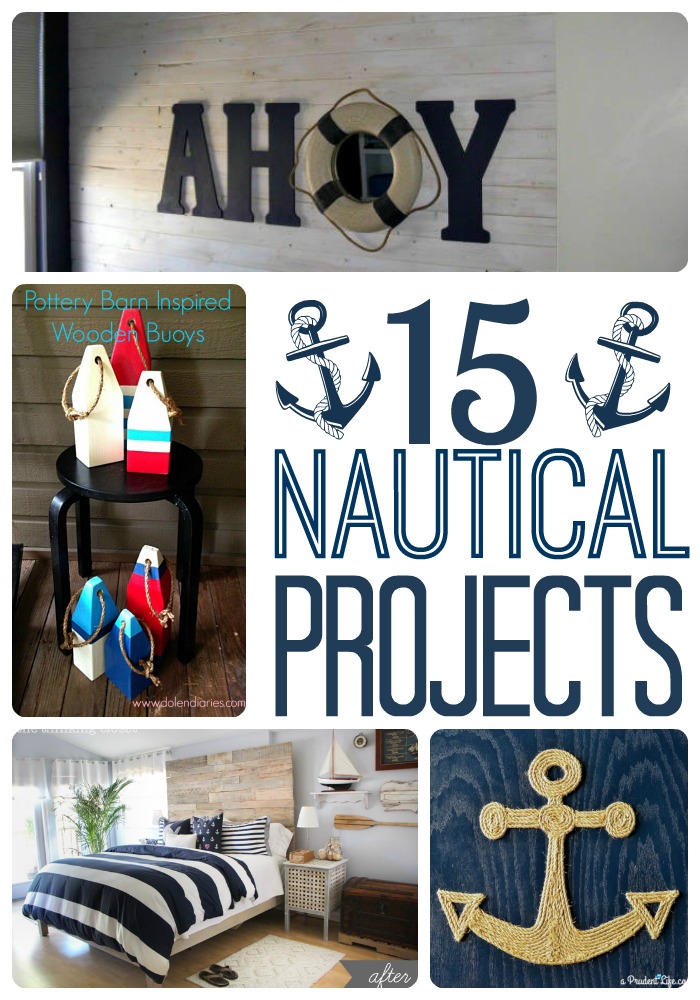
Need more nautical in your life? Check out my round up of 15 DIY nautical projects!

Collection of 15 awesome DIY nautical projects

Don’t want to DIY it? I found some amazing AFFORDABLE anchor items you can buy!
Collection of affordable home decor & clothing with anchor images.

20.9K shares
  • Facebook
  • Twitter
melissa

Melissa George

In 2013, Melissa founded Polished Habitat to share her passion for intersecting style and function to make everyday life more beautiful and less stressful. She does this by sharing easy home organization tips, home decor tutorials, and creative ideas to help readers think outside the box, no matter their budget. Her work has been featured in print in Better Homes & Gardens and Room to Create Magazine, and online by HGTV, House Beautiful, Buzzfeed, & more. In 2018 & 2019, Melissa was named as a Style Maker by Better Homes & Gardens. In 2019, Polished Habitat was shortlisted for the Amara Blog Awards Best Interior Styling Blog - International. Read more...

« May Goals & Spring Cleaning Infographic
Gold Vinyl & Las Vegas Traditions »

Comments

  1. Eva says

    11/15/2014 at 3:43 pm

    Hi. I absolutely love love love this project. This is exactly that I need. Could you please tell me where did you get the twine? Or maybe you still have a picture of it that you could send me?
    Love your ideas. I will follow your blog from now on.

    Reply
    • Melissa George says

      11/15/2014 at 7:13 pm

      Hi Eva, you can get twine like this in the craft stores, but I got mine at the hardware store!

      Reply
« Older Comments

Leave a Reply Cancel reply

Your email address will not be published. Required fields are marked *

Welcome!

In 2013, Melissa started Polished Habitat to share her skill of mixing decor & organization to add style & function to everyday life at home.

Her work has been featured in print in Better Homes & Gardens and Room to Create Magazine, and online by HGTV, House Beautiful, Buzzfeed, & more.

In 2018 &  2019, Melissa was named as a Style Maker by Better Homes & Gardens. In 2019, she was also short-listed by the Amara Blog Awards for Interior Styling, International Division.

Need to reach Melissa?
Email: Melissa @ PolishedHabitat.com

Affiliate Disclosure

Polished Habitat is a participant in the Amazon Services LLC Associates Program, an affiliate advertising program designed to provide a means for sites to earn advertising fees by advertising and linking to amazon.com.

Copyright

Please keep in mind that all text and images on this blog are the property of Polished Habitat (formerly A Prudent Life).

Projects are for personal use only.

Photo Use Policy

You are welcome to share 1 image for an online round up or feature if you clearly link back to my post and use nopin code.

You are not permitted to remove watermarks, crop or edit my photos, use my images without credit, print my images, or share more than 1 image online without my written permission.

The 1 image used can NOT be a collage image or any image I have created that includes text. Please email me with any questions about acceptable use! THANK YOU!

Copyright © 2025 · polishedhabitat.com