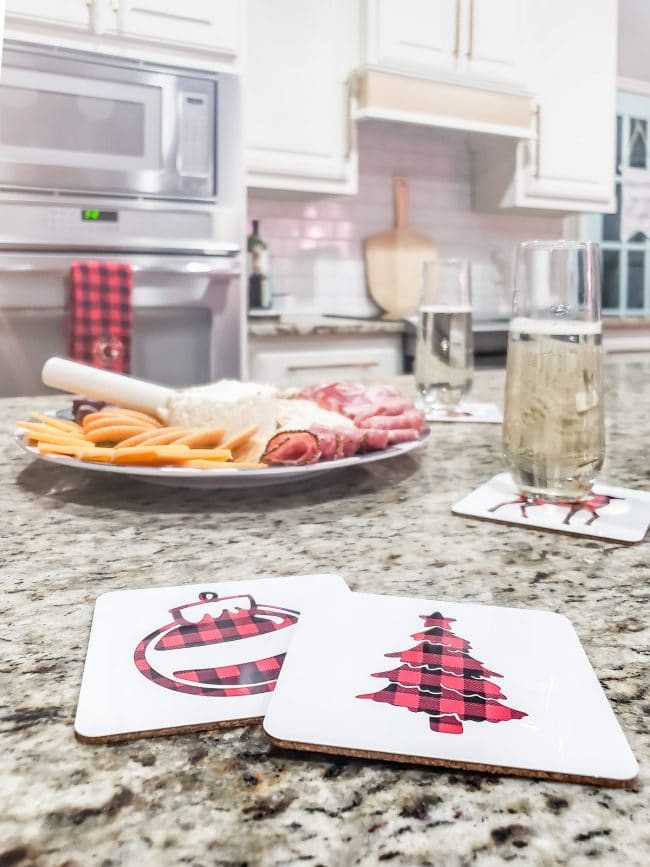
Last year, I purchased some fun materials to make several buffalo check Christmas decor projects. I got busy and only finished one of them, which worked out well because I started this Christmas season with supplies on hand and more time at home.
I finally had the perfect opportunity to use the Infusible Ink coasters and buffalo check Infusible Ink transfer sheets that have been sitting in my office cabinet for 12 months!
I did NOT work with Cricut on this post, but I am an affiliate for both Amazon and Cricut, so if you purchase anything after clicking on links in this post, I may receive a commission.
Coaster Project Materials & Tools
- Cricut Coaster Blanks
- Infusible Ink (also comes in Joy sized rolls)
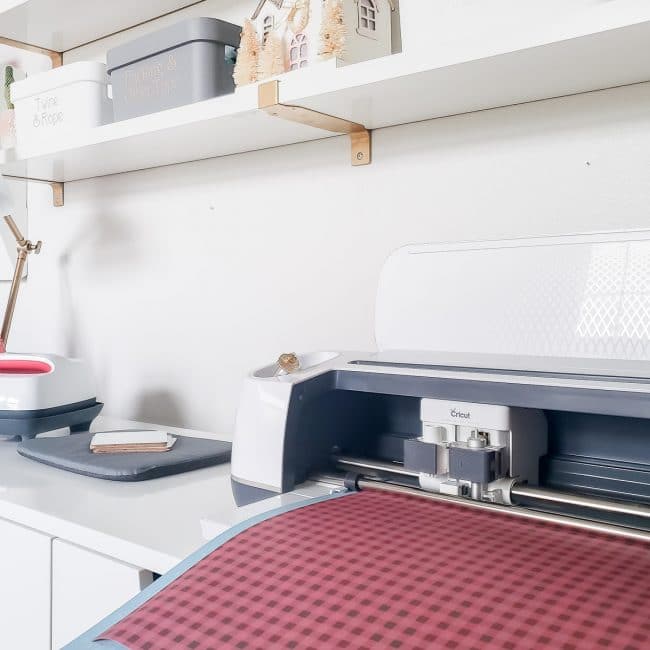
- Cricut Maker, Explore Air 2 or Joy
- EasyPress2 (mat is also helpful, but you can use a towel)
I’ve used the Cricut Infusible Ink to make shirts and Halloween bags, but I’ve been really curious to find out if it works as well on their solid coaster blanks as it does on fabric. Now that I’ve done the project, I can’t believe I let the coaster blanks sit in my office for a year – they are so fun!
To make this project super simple for you, you can open my file right from Design Space. If you have a Cricut Access membership, all the images I used should be included free.
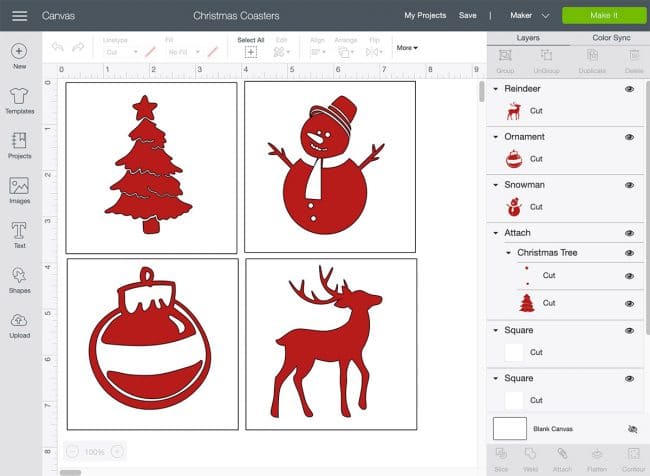
Of course, you can always design your own coasters as well. I used a square shape, sized to match the coasters, to get the scale right. Once you hit Make It, you’ll see Design Space try to cut the squares first on mat 1. Just click the mat 2 image with the actual designs on the left sidebar to skip cutting the squares.
For Infusible Ink, you want the printed side of the material FACE UP on the mat, which means you’ll need to click the button to mirror your design. Don’t worry, Design Space will remind you once you select the material.
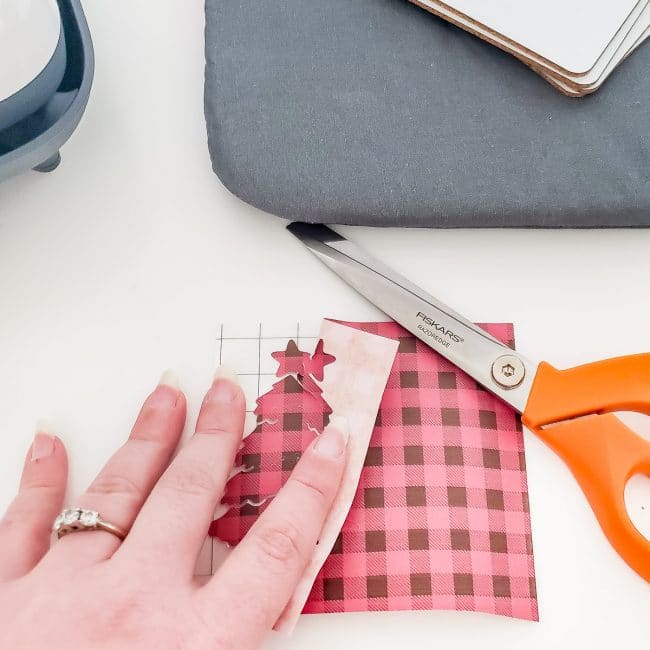
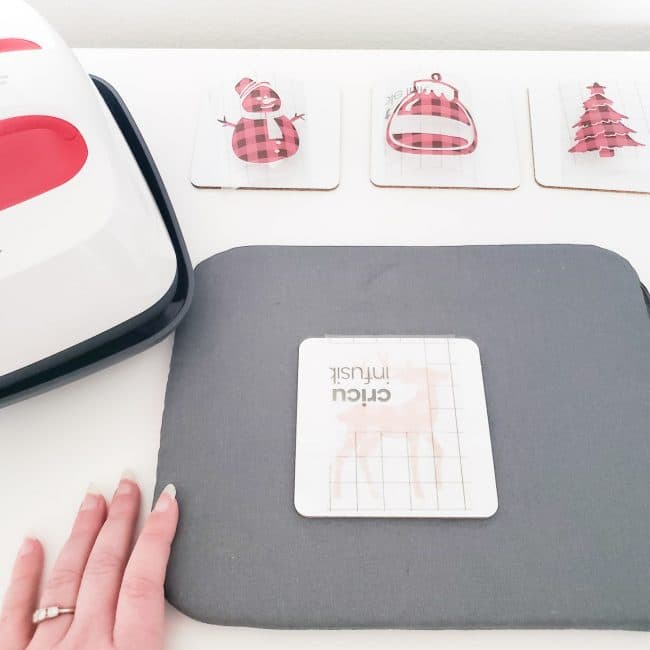
Once the cut is finished, use scissors to separate the four designs before weeding. For Infusible Ink, it’s recommended to weed with your fingers instead of tools. If it’s stubborn, bend the material to help the cuts release.
Be careful in places with fine detail, like the reindeer antlers. I wasn’t paying close enough attention and detached an antler, but was able to put it back in place before the transfer and you’d never know it happened.
Once you’re done weeding, place the coaster on your heat mat or a towel, then center your design with the printed side touching the coaster.
Cover the coaster with one of the pressing sheets included with the Infusible Ink, and then place the EasyPress 2 on the coaster for 60 seconds at 400 degrees. You don’t even have to press down, just place it and let go.
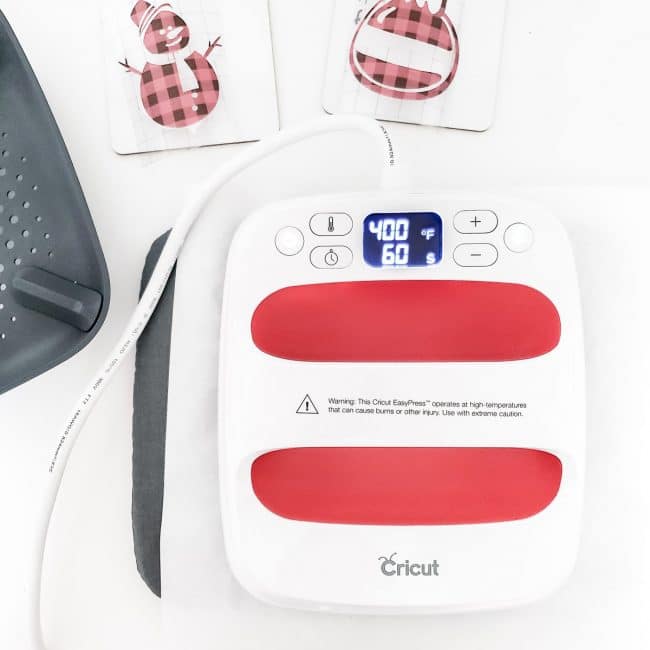
Don’t go too far away, because you’ll want to remove the heat press when the timer goes off. The next step is the hardest.
DON’T TOUCH IT! I know, I know, you want to see how it turned out. But first, the coaster will burn you. Yes, I tested that out for you to confirm. It hurt and my thumb has a small new coaster-corner-shaped addition to my thumbprint. Second, even if you think you have thumbs of steel, the material is designed to be a cool peel, so for the best results, you need to wait.
After several minutes, carefully check the temperature to see if it’s safe to move your coaster. Once it’s cool, peel away the plastic backing to reveal the magic. Because the ink transfers into the material, you’ll have a shiny, smooth design with no raised edges.
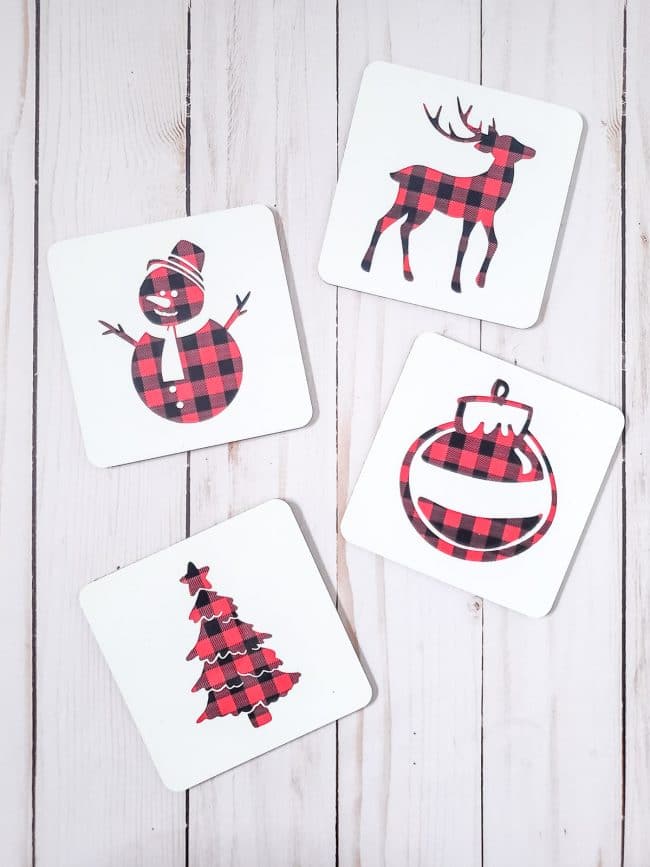
I was thrilled with how they turned out on my first try, now I can’t wait to make more coasters in a variety of colors and designs. Making a set with a customed coaster for each person in a family would be a fun gift!
Next up, check out my monogrammed Buffalo Check Christmas Tea Towel!


Leave a Reply