This is a sponsored conversation written by me on behalf of Cricut. The opinions and text are all mine.
One of the biggest keys to STAYING organized once you’ve decluttered and organized is to label like crazy.
There are TWO wonderful reasons for this magic.
First, it keeps everyone on the same page and eliminates excuses. There can’t be any “I forget where it was supposed to go” when there’s a clear label involved. This works for everyone from toddler’s (you can use photo labels for them) to spouses.
Second, it creates a mental barrier in your brain to avoid stashing something in the wrong spot. Without labels, it’s easy to toss something on the wrong shelf when you’re in a hurry. But if the bin says cold medicine, it’s harder to let yourself drop in a box of band-aids.
I’ve used a Silhouette machine to make adhesive vinyl labels before, for everything from our recycling bins to pantry canisters. Then it stopped working right.
I even got a replacement shipped and it still wasn’t cleanly cutting vinyl despite getting help from multiple experts. I ended up shutting the Etsy shop where I had been selling custom labels for others, but the most frustrating part was that I couldn’t quickly make adhesive labels for my own projects.
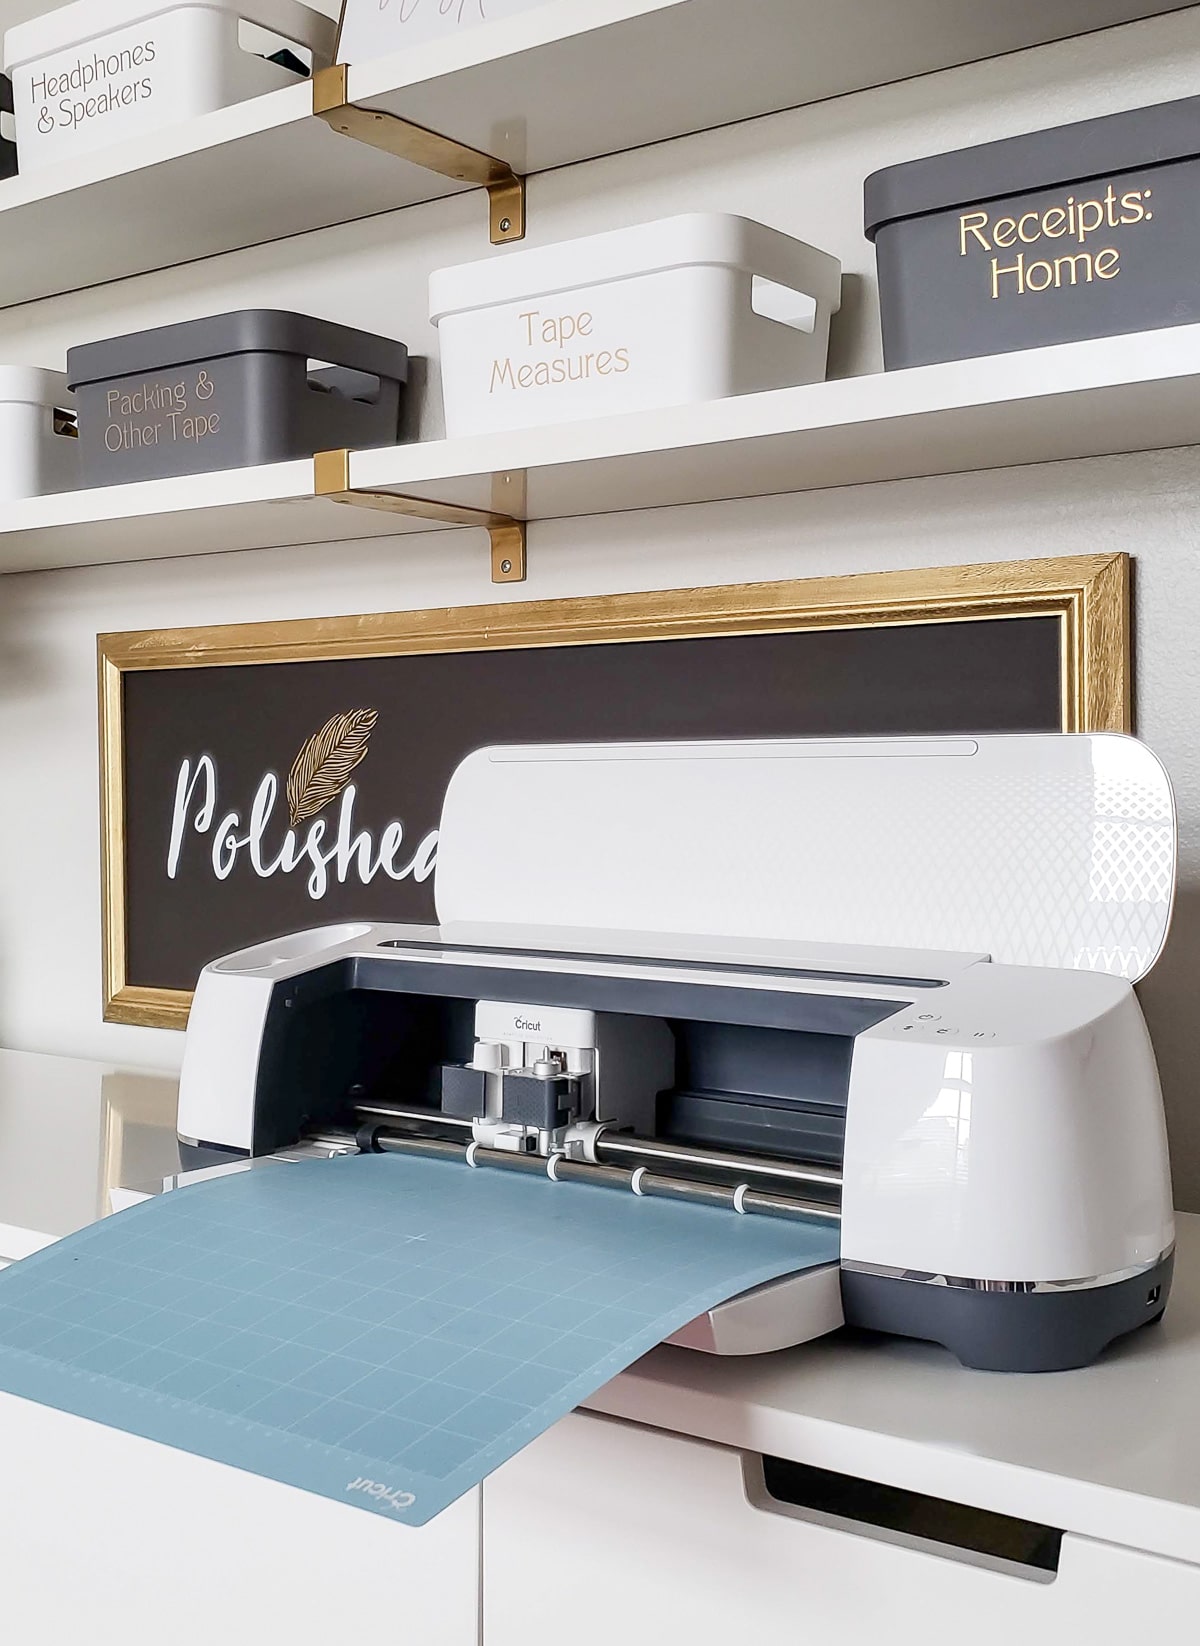
Thankfully, Cricut recently contacted me to help them highlight how their Cricut Maker machine can be used for home organizing.
I was a bit worried about having to learn a different machine and software, as well as concerned I wouldn’t like it as well as the good old days with my Silhouette.
As usual, my worries were all wasted energy because the Cricut Maker is SO MUCH NICER in every way!
PS: If you have space limitations or want a lower priced option, be sure to check out my Cricut Joy tutorial for labels. It can make these exact labels and MANY other projects.
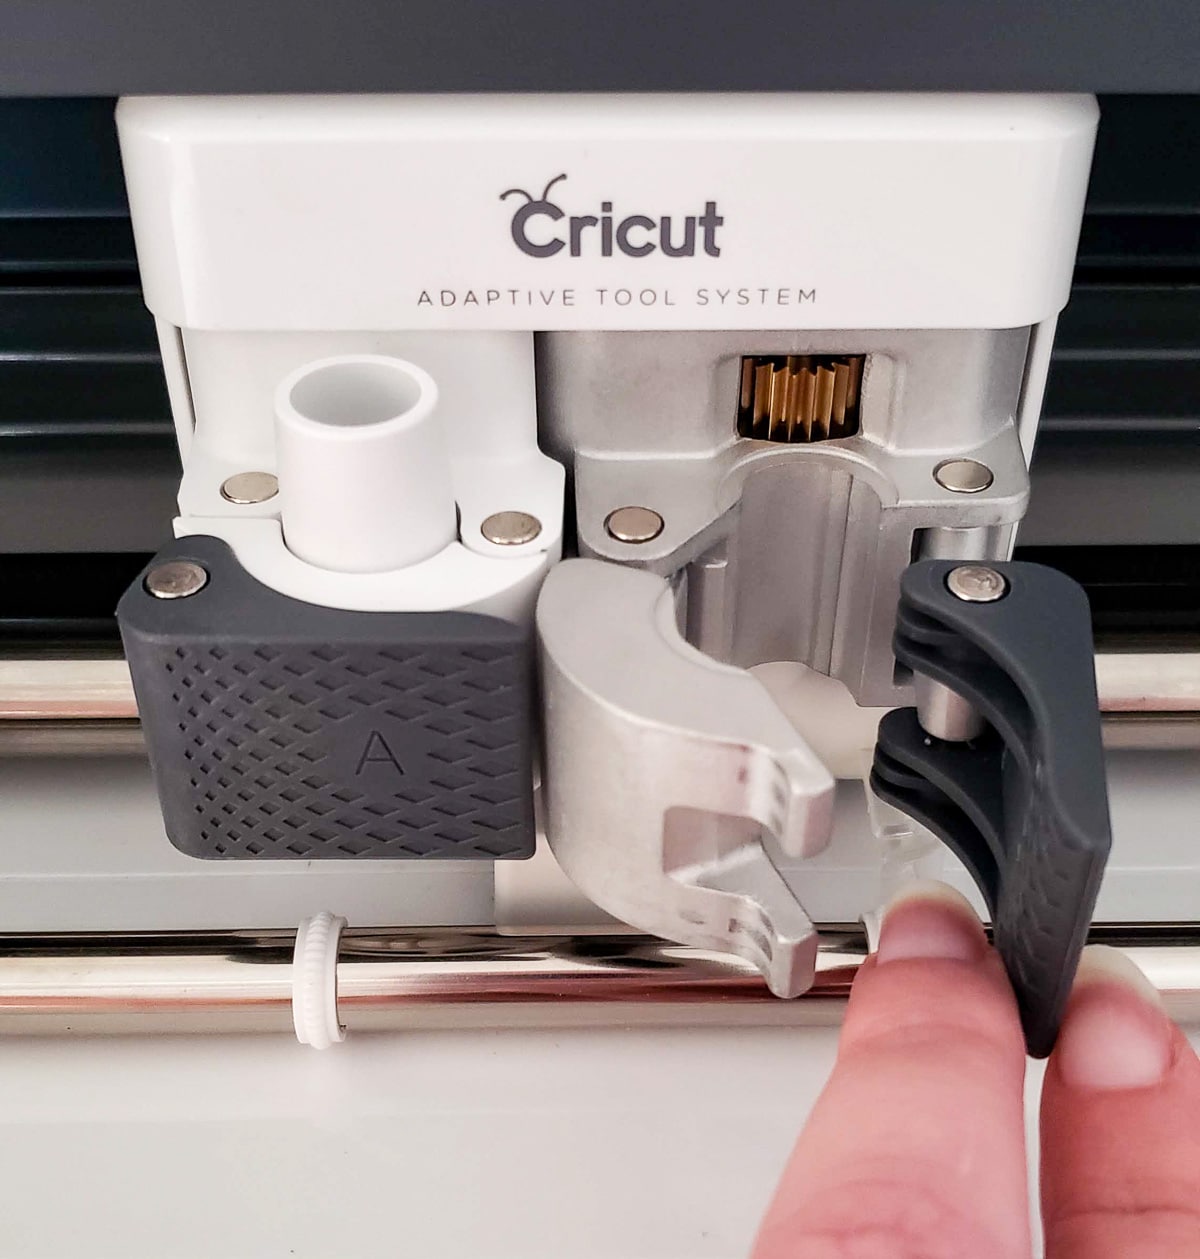
I knew about some of the features, like the fact that it has 10x more cutting power and unique blade options, for example, it can cut anything from delicate fabric to leather and even balsa wood.
Imagine how cute leather labels would be hanging from a basket!
In addition to having more features and flexibility, the Maker feels so much sturdier.
I always felt like I was going to break the clip that held the Silhouette blade, but the Cricut blade holders are hardy. Inserting the blade felt like I moved from a toy to a professional piece of equipment.
The initial learning process was also way easier with the Cricut. It came with all the materials needed for a demo project, which walked me through cutting paper, cutting fabric, and using a pen with the machine to create a cute greeting card.
When I was done with the card, I felt confident that I could create my own projects.
PS: I wrote more about getting started in Cricut Design Space here.
Which circles us right back to home organization!
In addition to leather labels, you can also create heat transfer labels for fabric bins and wood crates.
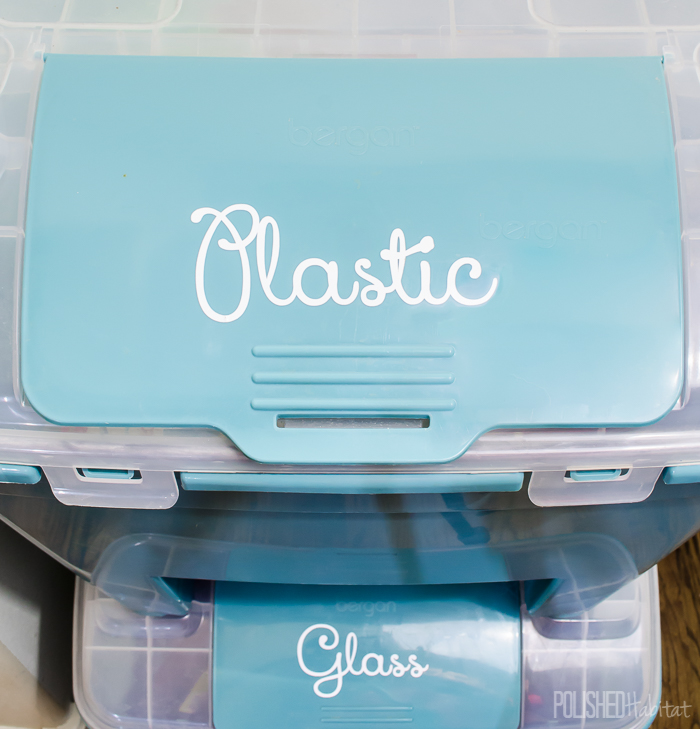
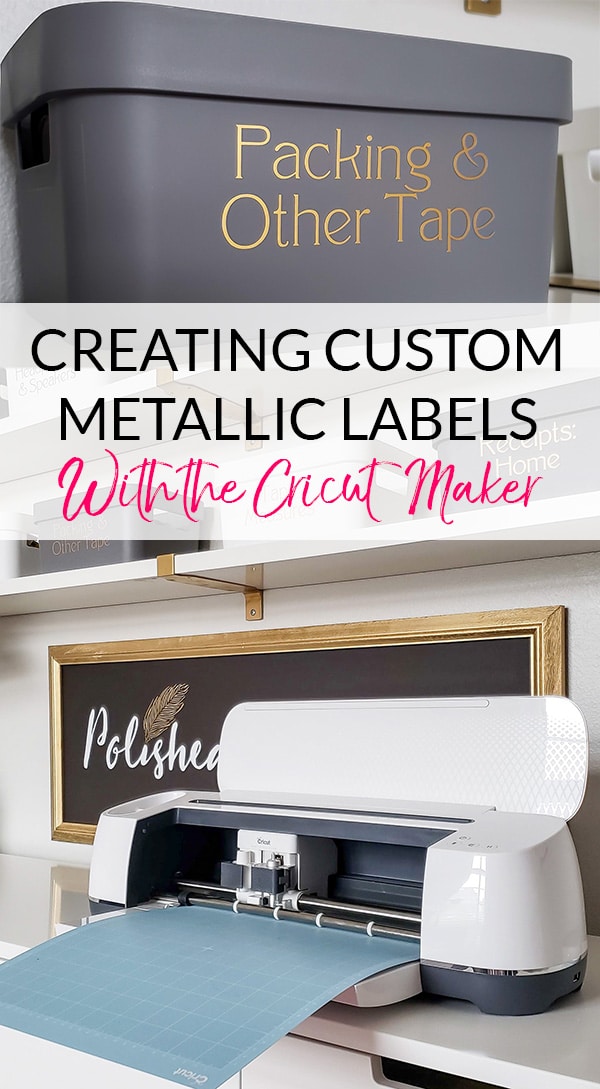
Today, I wanted to put my new Cricut Maker to the test with my most used labeling technique – adhesive vinyl!
Cutting Custom Metallic Labels
This is a great beginner option, but still the technique you’ll notice most throughout my house.
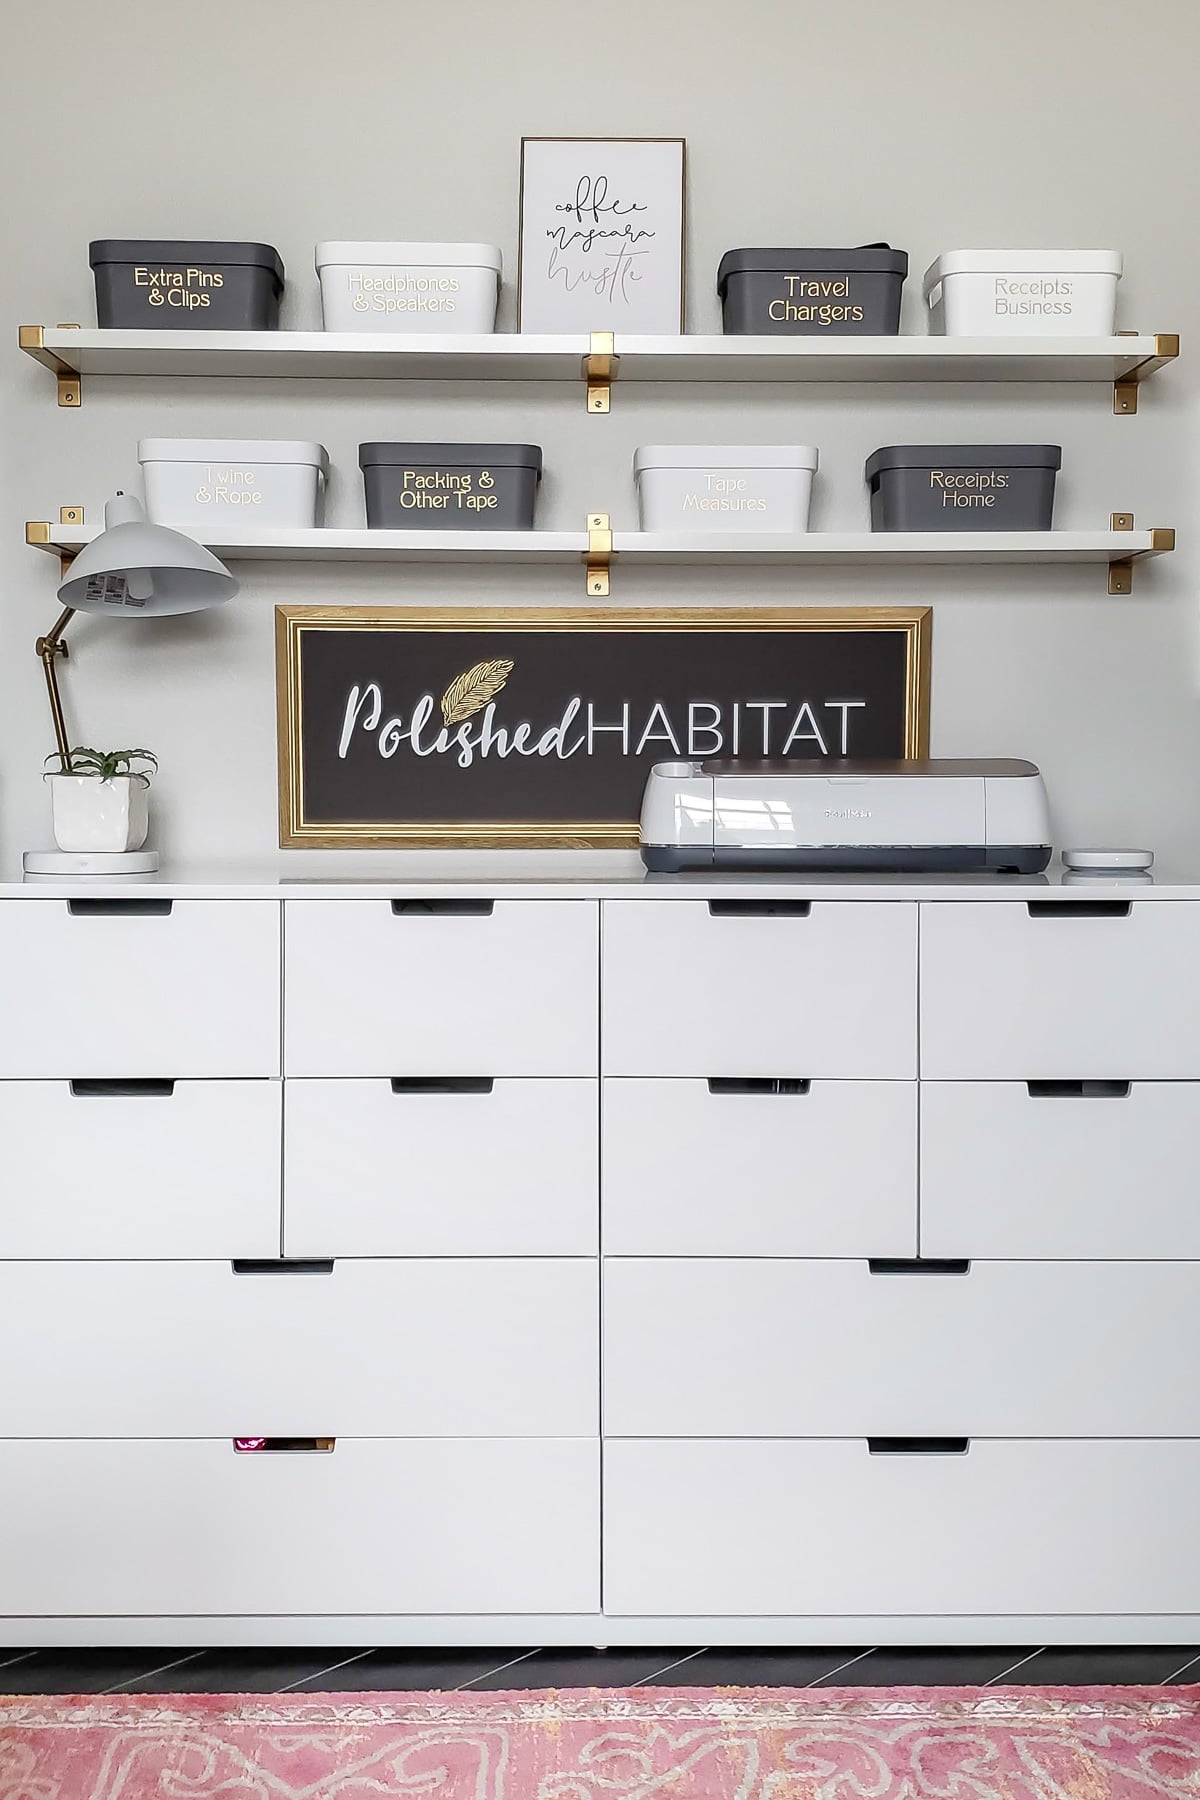
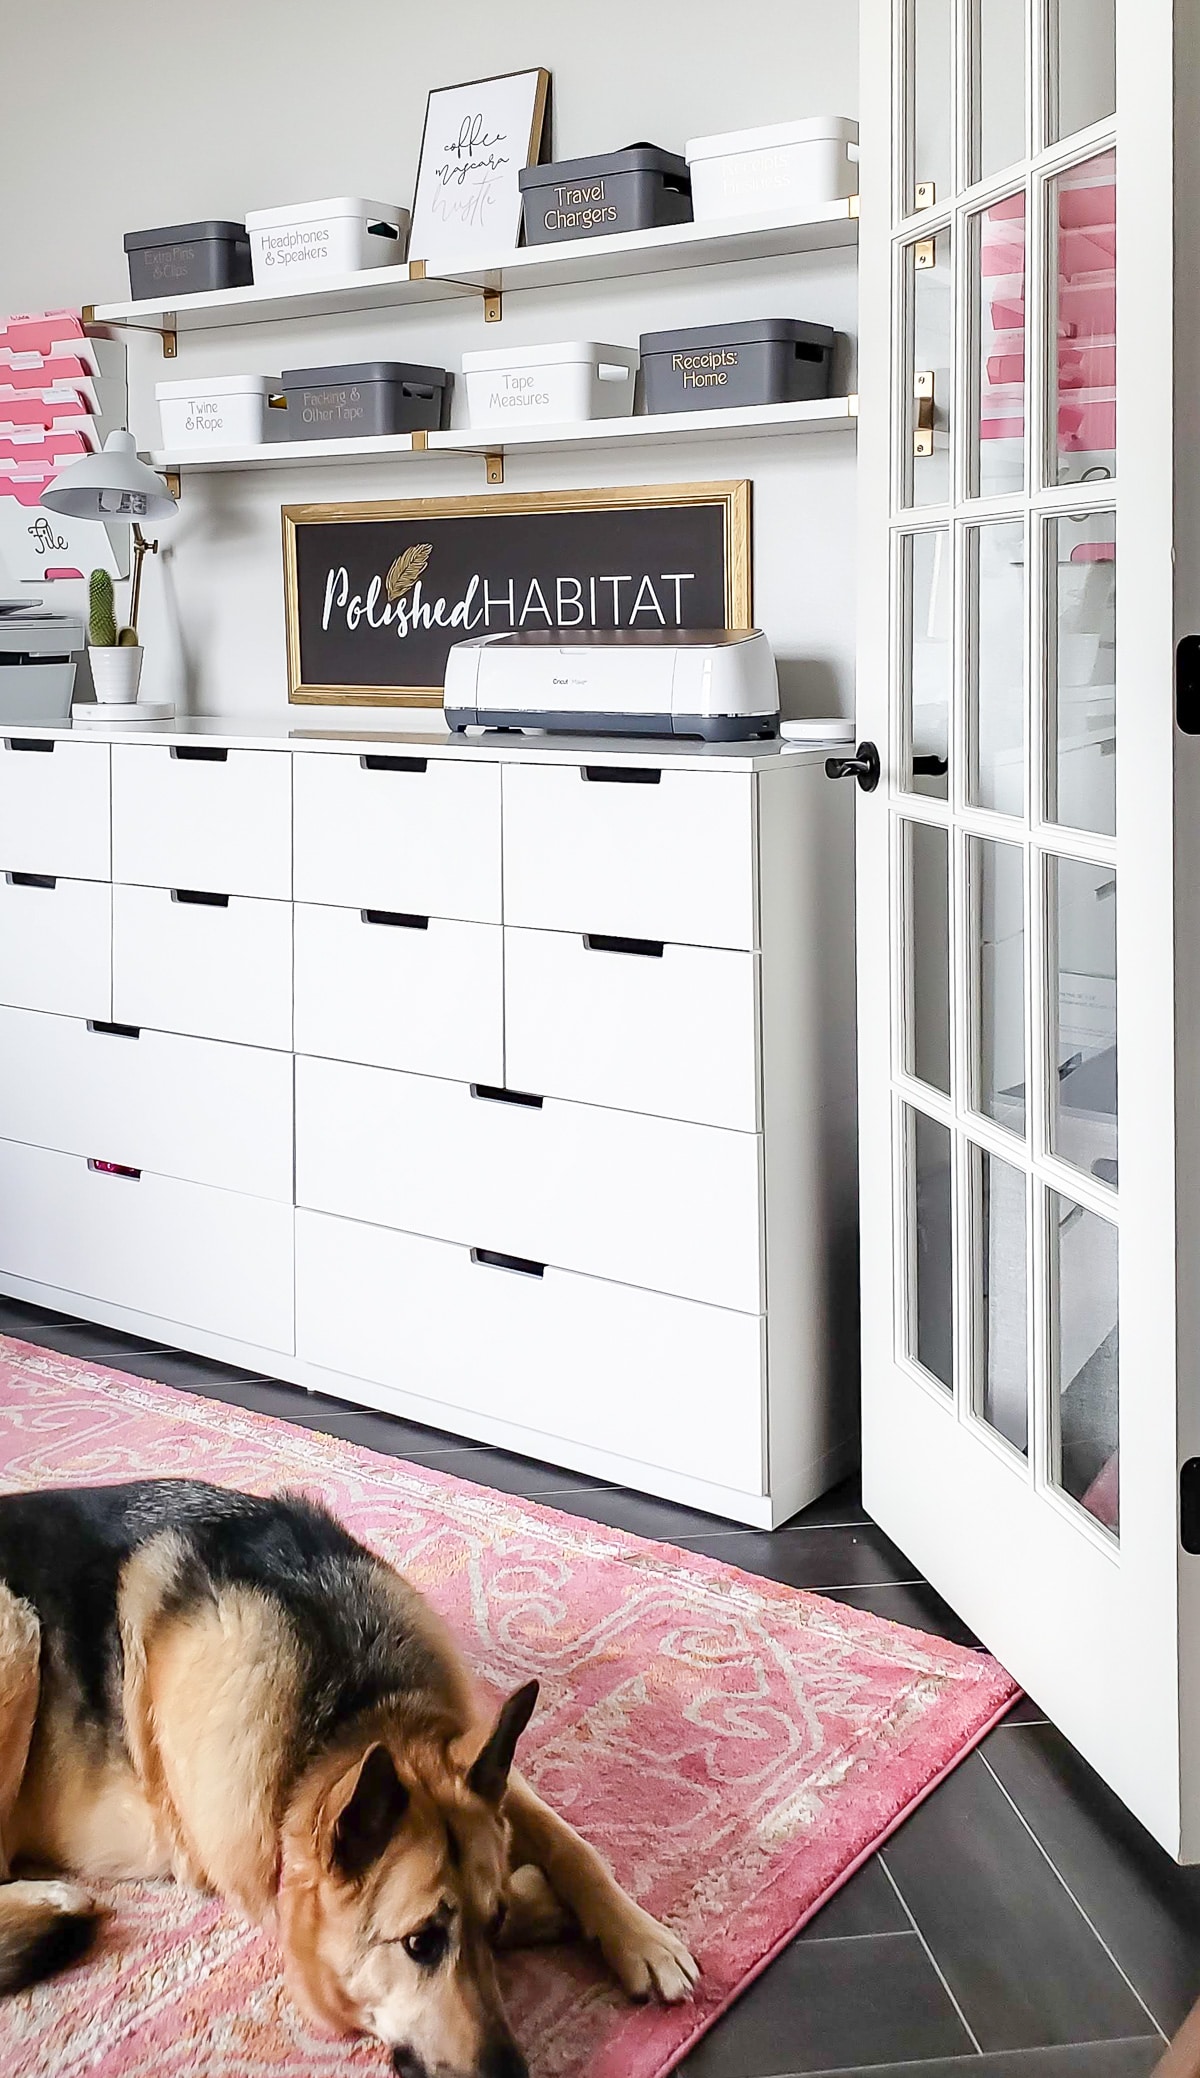
While the Silhouette was broken, I printed some labels on paper for my office shelf bins, attaching them with double-sided tape. They look okay…but constantly fall off and land behind the heavy dresser. Right now, 3 of the 4 labels from the top row have fallen into the abyss.

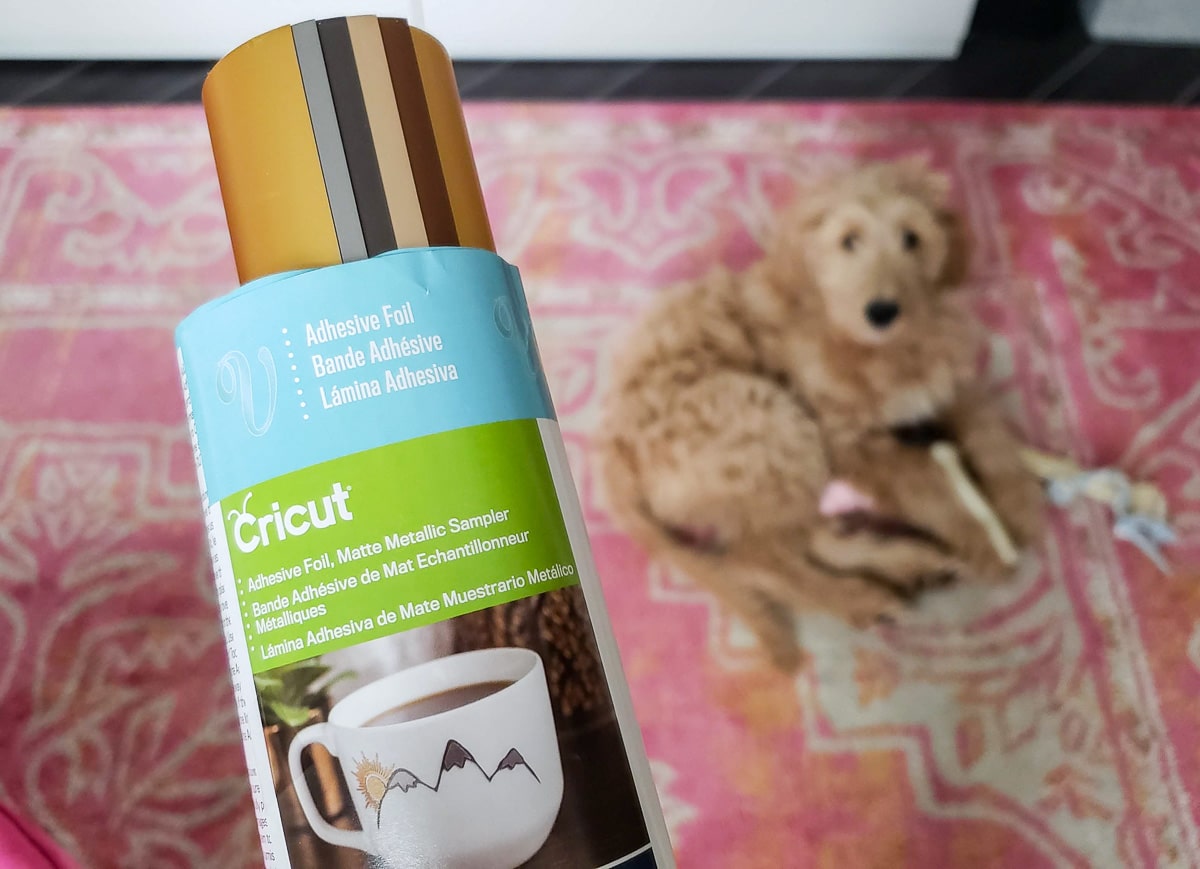
I picked a pretty gold metallic adhesive foil as my first material to test out – what could be better than custom metallic labels?
There’s a great free video tutorial series from Cricut on working with vinyl, so I’m just going to give you the highlights!
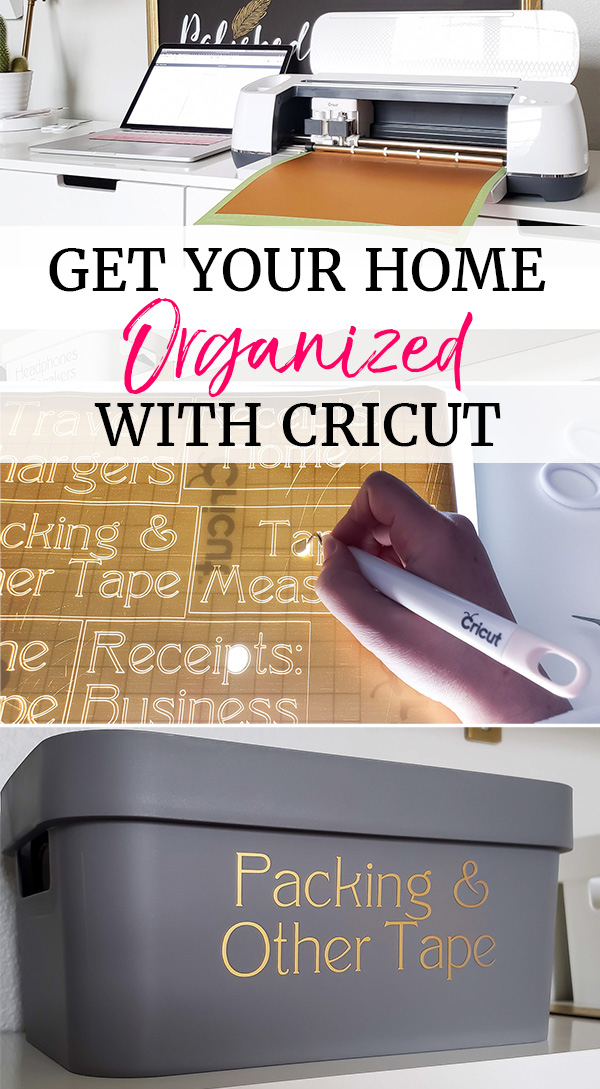
Using the included Cricut Design Space software, I typed out the names of all my bins and used the rulers at the left and top of the software to make sure they would fit on my containers.
Once I had all the words typed in (using Grafiko Com Regular typeface from Cricut), I added a rectangle box around each one and used the Attach feature to combine each word and it’s box together.
That will make the weeding step easier in a moment!

One HUGE benefit of the Cricut software over Silhouette is that it automatically arranges everything on the page before cutting to reduce wasted materials.
When I clicked the Make It button, I got a preview of how the program placed things on the cutting mat. You can manually move them around at this point, but I didn’t need too. 
Additionally, if you were cutting multiple colors of vinyl, you can color them in the software and it would assign them to different mats. Brilliant!
When the machine was done cutting, my piece of vinyl looked like the image below.
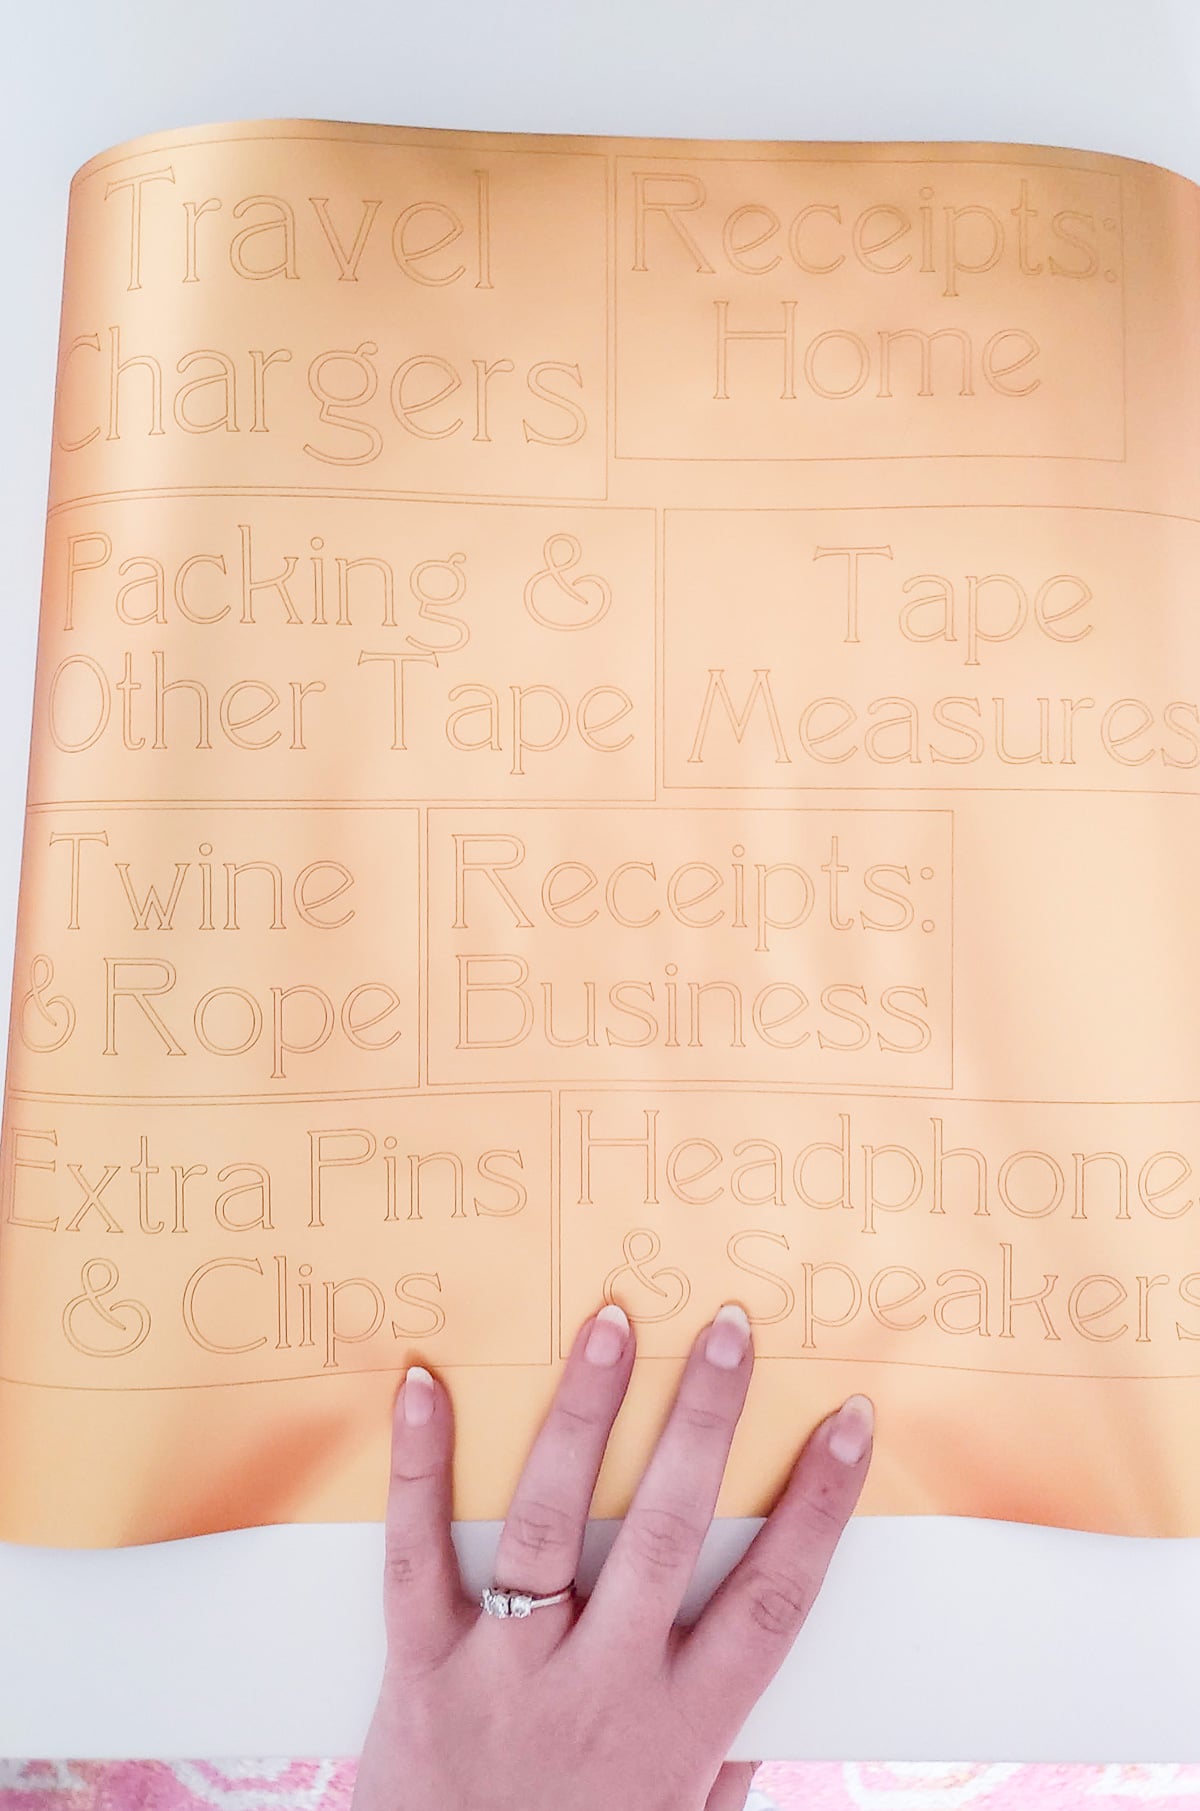
Then it was time to “weed,” which just means removing everything we don’t want.
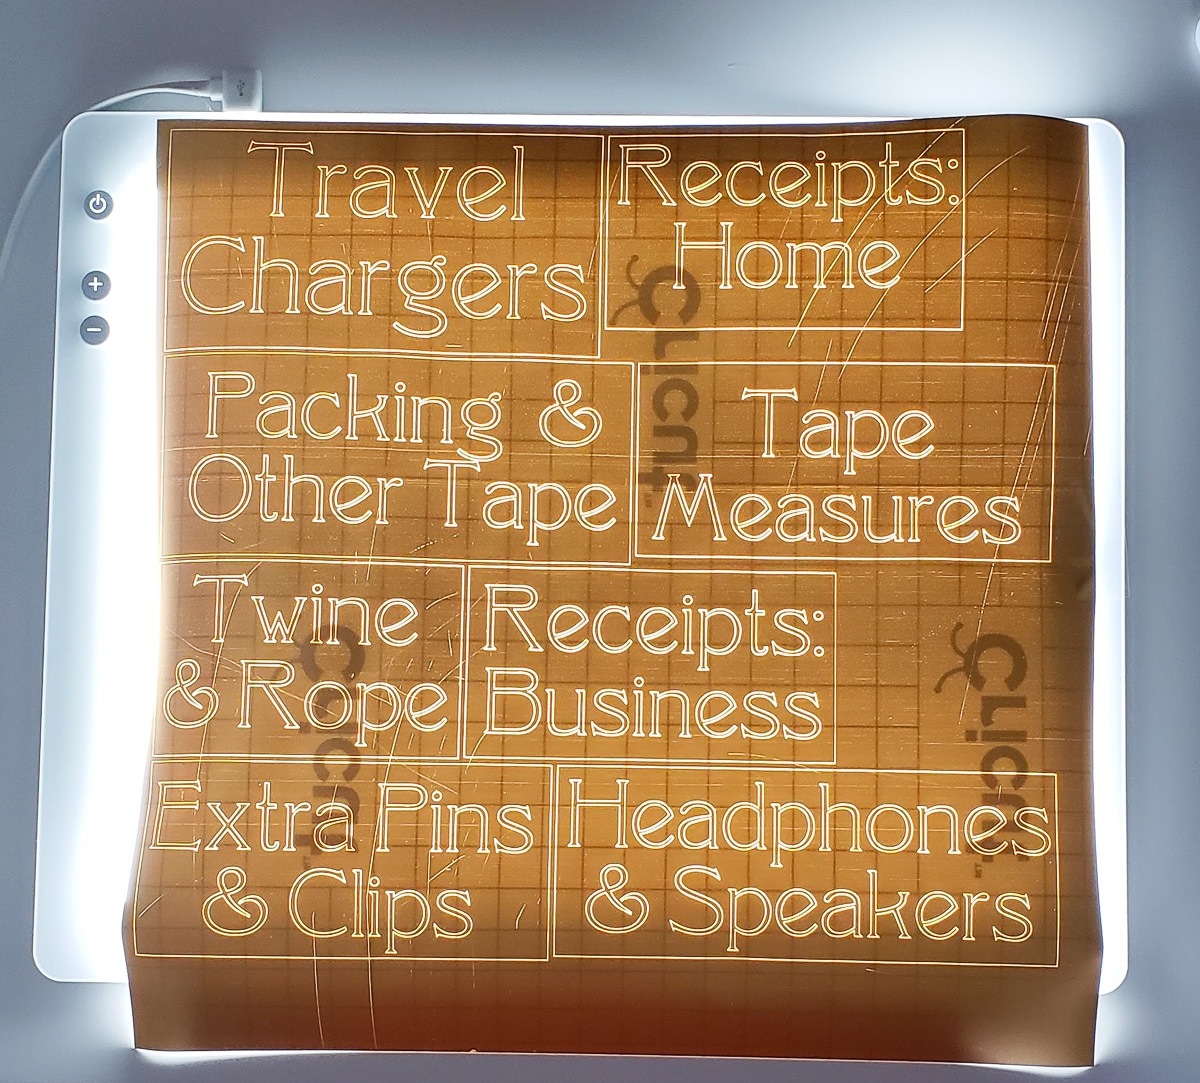
Cricut also sent me a BrightPad, which is a light box that makes it easier to see the cuts for weeding. I had never used one before and didn’t see how it could make that much difference.
OH MY GOSH, it’s amazing! I didn’t expect it to be something I used very often, but I was very wrong. I made a spot for it to stay plugged in near the Maker and I’ll grab it every time I need to weed something.
As much as I’m impressed by the BrightPad, it still falls into the “VERY nice to have” vs. “must-have” category as a label making accessory.
On the other hand, you won’t be able to live without the weeding tools, especially the hook to grab all the pieces you need to remove from your letters. 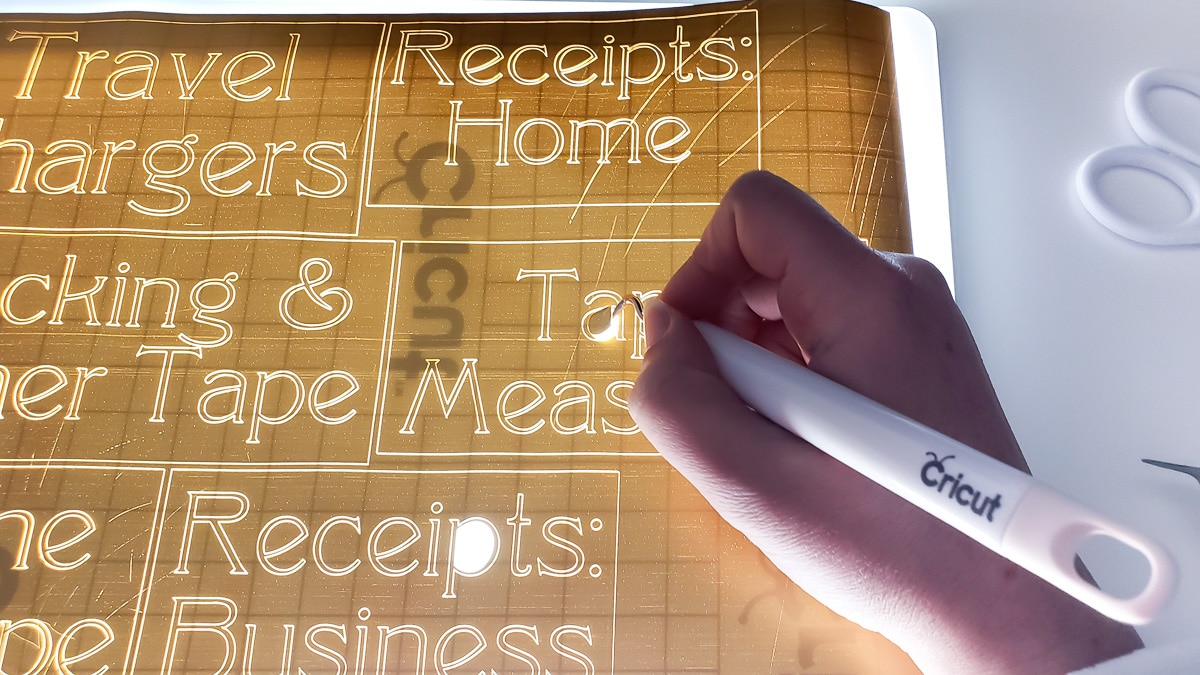
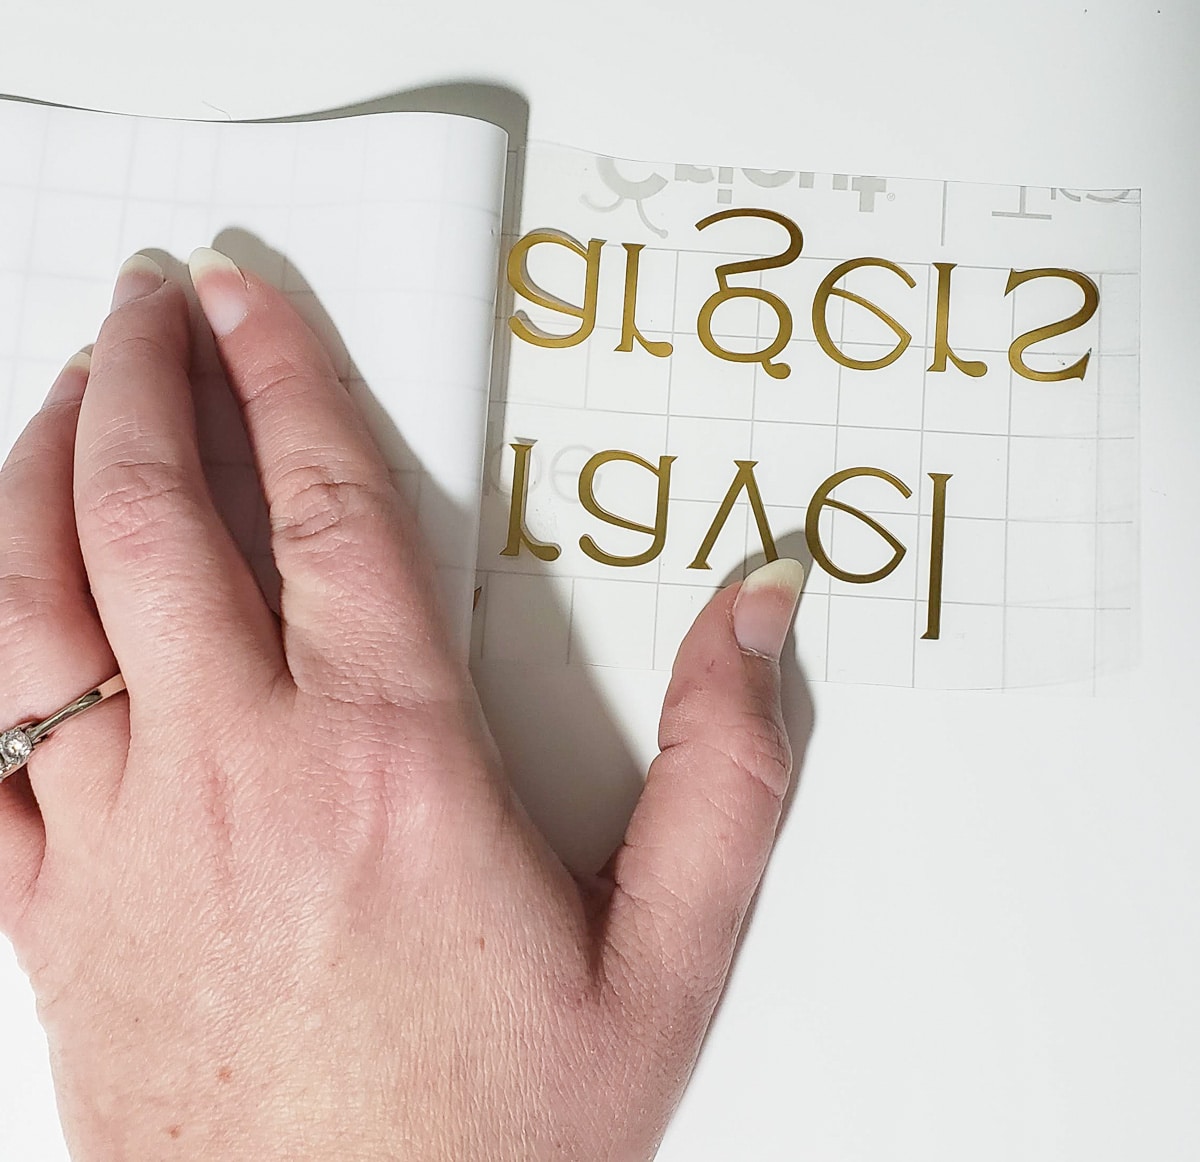
Once you have all the vinyl you don’t need weeded, you’re left with lots of letters.
Luckily, you don’t have to put them on your container individually. You just need some transfer tape, which is a clear sticky sheet to help you move all the labels at once. 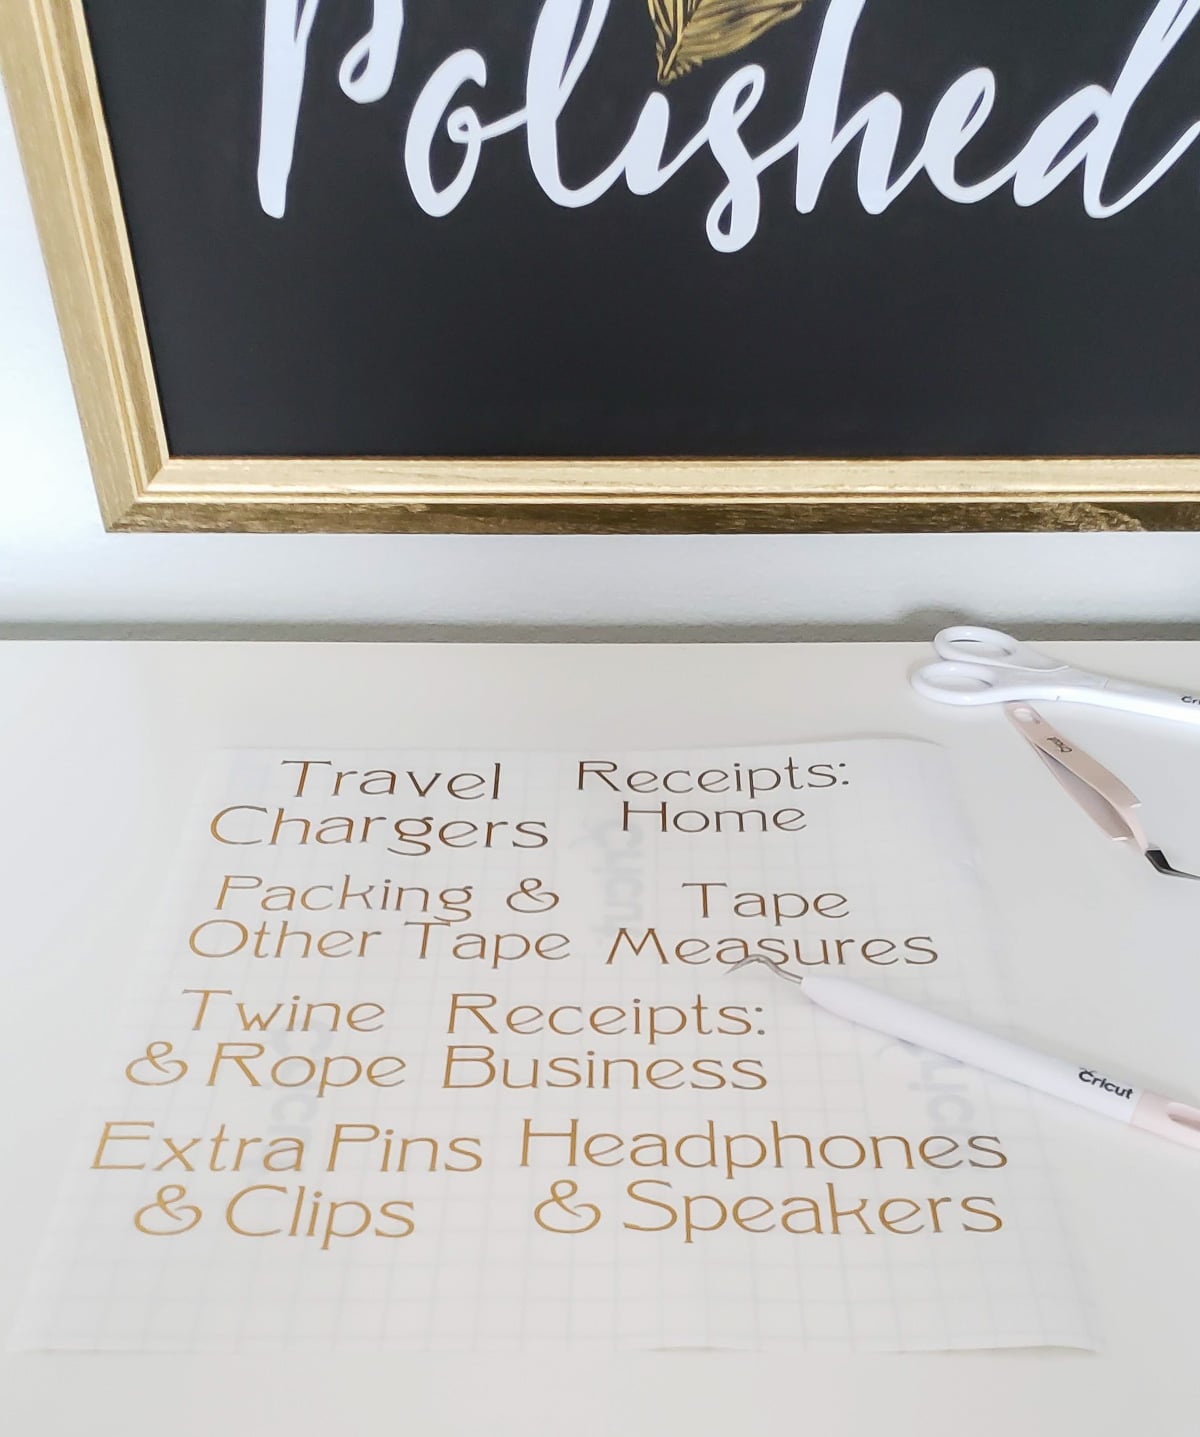
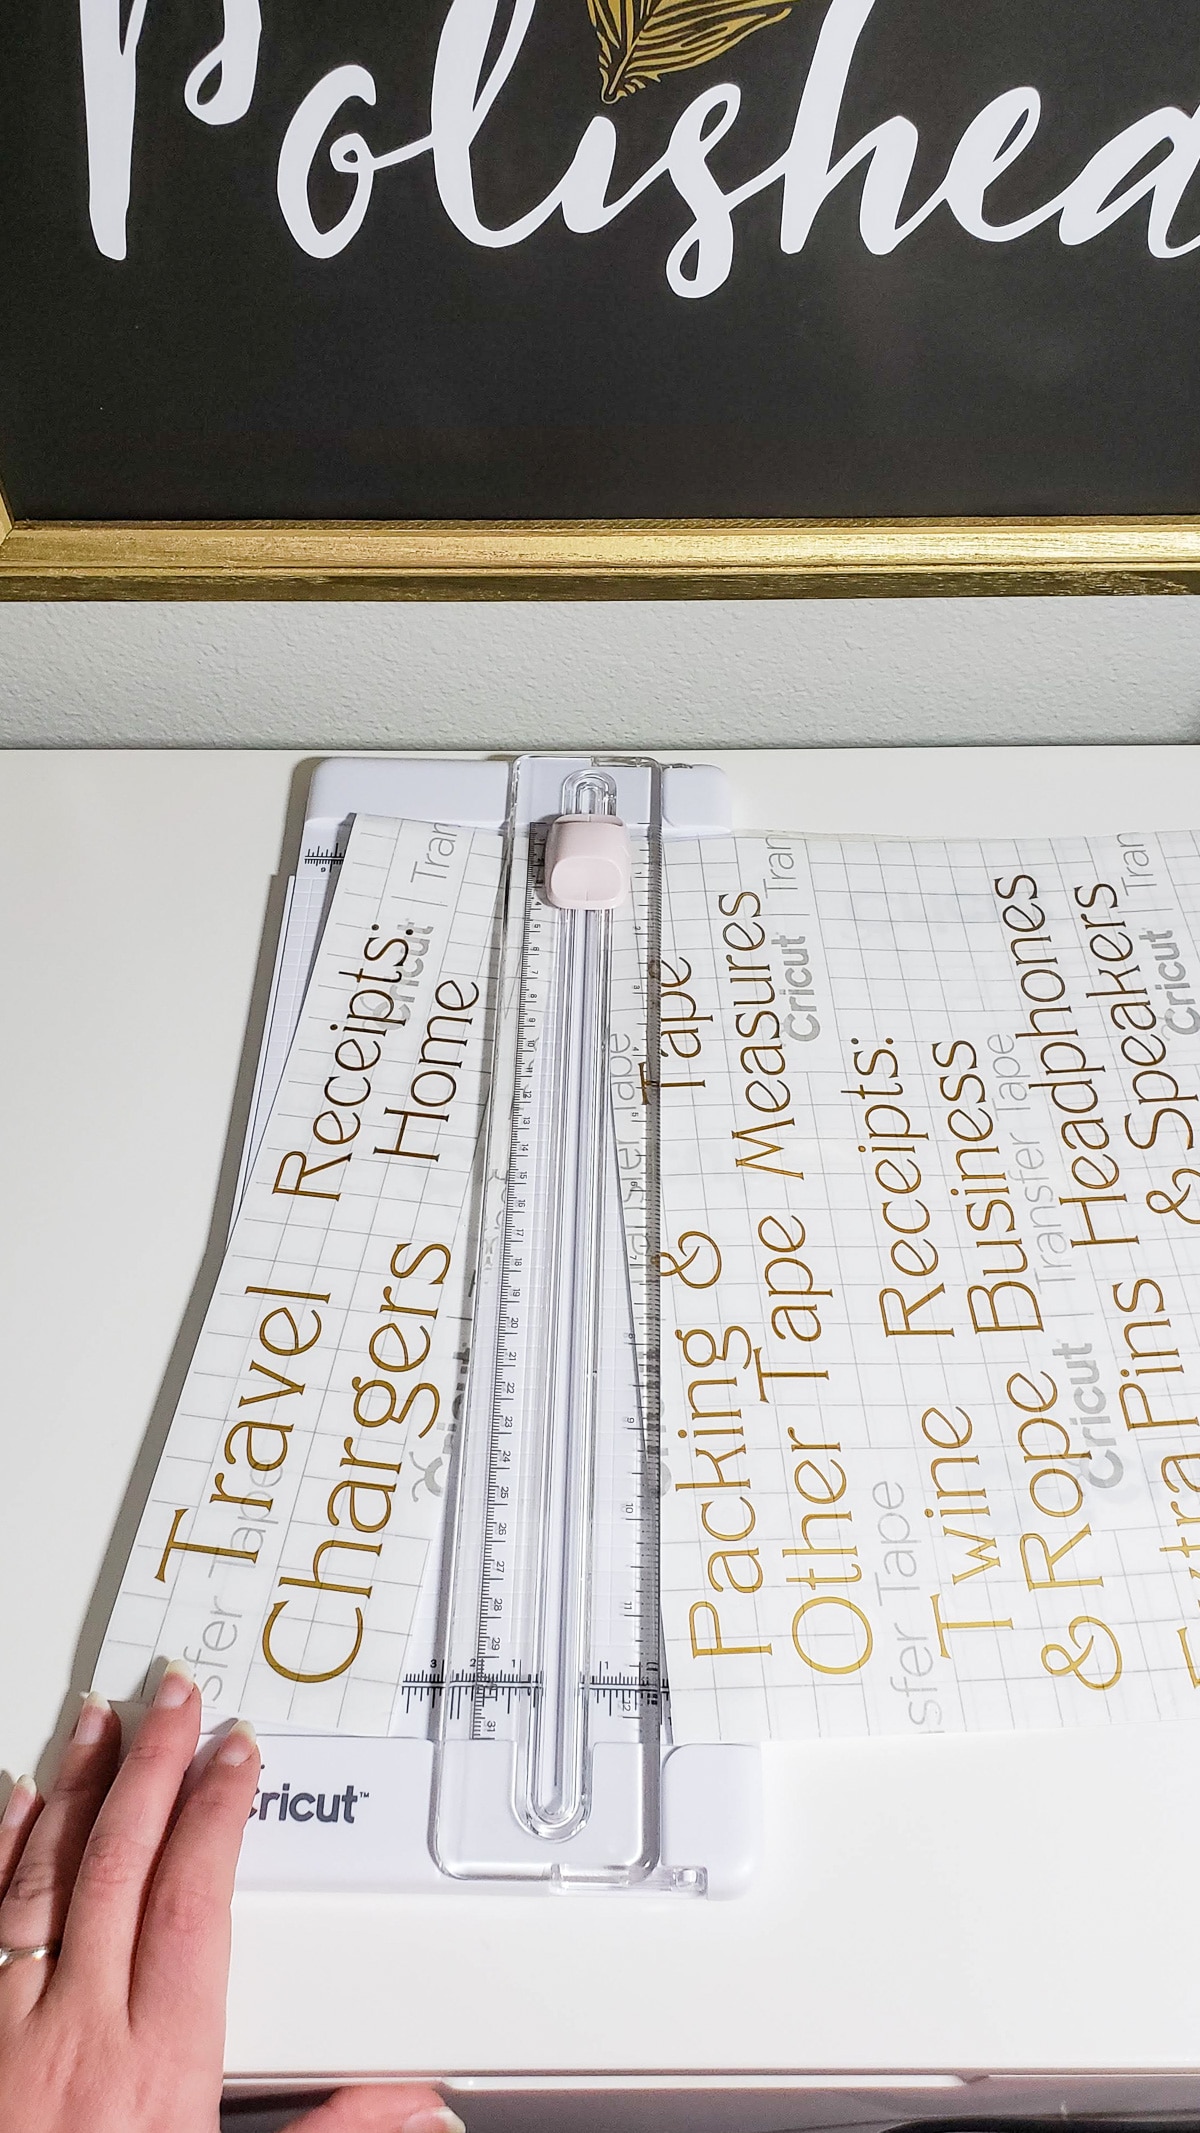
After covering the top of your labels with transfer tape, you’re ready to cut them into individual labels! I used the Cricut Portable Trimmer to get a straight cut, but scissors work too.
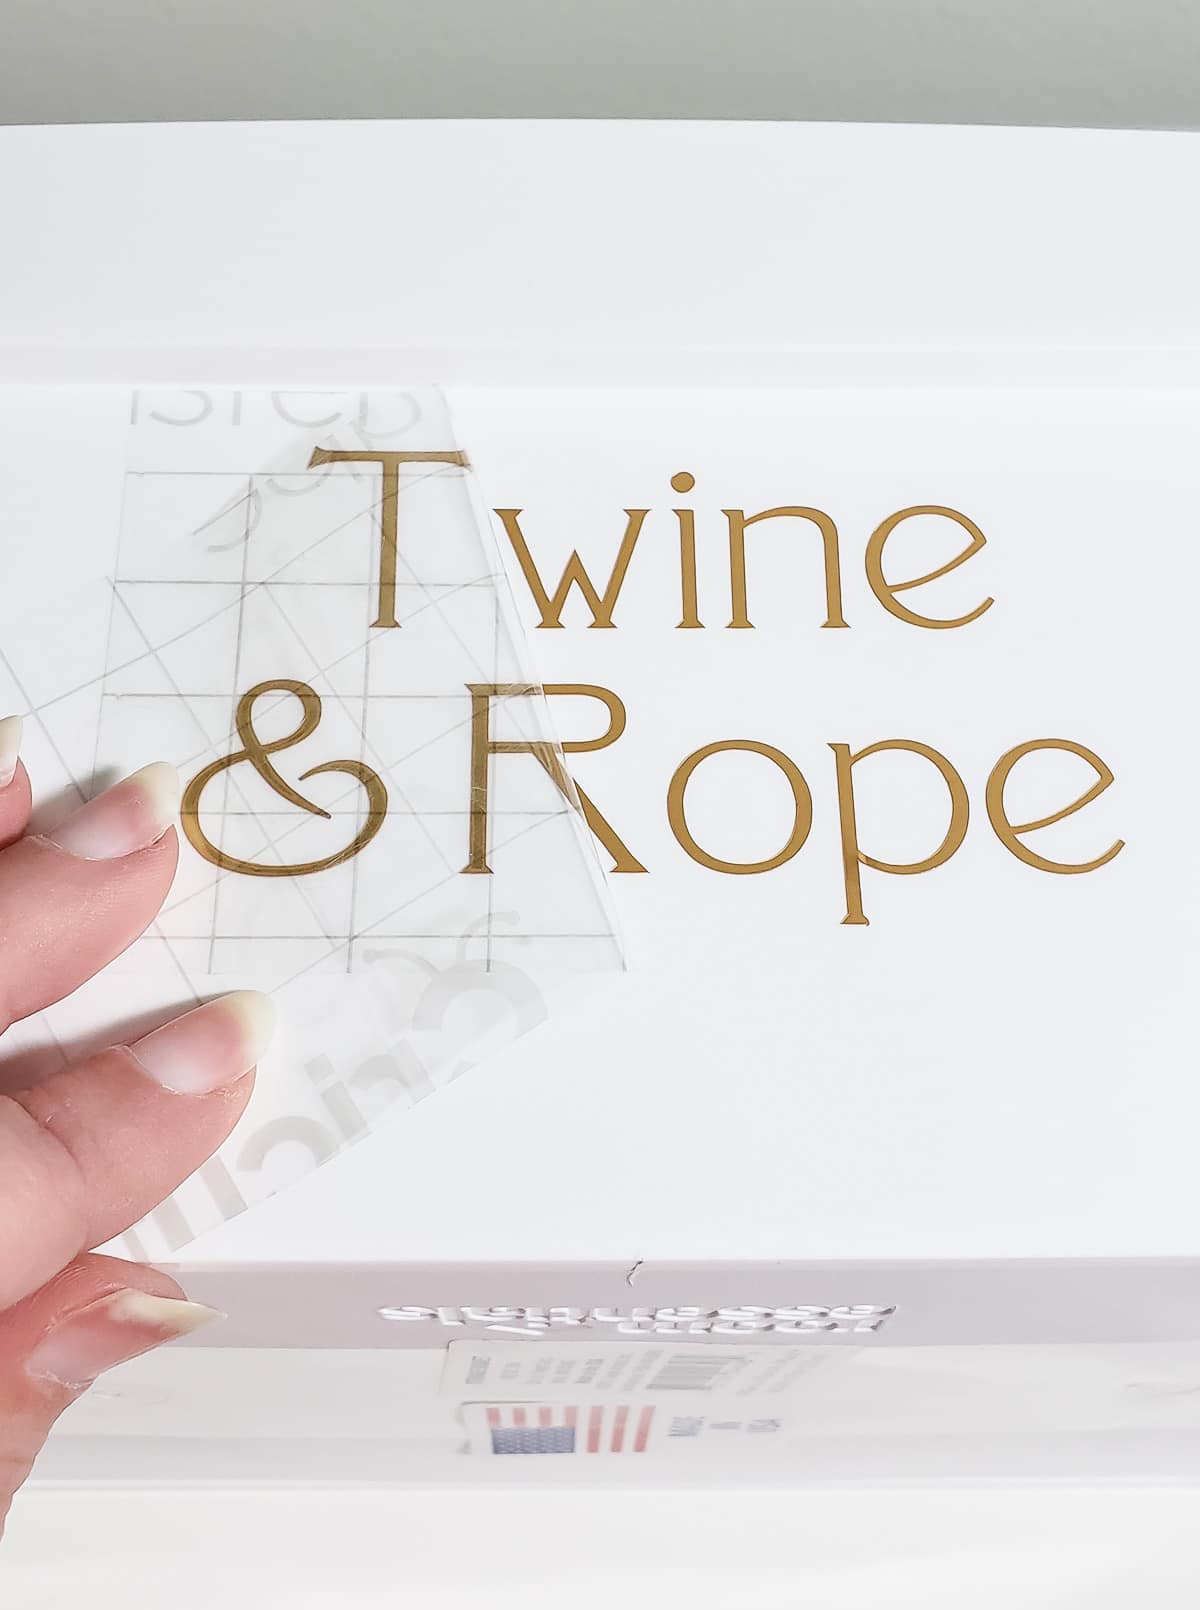
The next part is the best – applying the label to your container! Start by peeling the backing away from your label, leaving the vinyl letters attached to the clear transfer tape.
Center the label on your bin and press it down firmly. Use a credit card or the XL Scraper Tool to apply extra pressure and then slowly peel back the transfer tape.
Tada! Now you have tidy individual letters on your bin!
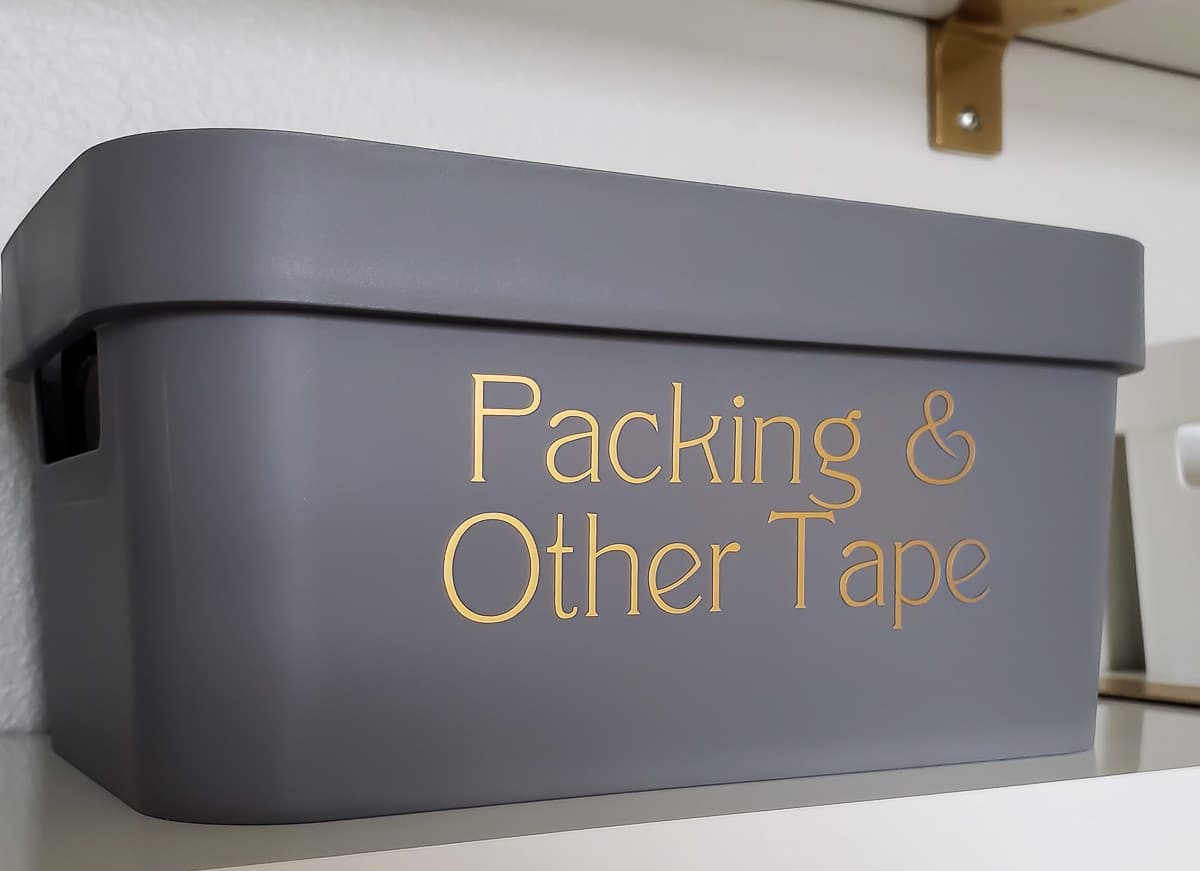
The metallic foil is so pretty and makes the $3 bin look expensive.
My office shelves have never looked better! And with all the bins labeled, they’re going to stay organized much longer.
I’m THRILLED to have the versatile Cricut Maker in my arsenal of organizing tools.
It’s such a bonus that it can also do so many other projects. I can’t wait to test out cutting balsa wood or matboard! There are also some fun sewing patterns where the Maker cuts the fabric and even marks it with a washable fabric marker, so all I have to do is follow the instructions to sew it up.
Now that you’ve seen how I label plastic bins, pop over to see how easy it is to label fabric bins!
Cricut machines and accessories are currently available in Michaels (including in Canada), and coming soon to WalMart and Costco!

Ellen | Ask Away Blog says
I LOVE IT!!! i have a cricut too and i’ve totally labeled ALL THE THINGS lol
Melissa George says
High five for that!
Robyne says
“… coming soon to Walmart ….” Those are the magic words for me Melissa !
Melissa George says
Right? I was excited to find that out too!
KC says
I just love your blog! You make organization beautiful!!! I am in the mist of getting our house ready to sell and am organizing the whole house to get it “ready”! While I would have preferred to do this one room at a time over time, I am getting it done!!! Your ideas have helped me so much in making my closets beautifully organized! Thank you for your tips and tricks, I look forward to taking my “newly” organized closets with me!! PS where did you get your bins from in your latest blog?
Thank you!
Melissa George says
Thank you so much! I’m sure all the work you’ve put in will lead to a quick sale at top dollar! The white and gray bins were from the Dollar Section/Bullseye Playground at Target a few years ago. I think they were $3 and I REALLY wish I would have stocked up with even more of them!
Pam says
Thank you for such detailed and pictures to show how to make the vinyl labels. I had read another blog recently about doing this but the directions with the detailed description and pictures were not included. This was the best and I am going to make a copy and definitely will be doing this.
Melissa George says
Yay! I’m so glad it was helpful to have the details! I know I was confused the first time I tried to make them, but once you’ve made it through the process once it gets really simple. I would say for your first go round, I’d go with a regular vinyl (it comes in tons of colors including gold) over the exact foil I used in the post. It took me a bit longer to weed the foil than it does regular vinyl and might be better to try once you’ve made a few labels with regular vinyl. Happy organizing!
lisa lambie says
I am looking at buying a cricut. not sure which one to get. any suggestions?
Melissa George says
Hi Lisa, I think it depends on how you want to use it. For making labels like this, creating heat transfer patterns for shirts or bins (I’ll show that next week!) or paper crafting, the Explore Air 2 is a great value and still really powerful. The Maker was designed to have a lot more pressure so can do more projects like cutting chipboard or balsa wood, so if it’s in your budget and that sounds intriguing, it won’t disappoint. However, if budget is a factor and you don’t need the extra power, the Explore Air 2 might be a good place to start until you know how much you’ll use it. You can always upgrade later!
Lydia says
Hi! My workplace is looking for some storage solutions, and we came upon your blog through Pinterest. We LOVE the white dresser/storage drawers in the photos above and were wondering if you remember where you bought it.
Melissa George says
I do! It’s a NORDLI dresser from IKEA!
Jean says
I just started following you and you are an inspiration. Im remodeling my home office and love your labeling ideas. also, I like your filing cabinets in your picture. Where did you purchase these. Thank you and keep posting.
Melissa George says
Hi Jean, The big unit in the office is actually a dresser from IKEA! It helps me organize and store so many supplies. My actual files are in the desk and on the walls in file organizers.