This is a sponsored post written by me on behalf of Cricut. All opinions are 100% mine.
It’s been a while since we’ve added a new humorous touch to our home, and this sure seems like the right season to add some joy!
Every time I pay for fresh basil at the store, I remind myself that I should be growing it in the kitchen instead. When Cricut was looking for people to customize planters, I took it as a sign to finally get our kitchen herb garden growing!
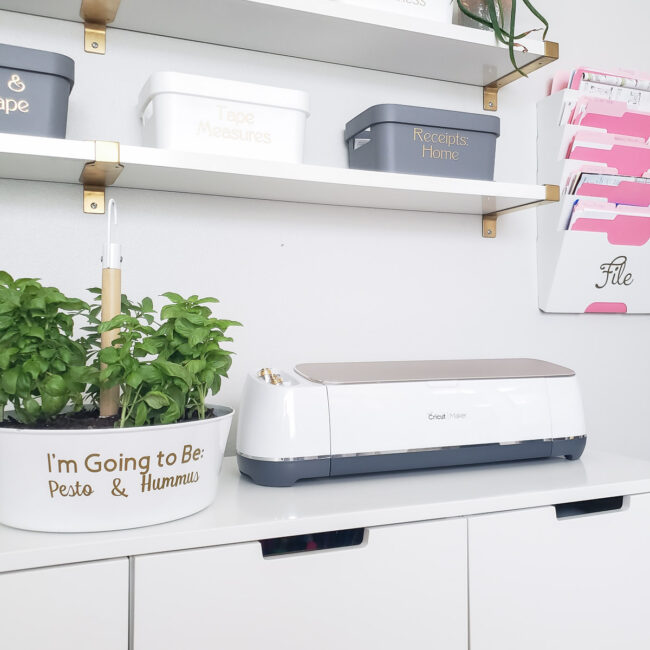
You could build your own planters for this easy project or use something purchased like I did. I love using my Cricut Maker to take something generic and customize it for our home. It’s the perfect DIY companion!
I’m using removable vinyl for my project so I can swap out the labels in the future as needed. But the thing I love most about the Maker is that I could have done this project with so many different materials.
It can cut, draw, score, deboss, or engrave and works with a total of over 300 different materials. The flexibility makes it a great value as a tool for your home projects.
I’ll show you how easy it was to make my personalized planters and then give you some ideas for alternate ways to label your own planters with the Maker.
How To Design a Planter Label with Cricut Design Space
Instead of labeling my planters with the obvious names, like basil and mint, I decided to identify them by their most common future purposes. In other words, what would by herbs be when they grow up?
To get started, I measured the side of my planters to know how big I should make my design.
I choose the Cricut Sans font for the top line, and then the Quirky Script for the 2nd. When working with a script font, you’ll often need to adjust them to get a true cursive look.
I started by reducing the letter spacing to -0.4 so all the letters squished together, but there were still a couple of spots that didn’t join correctly just because every letter combination is different. To fix those, I ungrouped the phrase to be individual letters that I could move around.
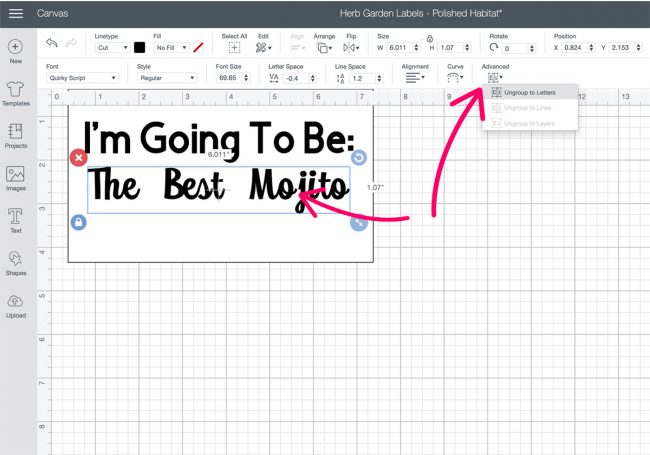
You’ll notice that you now have each individual letter as it’s own layer in your layer toolbar on the right side.
Once you have all your letters moved and looking good, you’ll want to weld them back together into one phrase before cutting. Just select all the letters and then click weld at the bottom of the layer bar.
Once you’ve clicked weld, your phrase should all be one layer again like the next image.
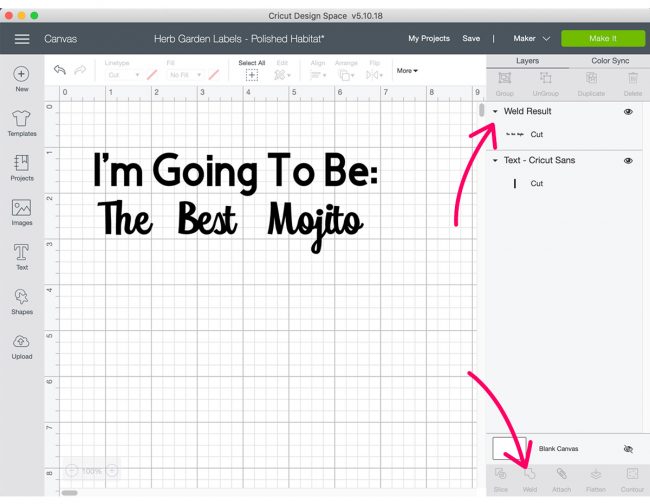
Now all you have to do is press Make It and select your materials to cut.
One caveat with planters – If your planter has slanted edges, when you apply your straight words, they will look bowed. You may need to add an extra step and curve your design. Because my planter is skinny at the bottom and wide at the top, I needed to curve my design like a rainbow. To do this, use the curve feature in Design Space BEFORE separating the letters. I used a 60 as the curve.
If you have the same IKEA planters I do, you can skip the design step and get my cut files here.
Now that your design is ready, it’s easy to cut and apply to your planter.
Here’s what you’ll need:
Materials:
– Removable Vinyl*
– Transfer Tape
*Use Permanent Vinyl if your planter will be outdoors
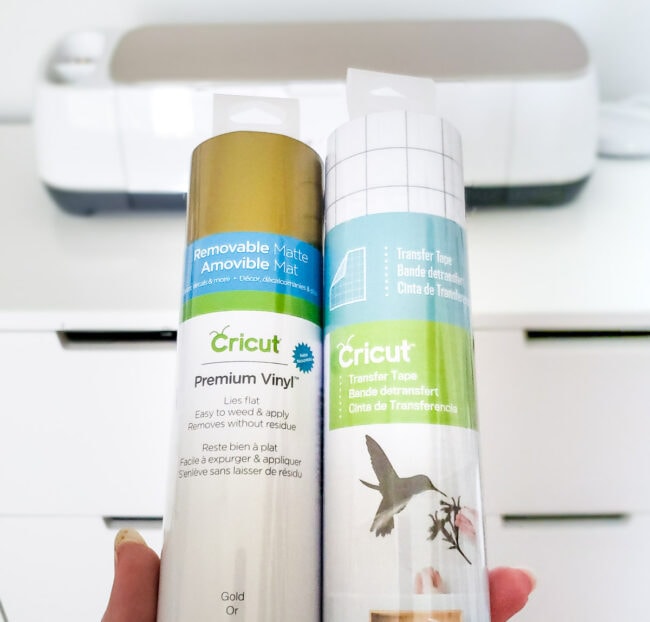
Tools:
– Cricut Maker with Standard Blade
– Weeder
– Scraper
How to Cut & Apply Vinyl:
- Hit Make It in Design Space and select Premium Vinyl as your material.
- Follow the machine prompts to load the vinyl and then press the flashing Cricut logo button to begin the cut.
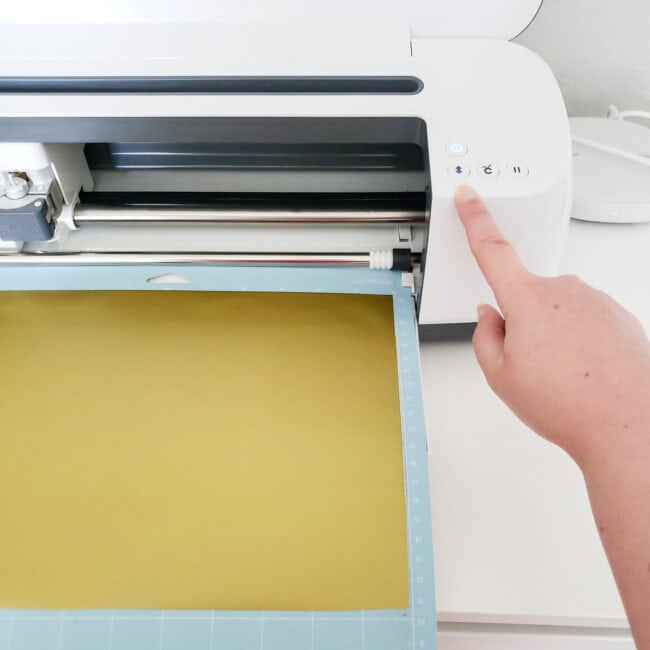
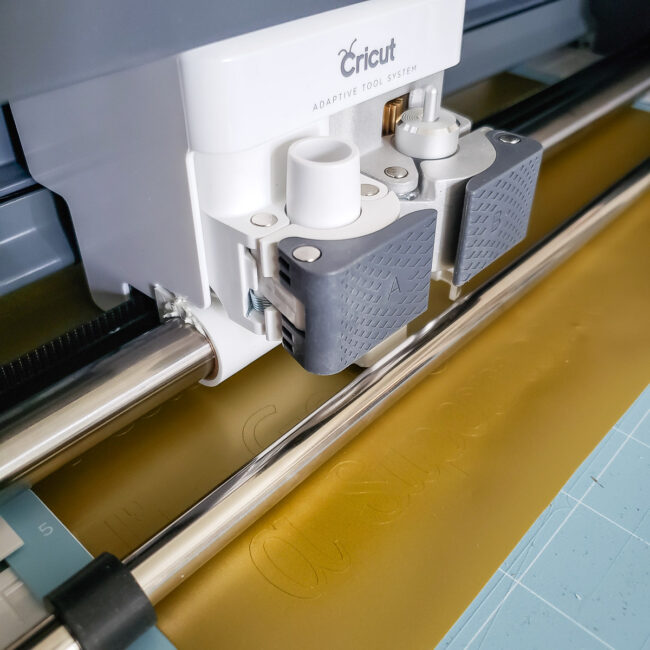
3. When your Maker is finished cutting, unload the vinyl and remove it from the mat.
4. Remove the excess vinyl (everything you don’t want on your planter) by starting in a corner and peeling it back. Use a weeding tool to remove the little pieces inside letters like O.
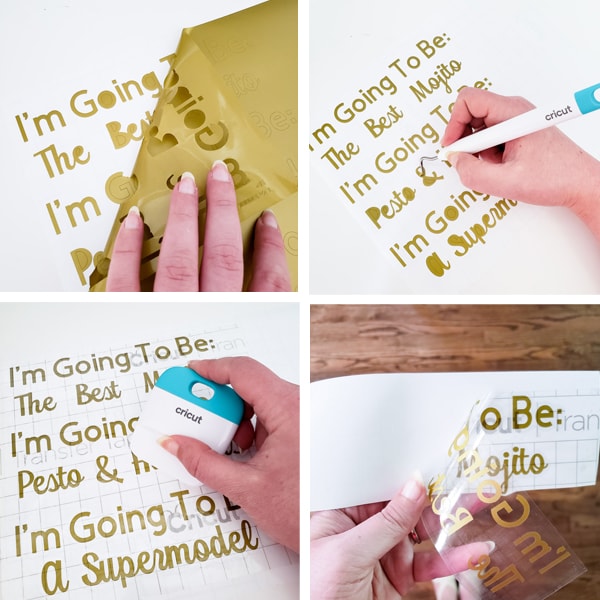
5. After weeding, apply transfer tape to your design and push it down with a scraper. If you cut labels for multiple planters as I did in the photos above, be sure to cut them into individual labels after you’ve applied the transfer tape.
6. The transfer tape will stick to the front of your vinyl so you can move it to your planter. Carefully pull back the transfer tape making sure it’s picking every part of your label up off the white backing. If it doesn’t stick, burnish it again with your scraper.
7. Now you’ve got a sticker to apply to the planter. Press the design onto your planter and use the scraper to press it down. Gently pull back the transfer tape to reveal your finished project!
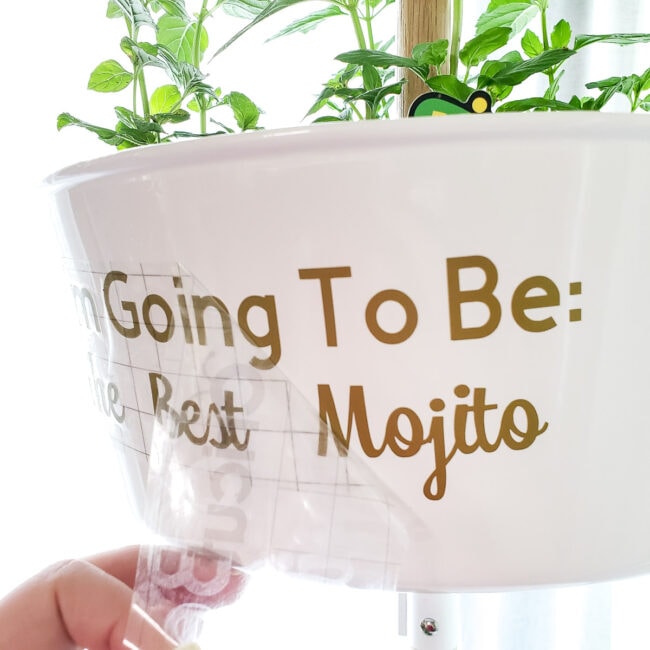
Writing out the step by step process makes it look a bit long, but you should be able to design, cut, and apply a vinyl label like this in under 15 minutes after you’ve done a couple.
I thought there would be a steep learning curve with the Maker since it’s so powerful and versatile, but I’ve had the opposite experience. It makes things easier than I expect. I’ve even started using the mobile app when I’m making things like pantry labels, sending projects to the machine right from my phone!
After applying the labels, all I had to do was fill up my new planters! Since they don’t have drainage holes, they needed a layer of rocks under the dirt to protect the roots from staying too wet.
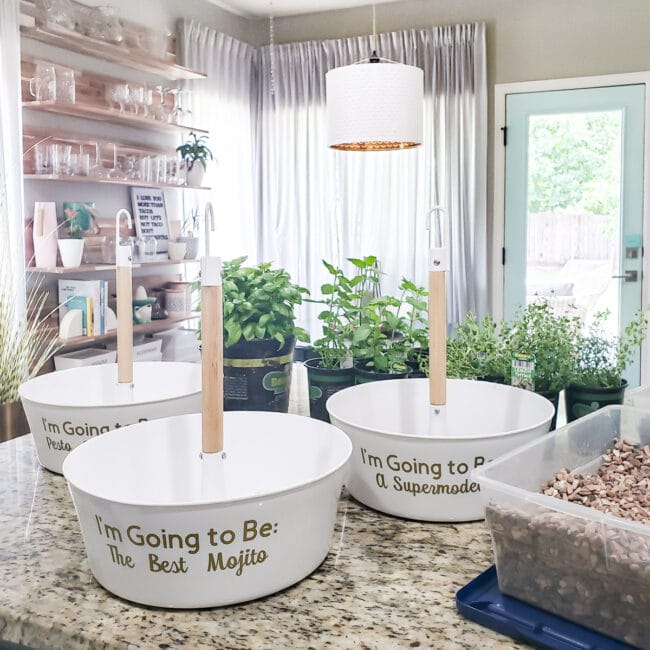
We used a special ceiling anchor since we knew the planters would be heavy, but they still weighed more than we anticipated. About 8.5 pounds EACH. We’re pretty comfortable with the anchor holding two of them, but are going make sure that holds for a while before leaving all three up.
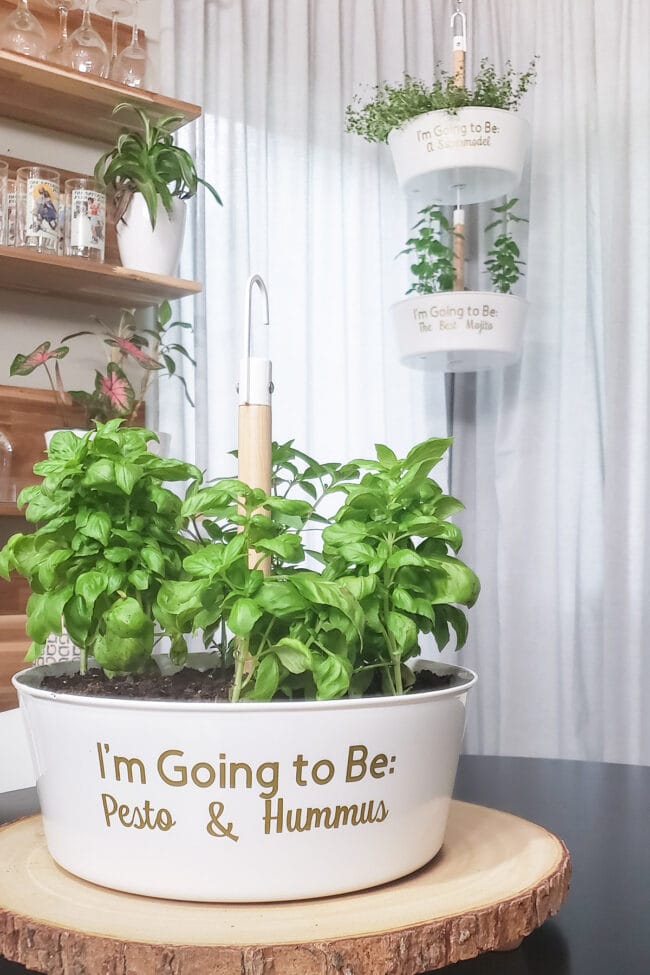
Luckily, the basil looks really cute on the table! The other containers are mint for mojitos or tzatziki and lemon thyme, which I bought largely because it’s really pretty in the top container.
Since it’s harder to reach, I wanted something that looked great and we’d use less often. When trying to decide what to label the thyme, I kept thinking that the main purpose was aesthetic. The theme song to Clueless popped into my head because the lyrics are “I’m Gonna Be a Supermodel”. Having a 90s music reference is totally perfect for our house.
If you want a different look in your home, I added more ideas for your own personalized herb garden below.
5 More Planter Labeling Ideas for Your Maker
- Use the Engraving Blade on Aluminum to make a stylish metal label for a rectangle wood planter.
- Deboss or cut leather tags to hang from basket style planters.
- Use Iron-On on denim for a country/vintage look and glue it to your planter.
- Use Printable Sticker Paper to Print Then Cut an illustration of each herb.
- Use Infusible Ink Coasters as labels on square or rectangle planters.
Isn’t it cool that one machine has so many possibilities even though it’s so simple to use?
For more inspiration, check out the Cricut blog to see new home projects each week!


Becky says
Love the hanging planters. Where can I find these? TIA❤️
Melissa George says
Whoa, sorry I missed this question last month, Becky. The planters are from IKEA!