If you’re new to the design method series, it’s essential to head back to Step 1: Feel & Function before proceeding!
When we left off with Step 3 of the design method, we had begun digging into the fun part of decorating. In that step, we found inspiration pieces that captured the look and feel we each described on our initial worksheets.
Step 4 goes a bit further, and we’re going to make mood boards!
You’ll want to have both your Feel & Function and Style Direction worksheets handy, along with an image of your inspiration art. Take a moment to read through everything you wrote and make any tweaks if needed. Decorating is an evolution.
It’s easy to get hung up on HOW to physically put your board together (on paper, on a big corkboard, digitally, etc). While I’ll give you some resources for that at the end of this post, I want to focus more on the thought process of selecting items.
Let’s use my Modern Beach example from step 3 and walk through the process of creating a mood board.
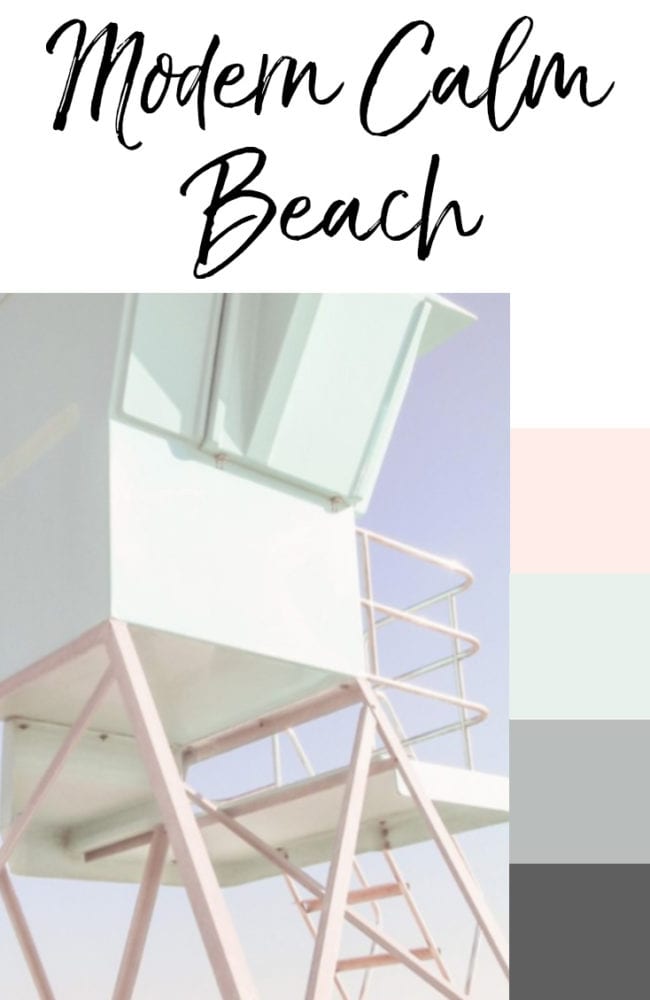
As a reminder, we found this art in the prior step looking for pieces that felt calm, welcoming, relaxing, and reminded me of nature based on the worksheets. Those words could take your room design several different directions as I showed in step 3, but after a recent trip to California, the beach version really spoke to me for this example.
First, I start with my inspiration piece on a blank page and review the color scheme I pulled from the photo.
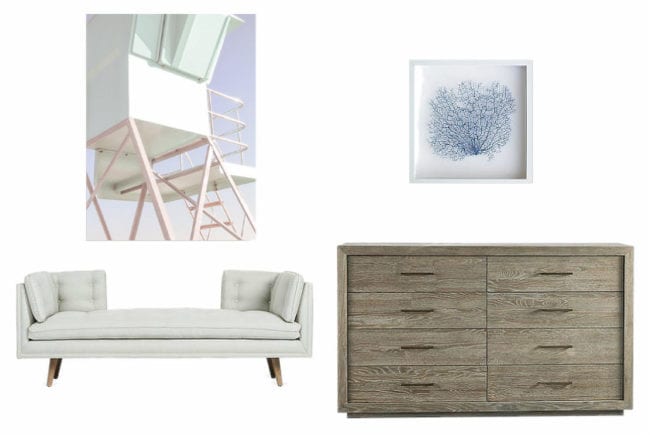
Next, if I have any existing furniture pieces or artwork that I know will be staying in the room for either design or budget reasons, I add those to the board.
Let’s say I had a bench, blue corral art, and dresser that I needed to keep.
My board might look something like this.
In the beginning, I don’t worry too much about where the items are on my page. I just want to have a clear idea of what I have and what I need.
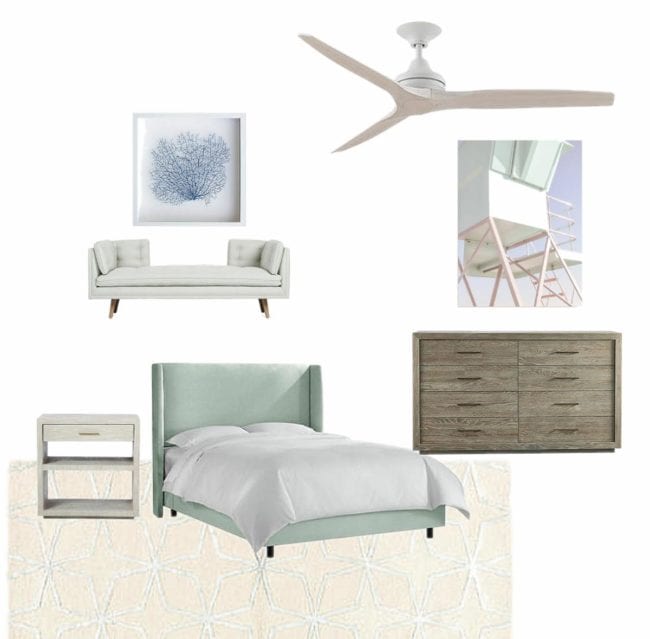
Third, I think about the larger furniture items that are needed to fulfill the functions I listed on my feel and function worksheet. Since those can have the most significant budget impact, I like to figure them out before moving onto accessories.
Throughout the process, I’m constantly thinking about both the color scheme and the feel. In this case, trying to make the space calm, relaxing, and with a natural element based on the work we did in prior steps.
The first furniture piece I looked for was the bed since it would be the largest both financially and space-wise.
I knew I wanted to find something in a soft fabric because that seems more relaxing than a wood or metal bed. After looking at several options, the subtle green caught my eye to balance out the top of the inspiration art. I really like that it feels a bit unique, but also very soft and simple.
The color on the bed led me to search for a more neutral rug. The pattern I found embraces the modern part of our room theme (Modern Calm Beach), but like the bed, still feels relaxing.
Because we were using an existing wood dresser in this example, I opted to look for a lighter nightstand. Trying to match or compliment wood tones can be tricky, so going with a similar shape but contrasting color is an easy way to get it right.
With the core pieces selected, you’ll have a better idea of what you need to finish out the room.
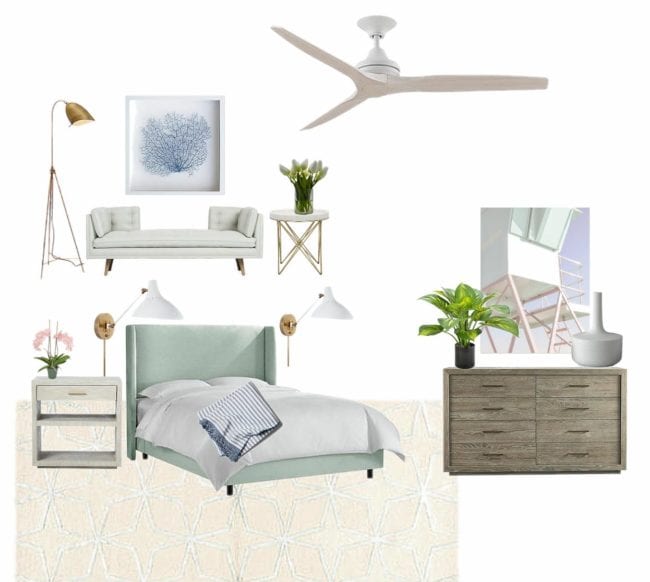
Here are the thoughts I had that helped steer the rest of my choices.
1) We’ve incorporated a little nature with the blue corral, but the room could use a bit more life.
2) The blue corral needs some balance with another pop of blue somewhere else in the space.
3) I love the gold nightstand pull and the bottom of the bench, so more gold might be a winner.
4) I need to incorporate lighting near the bed and bench because the fan doesn’t have an overhead light.
5) I’d love to add a bit of pink to balance the pink-hue in the inspiration piece.
With those things in mind, it’s time for another round of prioritization. This time the lighting is the biggest need on the list.
Knowing I wanted to add more gold, I narrowed the lighting search to gold floor lamps and wall-mounted fixtures. For the bedside, I love that wall-mounted options don’t take up valuable nightstand space.
To add a bit more blue, the solution was as simple as adding a striped throw to the end of the bed. Nature and pink were added in the form of plants and flowers to finish out my mood board!
A few more things about creating mood boards
- You can either use the exact items you plan to use in your room, or just items similar to what you’d like to find. Using the similar method is perfect if you love to score deals at garage sales or on local sale sites. You’ll have a vision in mind and be able to pounce when the perfect piece comes along.
- This process can be as simple as cutting images out of magazines and pasting them together onto one board or pinning them to a corkboard. You can even take quick pictures of existing pieces and print them out for your paper mood board.
- I used a free website called Olioboard to make all the mockups in this post. There is a great free tutorial for using Olioboard here.
- Don’t expect to love the first version of each item you select for your board. It’s a trial and error process. You may find a bed you think is perfect, until you completely fall in love with a piece of art. Then, you may end up back to square one because the bed doesn’t work with the art.
- If you picked an inspiration piece that you won’t be using in the room, perhaps a million dollar piece of art that you love, but isn’t quite in the budget, it’s still a good idea to add an image of the art to your board at the beginning. You can delete it or move it to the side once the room starts coming together, but initially, it will help keep your vision on track.
Now it’s time to stop reading and start working on your own space! I hope that sharing my thought process as I put this mood board together will help as you think through your own decisions.
The last tip I have is to not be afraid to test out different options on your board. Nothing is permanent and this process is a great way to experiment without spending any money!
To get a handy email with links to all 4 design method posts AND two free worksheet to help with your own room design, be sure to fill out the box below before you go!


Leave a Reply