This is a sponsored conversation written by me on behalf of Cricut. The opinions and text are all mine.
Although I’d done some serious kitchen organization in the last year, some messy secrets have been taunting me. Today, we’re crossing a big one off my to do list and covering how to organize spices!
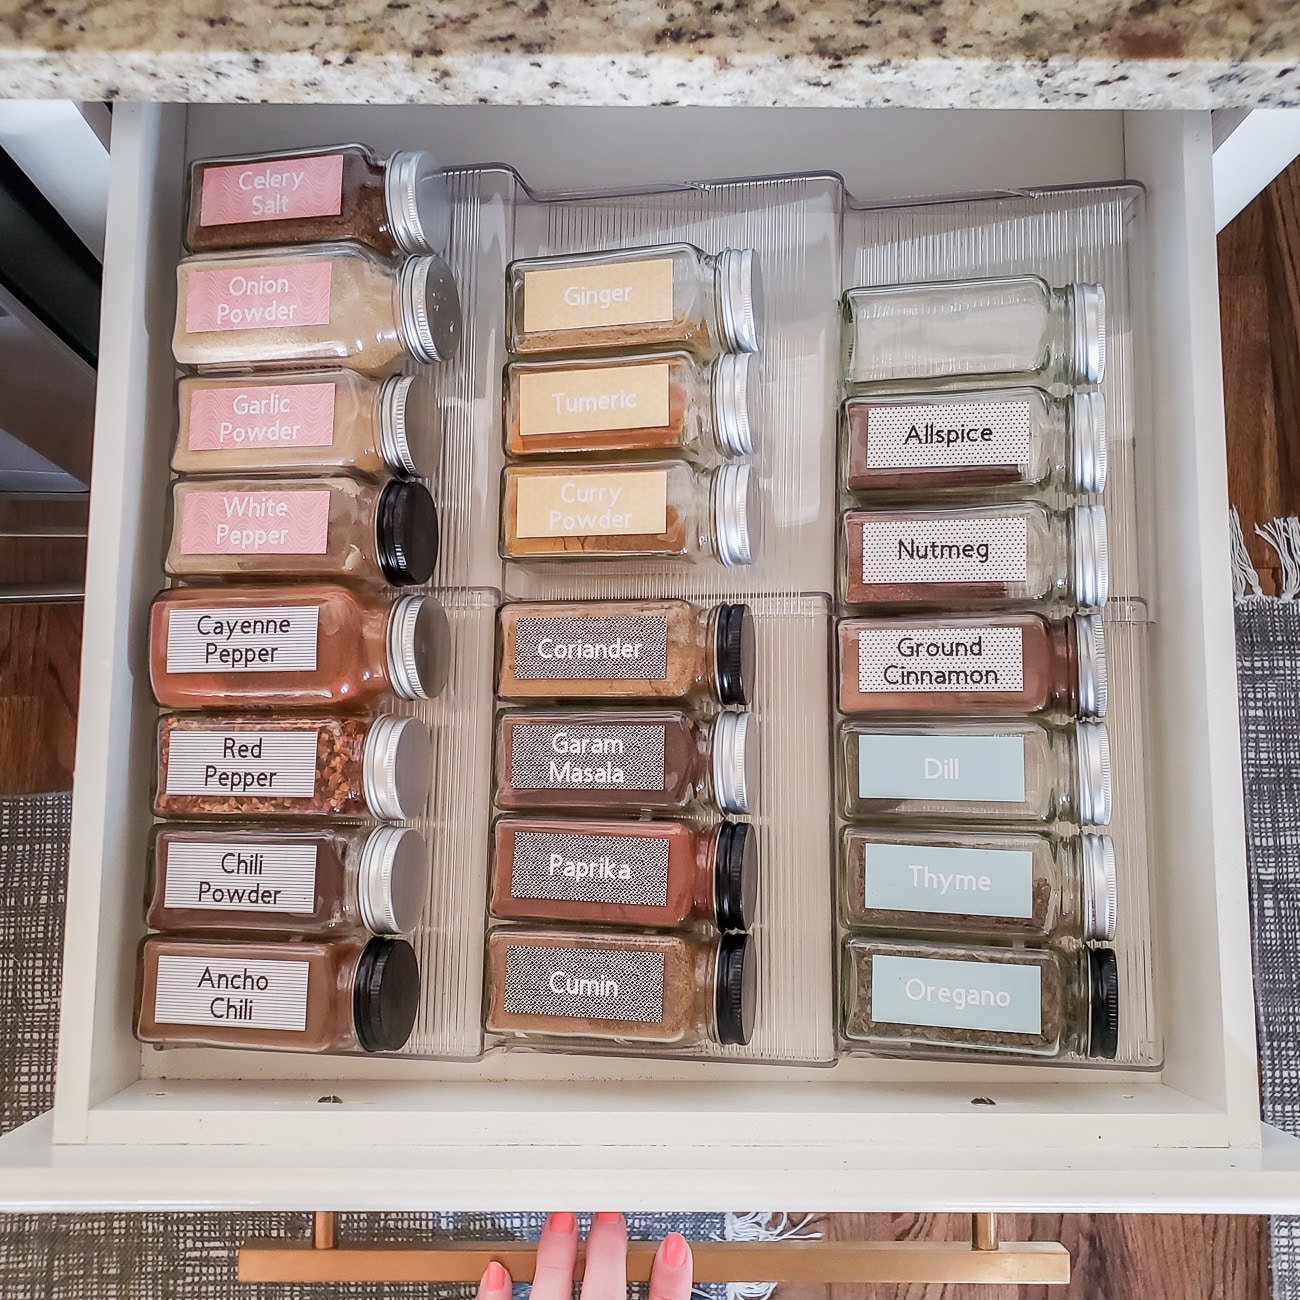
I love keeping spices in a drawer next to the stove because I can see all of them at once.
Well… I could if the drawer was organized. Here’s what it really looked like at the beginning of the week.

Scary, right?
The last few spices we’ve purchased, we’ve gotten from the bulk section of our local grocery store, which is WAY less expensive than buying pre-jarred spices. But the plastic baggies they come in are not ideal for storage or organization.
We also had a mix of spices in my preferred glass, square jars and annoying plastic round jars that roll around.
My first fix was something I should have done long ago – ordering empty glass spice jars. They’re usually under $1.50 each and a great value when filling them with bulk spices.
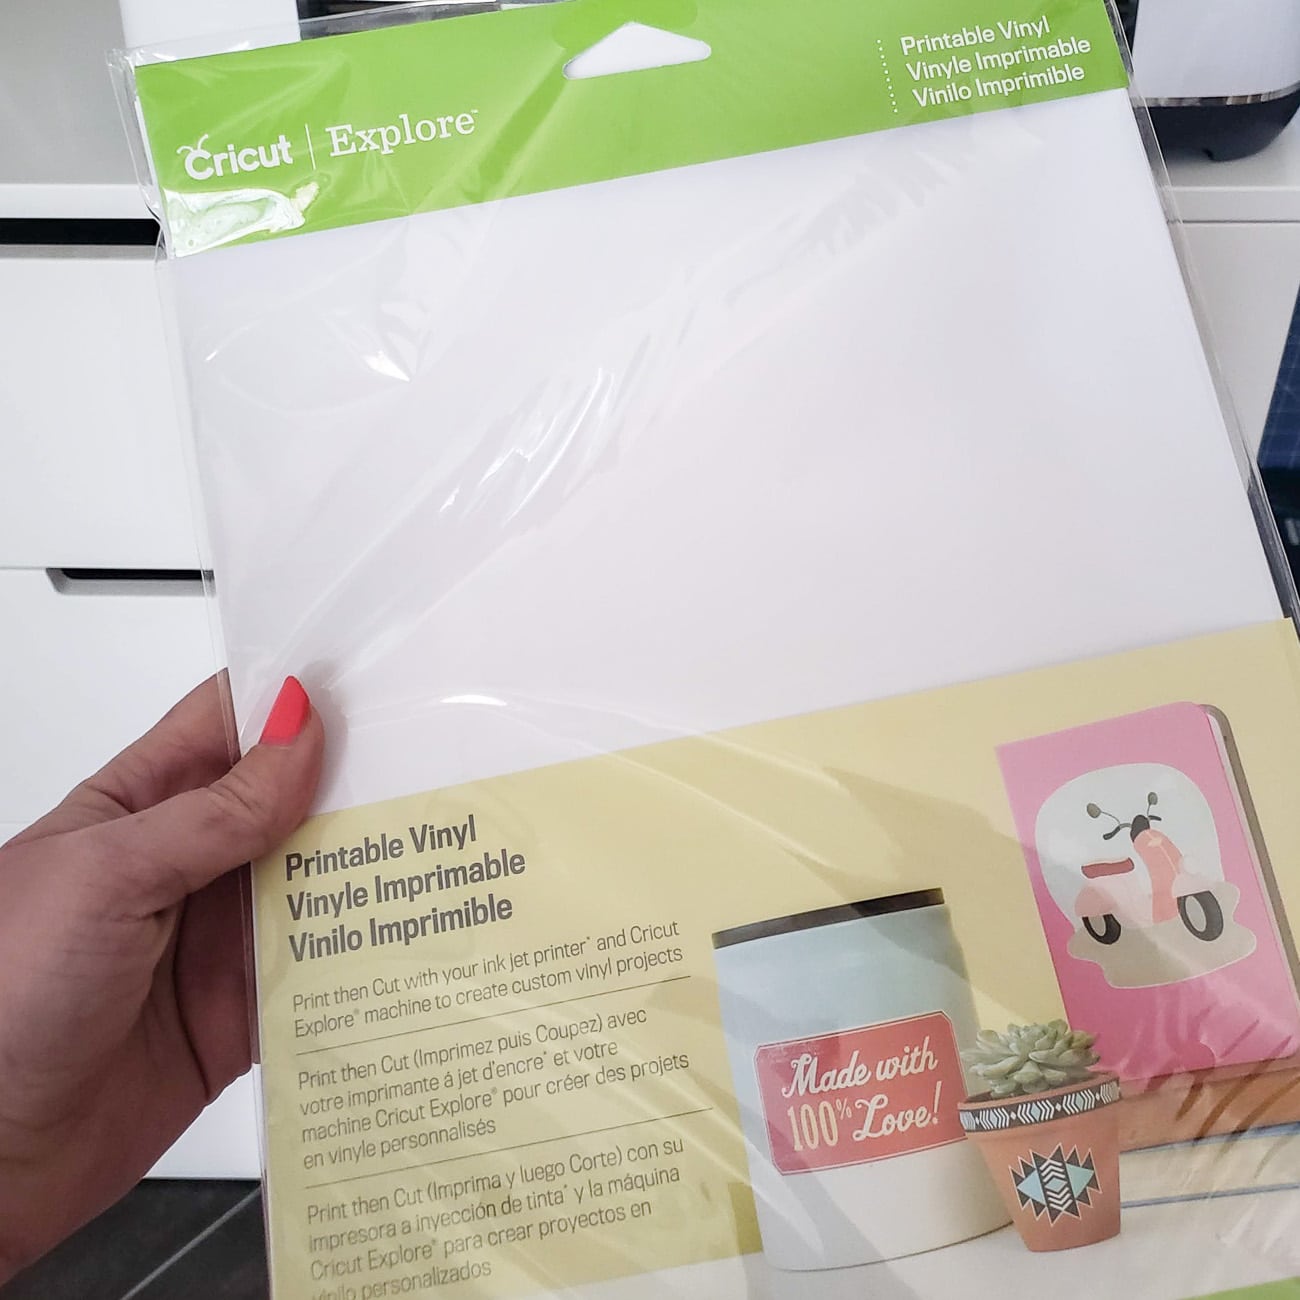
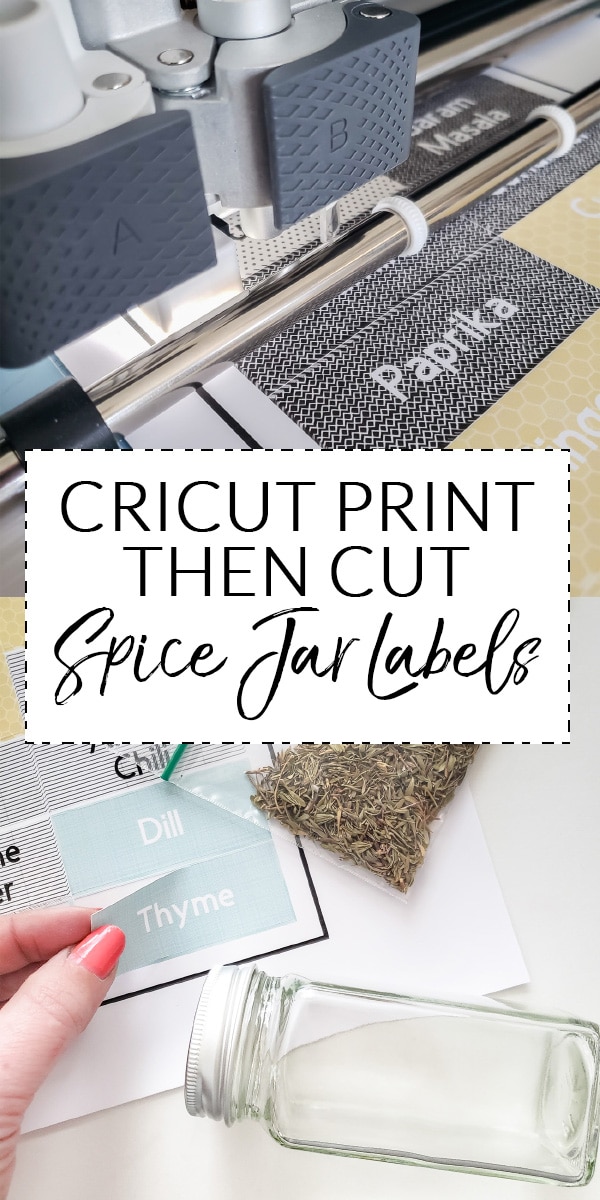
Once I had the new jars, I was ready to make them pretty! It was a good chance to try out Printable Vinyl for the first time using the Print Then Cut feature with my Cricut Maker machine.
Despite making vinyl labels for years, I was a bit intimidated by this new-to-me method. As usual, there was nothing to fear – it’s SUPER simple!
You can actually download my exact labels in Design Space here, but I’ll also show you how easy it is to make your own.
How to Print Then Cut in Design Space – Spice Labels
1) Use the Rectangle Shape Tool and size the rectangle to your jar.
2) With your rectangle selected, change the Fill dropdown to Print. Then click the square next to it and change the Print Type to Pattern to open all the fun backgrounds you can print for your labels.
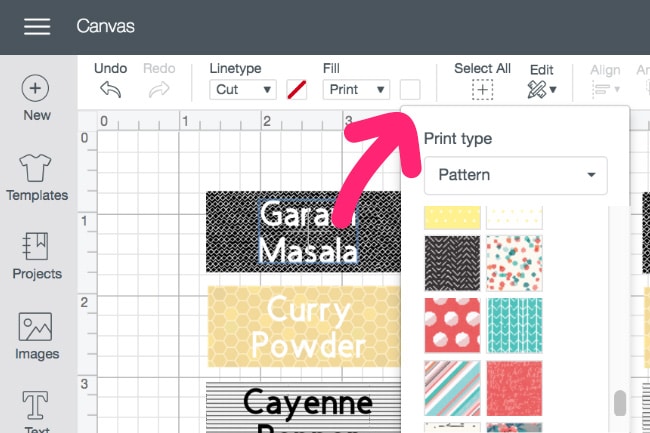
3) Use the Text tool to type out the spice name, sizing it to fit in your patterned rectangle. Use the same Fill > Print option for your font, changing the color as needed.
4) Select the rectangle background and the spice name together. Hit Align, then Center on the top toolbar to perfectly center your text within the background.
5) With both still selected, click on Flatten in the lower right toolbar.
The Flatten tool preps your label for the Print Then Cut process by combining your text and rectangle into one comprehensive label. It tells the Maker not to separate them AND not to cut out the individual letters. Once the label is flattened, it will only cut out the outside of your label.
When you’ve designed all the labels you need, you’re ready to hit Make It just like any regular Cricut project.
Design Space will walk you through everything step by step, first printing your labels on your ink jet printer. I have this printer and it worked flawlessly with the printable vinyl.
Printing Tip: Anytime I’m printing to a special material or paper, I have the best luck only putting one piece in the tray at a time to prevent feed errors.
When your printer is done, continue following the directions in Design Space, selecting Printable Vinyl as your material type.
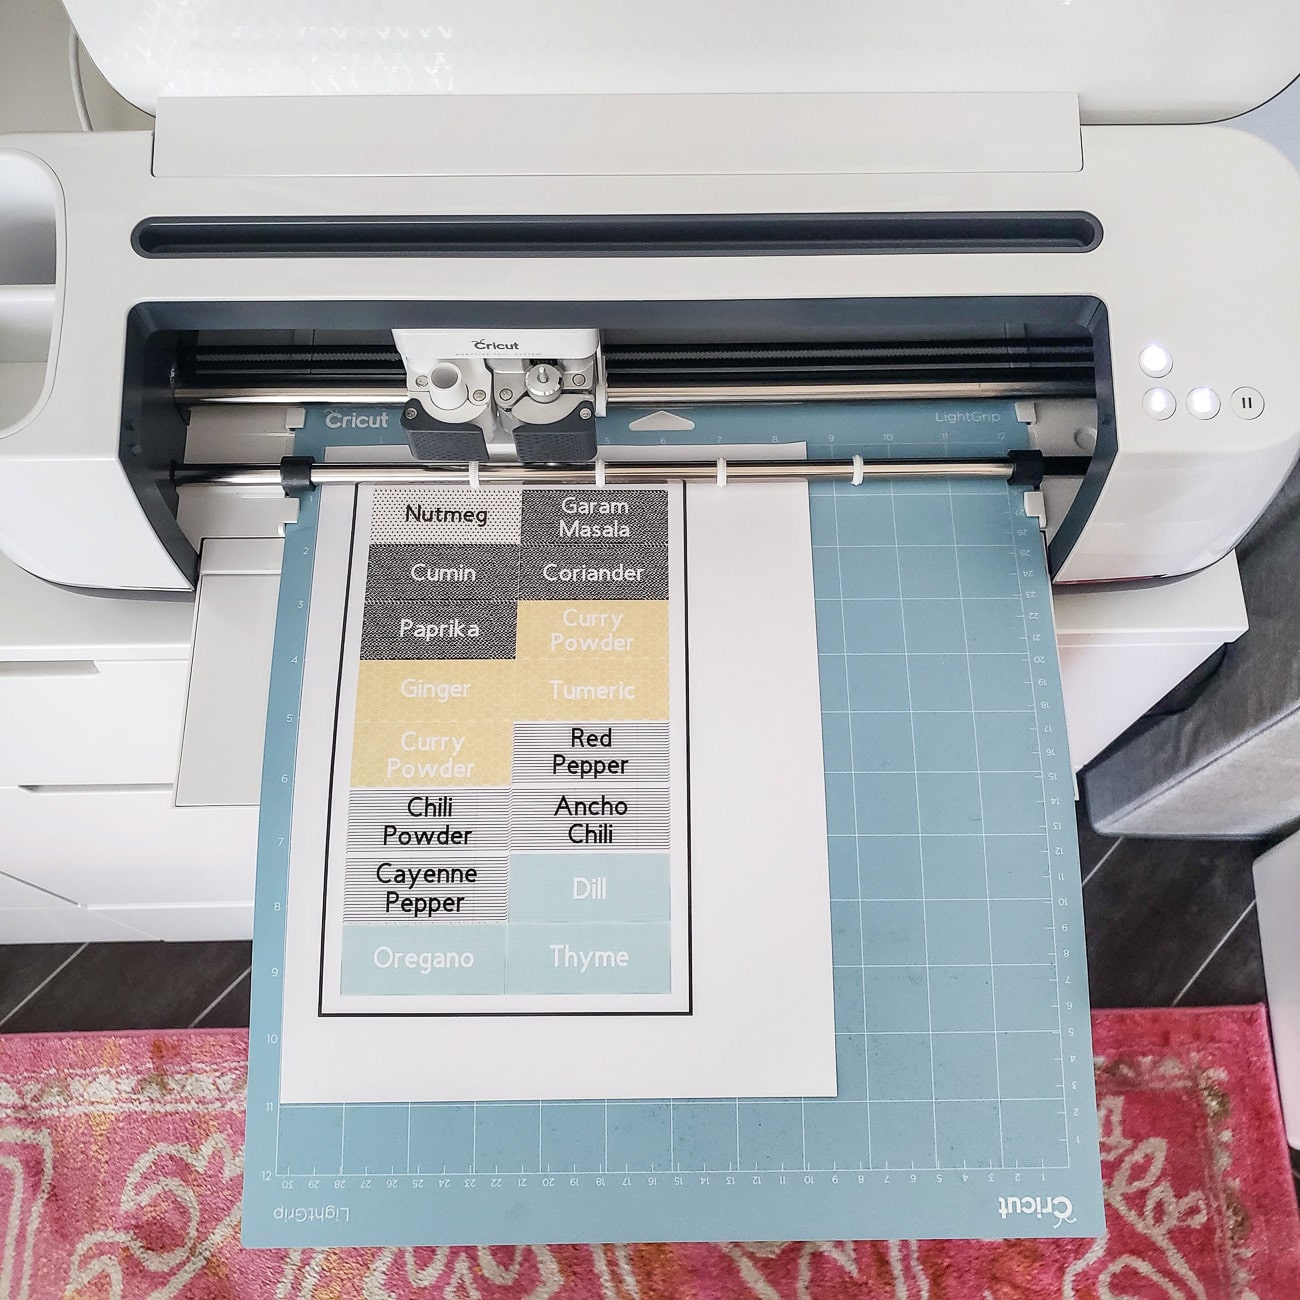
You’ll notice a black box around the outside of all your labels. This is the guideline your Maker will use to get its bearings before cutting out your labels.
I was impressed to see that the Maker has a built-in light that helps it find the guideline. I always avoided testing the Silhouette version of Print Then Cut because I heard horror stories of how frustrating it was and that you had to use a flashlight to help the machine.
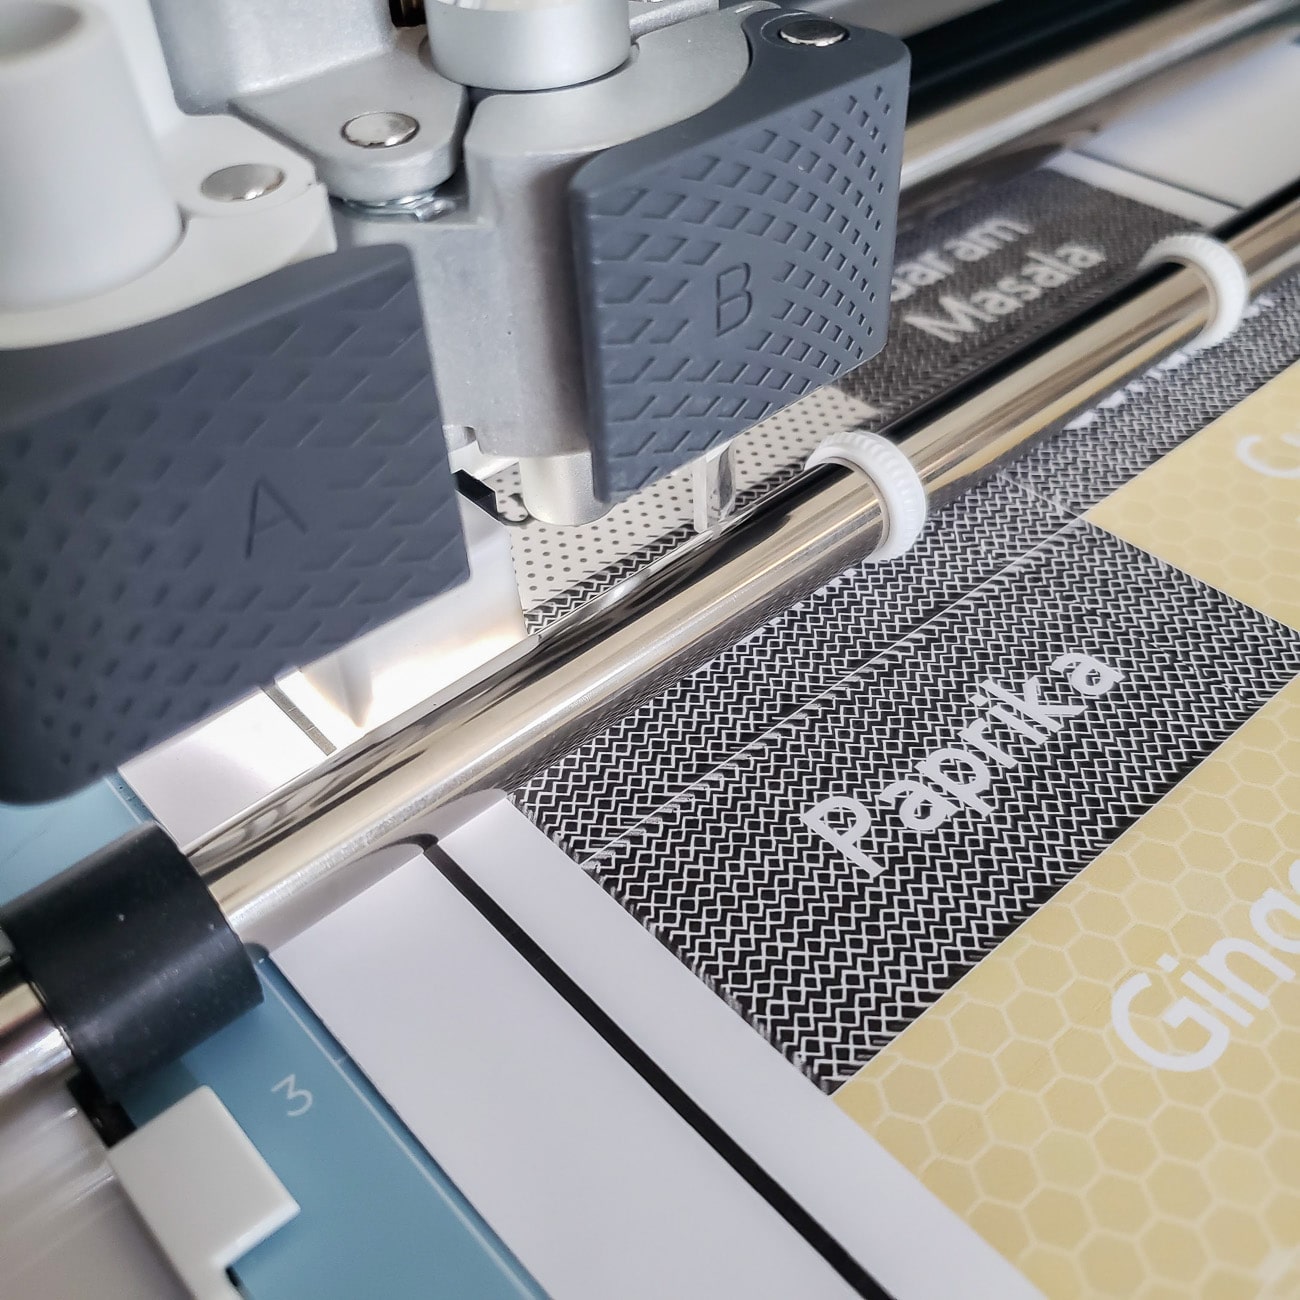
The Maker had NO problem!
With Printable Vinyl, your Maker will perform a kiss cut, which means you’re essentially creating a sticker sheet. The backing will stay solid and you’ll be able to peel the labels off the front as you need them.
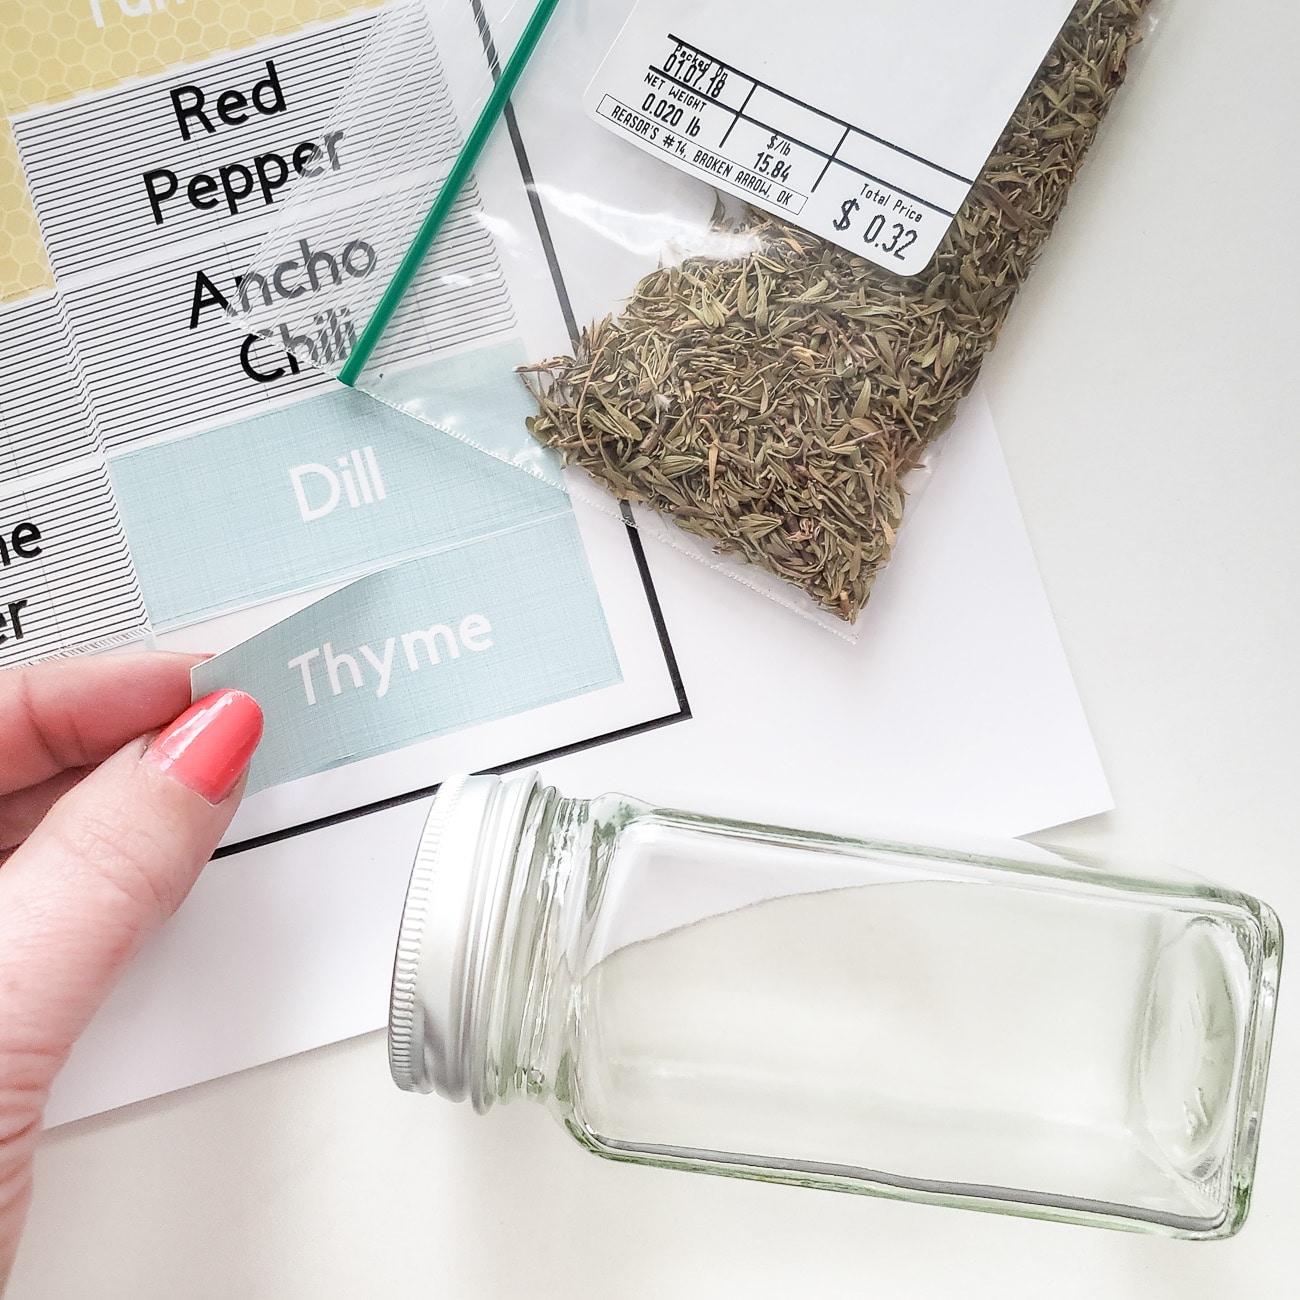
PS: Did you see that crazy price tag – the Thyme was $0.32! This is why it’s worth it to buy your own jars.
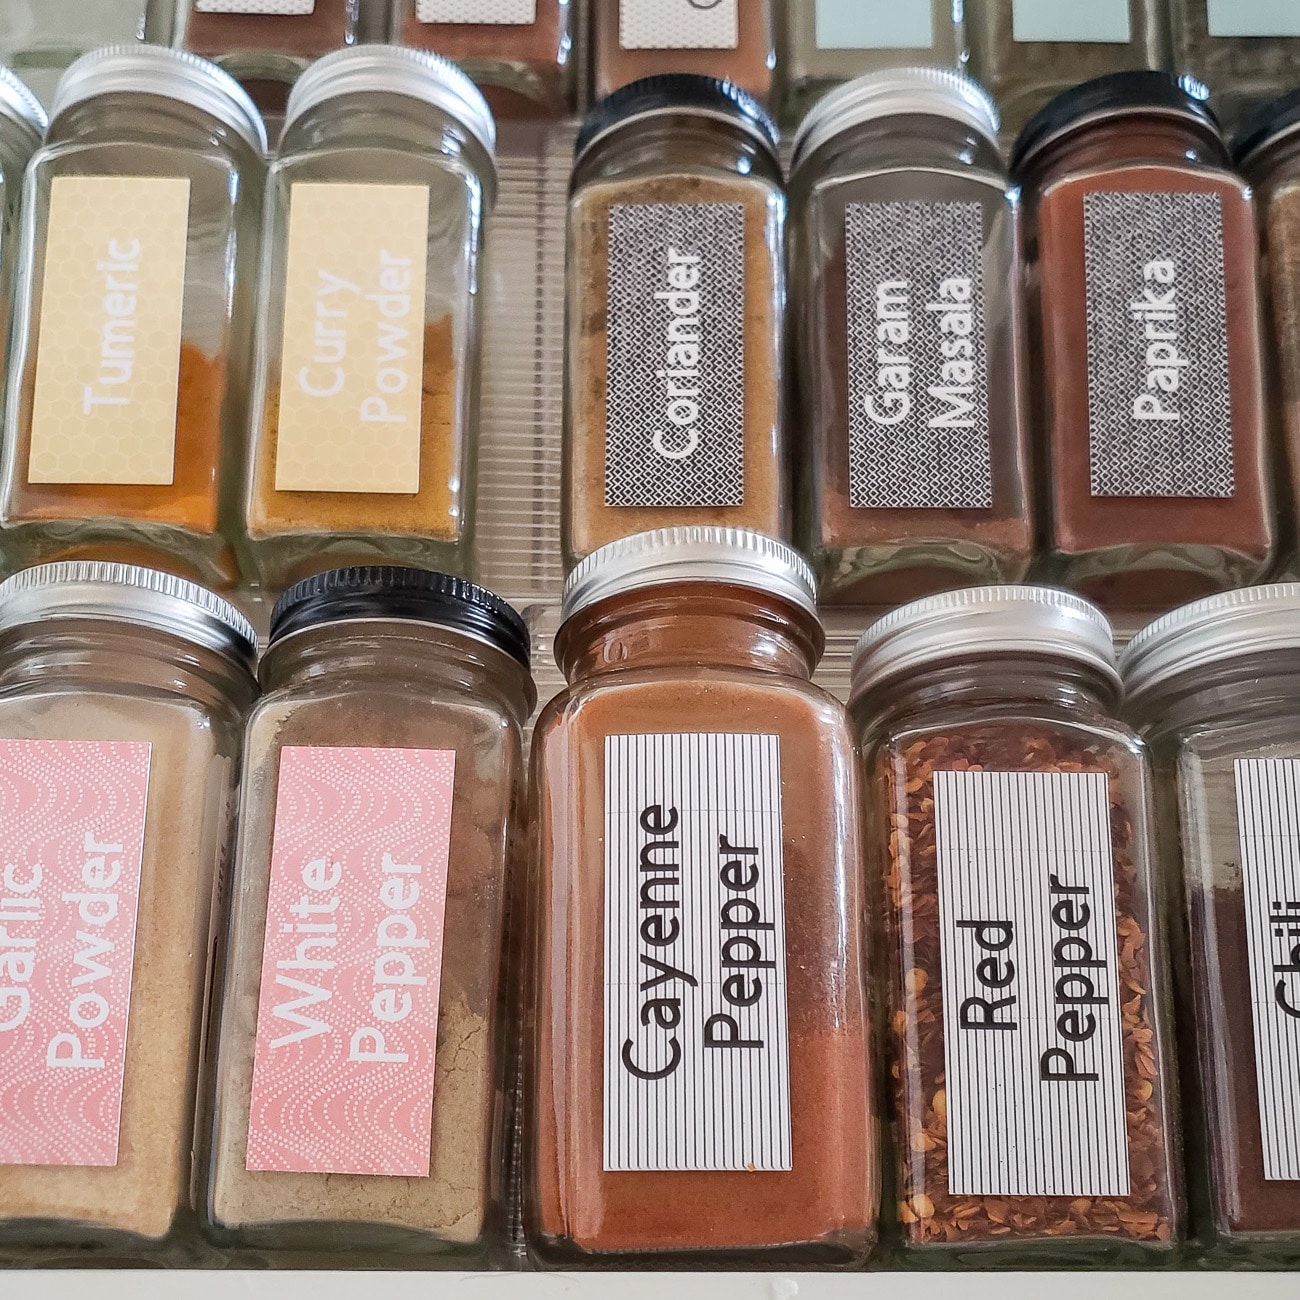
For my existing square glass jars, I just applied the new labels to the blank side of the jar. As you can see, I couldn’t pick just one label background because I found so many fun options!
I wanted something to hold the jars into neat rows to finish off the spice drawer organization, so I added one of these clear spice racks.
To make the words on the jars as large as possible, I created my labels long-wise and turned the spice stand sideways from how it was intended to be used. It worked perfectly!
My mind is now spinning with other things I could label using this Print Then Cut method now that I know how easy it is. It’s so much faster and easier than weeding vinyl for small labels.
I couldn’t be happier with the transformation of this drawer – I can’t wait to get cookin’!
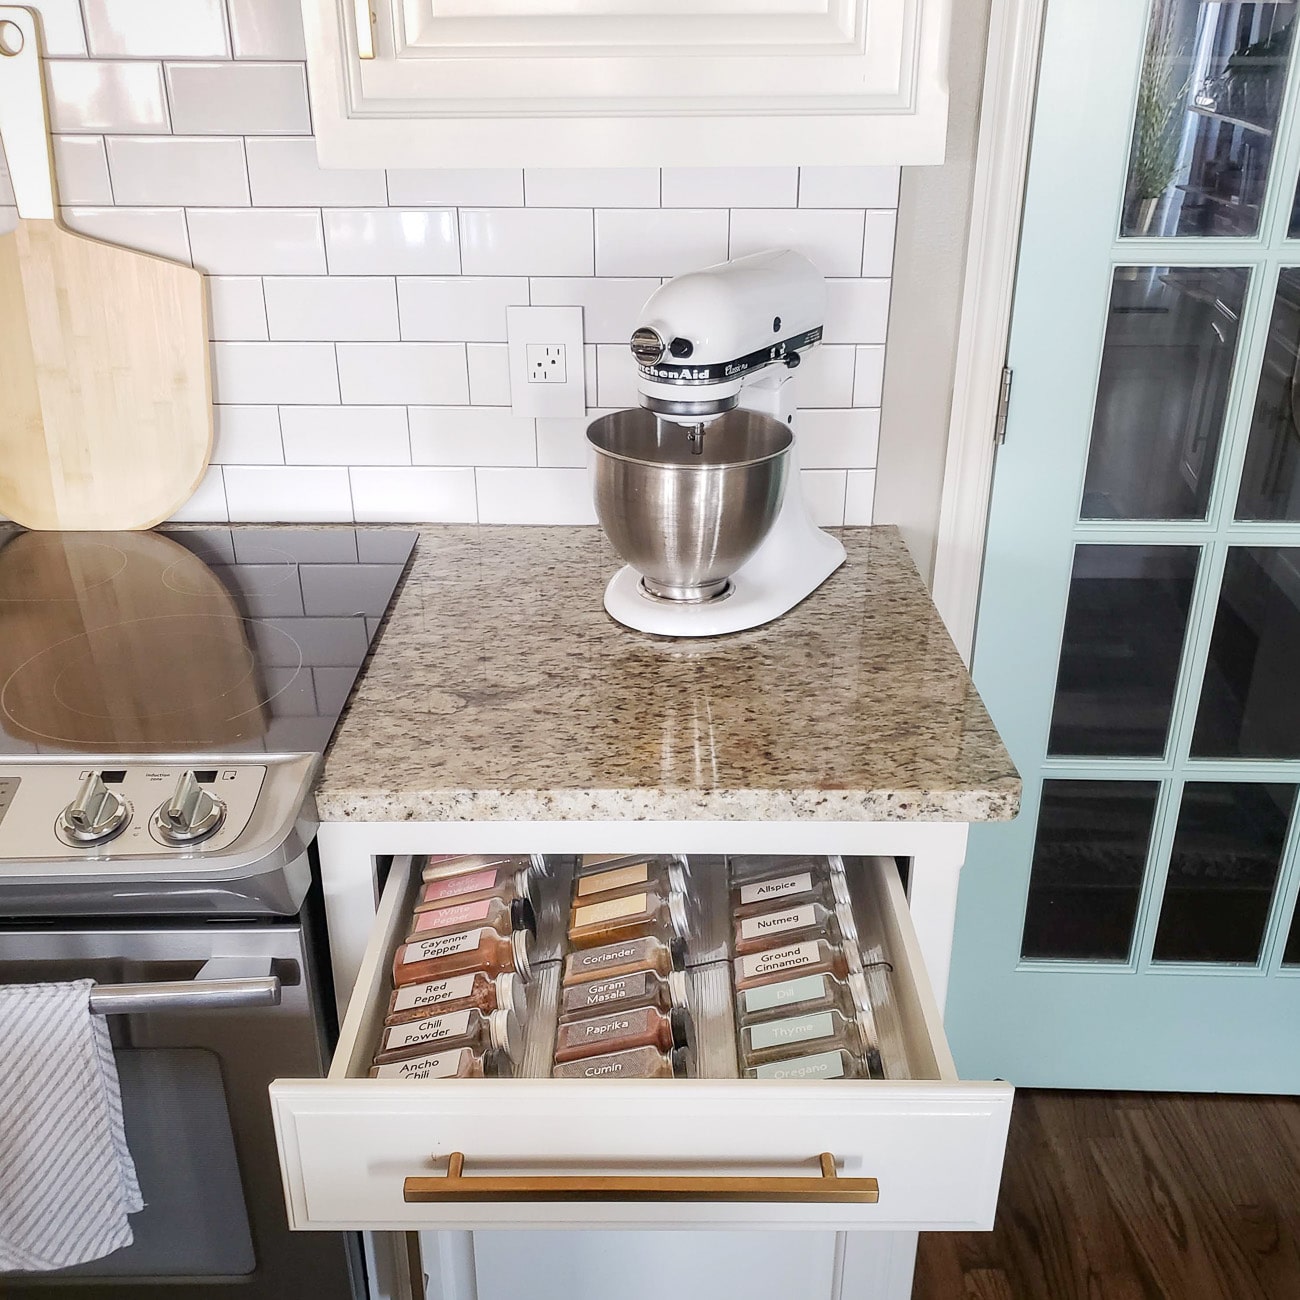
After seeing the transformation of this drawer, I was on a roll!
See the rest of my newly organized kitchen drawers next!

Mariely says
Nice! I have the same organizer but my jars are all random, and sometimes too big for my drawer. I honestly don’t even know if my grocery store has bulk spices, but I’m checking this weekend!
And as for labels, I love this one white paint marker, I think it might be ArtDecor brand or something like that. It’s perfect for writing on glass!
Melissa George says
These jars fit perfectly on the organizer! If you have a Sprouts nearby, they have them on an end cap. Our local/regional grocery chain also has them, along with Whole Foods. Fair warning – sometimes they look like they’ll be expensive because the prices are by the pound, but then things like Thyme are so light, I have to get enough to make sure it even registers on the scale.
Beg says
Where did you find the perfect size spice jars? Love your idea!
Melissa George says
Thank you! They came from Amazon here: https://amzn.to/2ude8vd
Patty Maneke says
I recently organized my pantry where I keep my spices. So awesome! One tip I would like to add is to alphabetize your spices. The grocery stores do. I also put a tiny sticker on the jars that I have duplicates of. I store them in a bin in top of my back pantry. This way I knew if I need to add a spice to the grocery list or not!